- LevelIntermediate
- Time4-6 hours
- YarnWorsted
About This Pattern
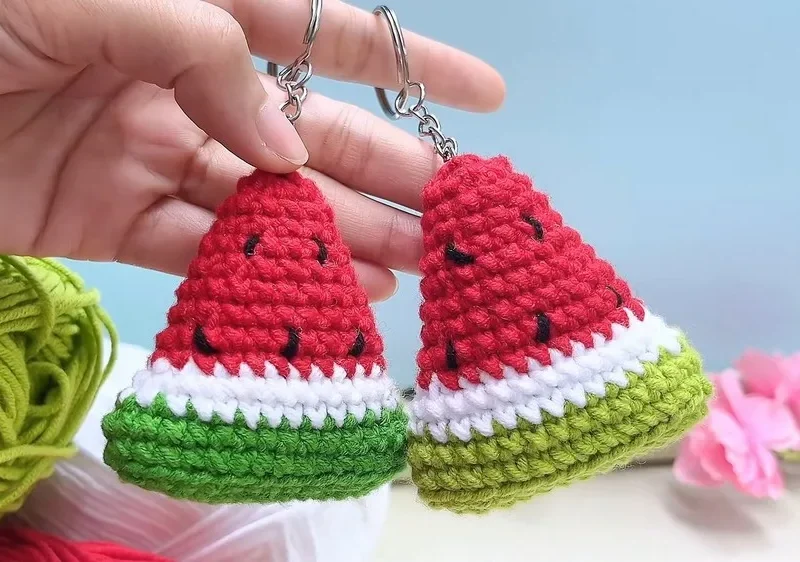
This one feels like a snack break turned into yarn. Green on the outside, white in the middle, red at the center with little black seeds scattered in — it is playful without trying too hard. I always smile when the rind color shows up on my hook.
Your hands stay busy with single crochet and increases building the rounded shape, then decreases pulling it back in to close. You will attach a fresh color partway through, so keep your yarn needle close for weaving in ends as you go. Nothing fussy, just steady rounds.
Clipped to a keyring or hanging off a backpack zipper, this little wedge catches eyes in a doorway or on a hook by the kitchen sink. It is small enough to tuck in a pocket but bright enough to never get lost in a bag.
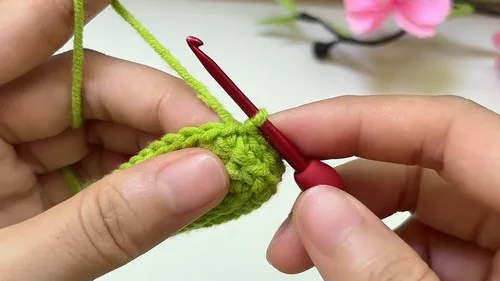
- Start with green yarn, chain 13, and work single crochet around the chain, increasing at both ends to build the oval base (Rounds 1-2).
- Still in green, work one round in back loops only and one round through both loops to add height, then fasten off (Rounds 3-4).
- Keep decreasing to 12 stitches, slip stitch to join, and begin stuffing the keychain (Round 13).
- Work one more round of single crochet around all 12 stitches, topping up stuffing as needed (Round 14).
- Close the piece by alternating single crochets and decreases until the opening shuts, then fasten off leaving a long tail.
- Weave the tail through the front loops of the remaining stitches and pull tight to close the hole completely.
- Use black yarn to stitch seeds onto the red part of the watermelon.
- Sew the end tightly and attach a keychain or loop as desired.
On the desk
- Green, white, and red yarn
- Crochet hook
- Yarn needle
- Black yarn (for seeds)
- Stuffing / fiberfill (for stuffing the keychain)
Stitch shorthand
- ch — chain
- st — stitch
- sl st — slip stitch
- sc — single crochet
- inc — increase
- dec — decrease
- fo — fasten off
Watermelon amigurumi keychain crochet pattern
Main Pattern
With Green Yarn:
- Round 1
Start with a slip knot. Make 13 chains. Start from the second chain from the hook, make 1 single crochet. Continue with single crochets into each chain till the end. At the last stitch, make 3 single crochets. Crocheting on the other side of the chain, make 1 single crochet in each stitch till the last one. In the last stitch, make an increase. Slip stitch into the first stitch to join.
- Round 2
Chain 1. Increase in the first stitch, then single crochet in the next 10 stitches. Make an increase in each of the next 3 stitches. Single crochet in the next 10 stitches. Increase in the last two stitches. Slip stitch into the first stitch to join.
- Round 3
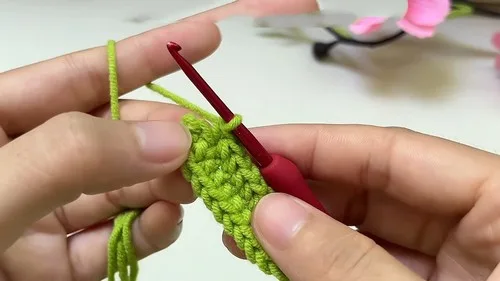
Chain 1. Crochet in the back loops only. Make a single crochet in each stitch around (32 single crochets total). Slip stitch in the first stitch.
- Round 4
Chain 1. Single crochet in each stitch through both loops (32 stitches total). Slip stitch in the first stitch. Fasten off and cut the yarn.Switch to White Yarn:
- Round 5
Attach white yarn, chain 1. Make a single crochet in the first stitch, then decrease using the next two stitches. Continue pattern (10 single crochets, 1 decrease) two times. Single crochet in the last stitch, slip stitch to join.
- Round 6
Chain 1. Make a single crochet in each stitch around (28 stitches total). Slip stitch in the first stitch. Fasten off and cut the yarn.Switch to Red Yarn:
- Rounds 7–12
Continue crocheting as per Rows 5-6 pattern, gradually decreasing in each row as follows: In Row 7: 26 stitches around. Row 8: 24 stitches around. For Row 9: 22 stitches around. Row 10: 20 stitches around. Row 11: 18 stitches around. In Row 12: 16 stitches around.
- Round 13
Chain 1. Repeat pattern of single crochet and decreases, reducing to 12 stitches. Slip stitch to join and begin stuffing the keychain.
- Round 14
Chain 1. Single crochet in each stitch (12 total). After this row, add more stuffing if needed.
Closing
Chain 1.
Begin closing by alternating single crochet stitches and decreases until closed.
Fasten off, leaving a long tail.
Weave the tail through the front loops only of the remaining stitches.
Pull tightly to close the hole.
Adding Seeds Use a black yarn to stitch seeds onto the red part of the watermelon.
More shots
Where it goes
- Clip it to a keyring so your house or car keys are easy to spot in a bag.
- Hang it from a backpack zipper for a bit of color on a school or gym bag.
- Attach it to a lanyard as a cheerful accent for work badges or ID cards.
- Give it as a quick handmade add-on paired with a notebook or a small tote.
Color ideas
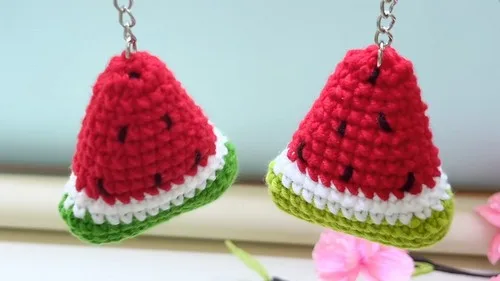
- Classic watermelon Green yarn forms the base rounds (Rounds 1-4), white yarn forms the next two rounds (Rounds 5-6), red yarn carries the main body through the gradual decreases to the closing, and black yarn seeds are stitched onto the red section once the shaping is complete.
Care
Hand wash in cool water if the yarn gets dirty, since most worsted-weight acrylic or cotton blends hold their shape better without a machine wash cycle.
Lay it flat to dry on a towel rather than hanging it, so the keychain loop does not stretch under the damp weight.
Store it loose in a drawer or basket rather than squeezed in a tight pocket, so the rounded shape and seed placement stay crisp.
Assembly
- Step 1 Sew the end tightly and attach a keychain or loop as desired.
Easy to get wrong
Losing count during decrease rounds
Place a stitch marker before each decrease so you always know where the next one falls. Recount after every decrease round before moving on.
Sloppy color change at the white-to-main transition
Drop the old color to the inside and carry it loosely rather than cutting it right away. Weave in ends only after the piece is fully shaped so tension stays even.
Closing hole left loose or puckered
Weave the tail through the front loops only, then pull slowly and check the gather before fastening off. A quick tug test before you cut keeps the hole fully sealed.
Listener questions
Can I make this without a keychain finding?
You can skip the hardware and just leave a small loop of yarn at the closing instead. It still works as a little ornament to hang or clip with a safety pin.
How do I attach the black seeds?
Use short lengths of black yarn and stitch small straight accents directly onto the red section once the main shaping is done. Scatter them unevenly so they read as natural seed placement.
What stitch does most of the shaping work?
Single crochet carries nearly the entire piece, with increases and decreases doing the rounding and closing. There is no need for any fancier stitch here.
Why does the stitch count decrease gradually near the end?
The gradual decrease rounds pull the rounded body back in toward the closing section. This tapering is what gives the finished piece its wedge-like shape before you cinch it shut.
Original pattern: https://crocheteverything.com/easy-crochet-watermelon-amigurumi-keychain-pattern-for-keys/
About the Author

Marisol QuinteroWho runs Crochet Obsessed, why a stitch count sits at the end of every round, how a pattern gets written here, and the things this site will never do.
More Patterns
- IntermediateNo. 01

Rose Granny Square Tote Crochet Pattern
Rose granny square tote crochet pattern made from 18 dimensional rose squares for a sturdy, romantic everyday bag.
- IntermediateNo. 02
Tropical octopus baby blanket crochet pattern with appliqués
Tropical octopus baby blanket crochet pattern: a cream filet base with coral and turquoise octopus appliqués, leaves, and…
- IntermediateNo. 03
Sunny lemon couple amigurumi crochet pattern
Sunny lemon couple amigurumi crochet pattern with embroidered slices and safety eyes for a cheerful handmade shelf pair.


