- LevelIntermediate
- Time4-6 hours
- Hook3.5 mm
- YarnWorsted
About This Pattern
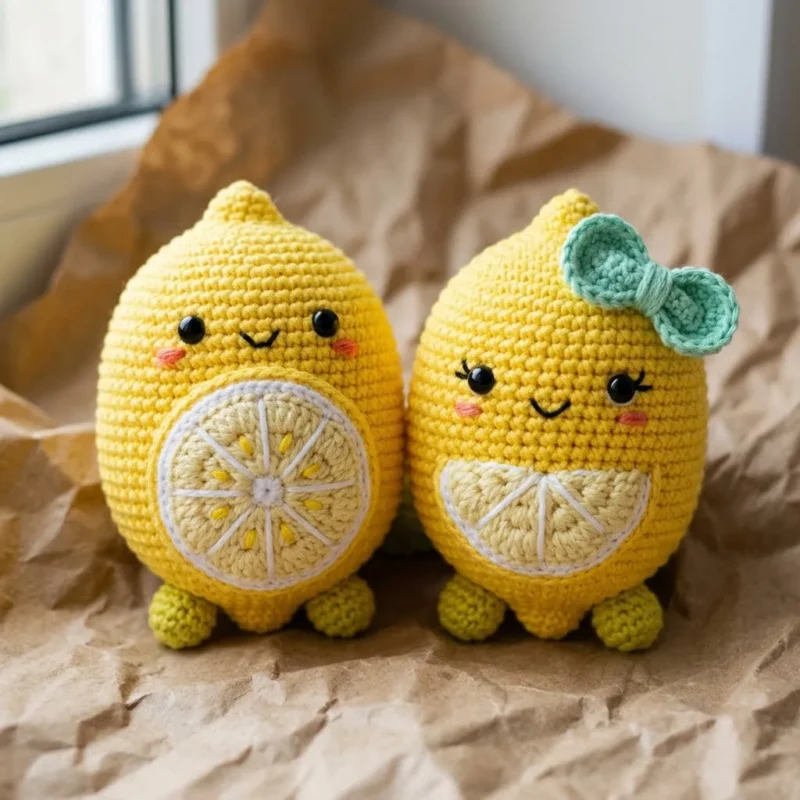
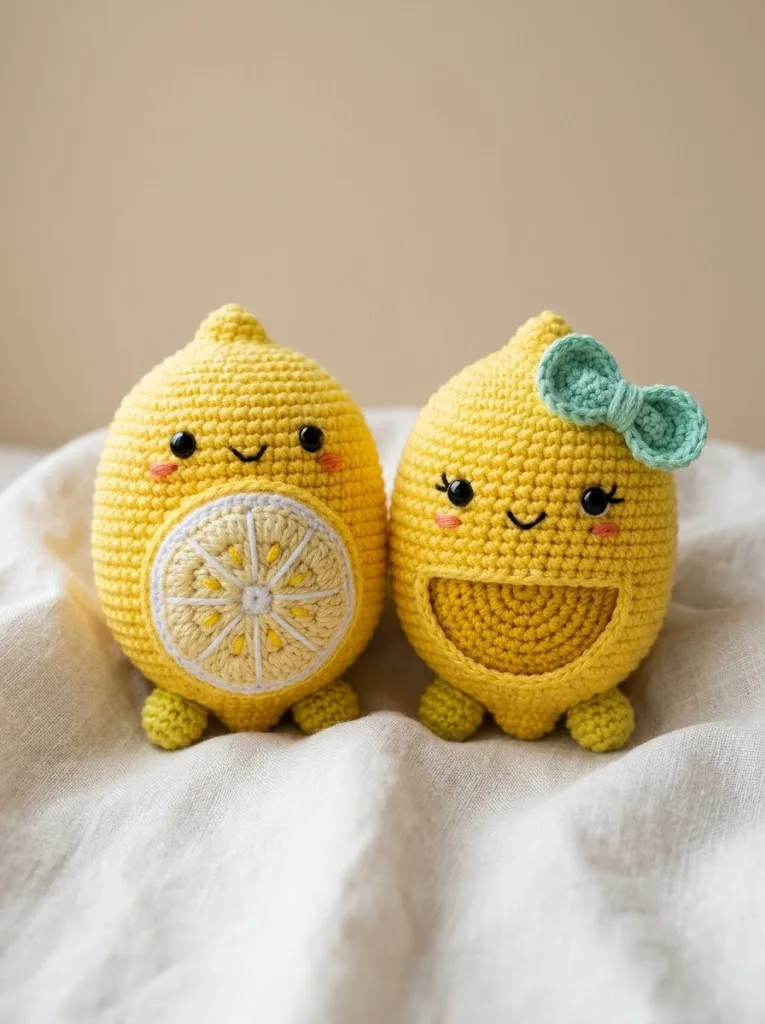
This one feels like a sunny windowsill on a gray morning. Two bright yellow lemons, each with their own little slice and their own personality. It is a cheerful make, the kind of project that puts a smile on your face before you have even finished the first round.
Your hands get a nice mix of tasks here. You will work tight amigurumi rounds with the 3.5mm hook, then slow down for embroidery as you stitch straight lines radiating out from the center of each slice. There is also careful appliqué sewing and safety eye placement that asks you to test and adjust before you commit.
Set the pair on a shelf, a windowsill, or a desk and they do the rest of the work. Standing five to six inches tall, they hold their own next to books or plants. One leans in with a bow, the other keeps it simple, and together they read like a tiny citrus still life.
- Start each lemon body with a magic ring and crochet the main pattern in increasing rounds to build the rounded shape.
- Crochet the half circle lemon slice separately in rows, increasing on both ends to shape its curve.
- Embroider the segment lines in white yarn, radiating out from the center of each slice with a yarn needle.
- Make four little feet in olive green or yellow-green, stuffing them lightly so they stay small and neat.
- Insert the safety eyes before closing up the body, testing placement with pins and stepping back to check.
- Stuff the body in small pieces, packing the top and bottom firmly while keeping the middle a bit softer.
- Pin and sew the slice appliqué and both feet in place, then add the bow to one lemon if you like.
On the desk
Yarn
- Worsted weight yarn (medium weight, category 4) in bright yellow for the main body
- Small amounts of pale yellow or cream for the inner lemon slice
- Small amounts of white for the slice outline and segment lines
- Small amount of olive green or yellow-green for the feet
- Pink embroidery floss for the cheeks
Hook
- 3.5mm crochet hook (US E/4)
- Using a smaller hook than typically recommended for worsted weight creates a tight fabric. This prevents stuffing from showing through. Amigurumi always works best with a tighter gauge.
Notions
- 8mm black safety eyes (2 per lemon, 4 total)
- Polyester fiberfill stuffing
- Yarn needle for sewing and weaving
- Stitch marker
- Scissors
- Pins for placement
Stitch shorthand
- Magic Ring (MR) — An adjustable loop that lets you start crocheting in the round with no hole in the center. Pull the tail to close it tight.
- Chain (ch) — The foundation stitch. Yarn over, pull through the loop on your hook.
- Single Crochet (sc) — Insert hook into stitch, yarn over and pull up a loop (2 loops on hook), yarn over and pull through both loops.
- Increase (inc) — Work 2 single crochet stitches into the same stitch. This adds one stitch to your count.
- Invisible Decrease (invdec) — Insert hook through the front loops only of the next 2 stitches, yarn over and pull through both front loops, yarn over and pull through both loops on hook. Creates a neater decrease than standard decrease.
- Slip Stitch (sl st) — Insert hook, yarn over, pull through stitch and loop on hook in one motion. Used for joining or moving position.
- Fasten Off (FO) — Cut yarn, pull tail through final loop, pull tight to secure.
Sunny lemon couple amigurumi crochet pattern
Main Pattern
Step by step: Inner section with pale yellow:; 6 sc in magic ring (6 sts).
- Round 1
6 sc in magic ring, pull closed (6 sts)
- Round 2
Inc in each st around (12 sts)
- Round 3
*Sc 1, inc* repeat around (18 sts)*Sc 2, inc* repeat around (24 sts) Sl st to first st. Fasten off, leaving a long tail for sewing.
Step by step: White outline:.
Join white yarn to any stitch of the pale yellow circle. Working in the same round 4 stitches, sc in each st around (24 sts). Sl st to join. Fasten off, leaving a long tail.
Step by step: This creates a white border around the pale yellow center.
- Round 4
*Sc 2, inc* repeat around (24 sts)
- Round 5
*Sc 3, inc* repeat around (30 sts)
- Round 6
*Sc 4, inc* repeat around (36 sts)
- Round 7
*Sc 5, inc* repeat around (42 sts)
- Round 8
*Sc 6, inc* repeat around (48 sts)
- Round 9
through 22: Sc in each st around (48 sts) — 14 rounds total This creates the rounded middle section of the lemon body.
- Round 23
*Sc 6, invdec* repeat around (42 sts)
- Round 24
Sc in each st around (42 sts)
- Round 25
*Sc 5, invdec* repeat around (36 sts)
- Round 26
Sc in each st around (36 sts)
- Round 27
*Sc 4, invdec* repeat around (30 sts)
- Round 28
Sc in each st around (30 sts) Pause here. Insert safety eyes between rounds 15 and 16, spaced about 8 to 10 stitches apart. The exact placement depends on where you want to attach the lemon slice later. Position eyes above where the slice will sit.Begin stuffing the body firmly. Continue stuffing as you decrease.
- Round 29
*Sc 3, invdec* repeat around (24 sts)
- Round 30
Sc in each st around (24 sts)
- Round 31
*Sc 2, invdec* repeat around (18 sts)
- Round 32
Sc in each st around (18 sts)
- Round 33
*Sc 1, invdec* repeat around (12 sts)
- Round 34
Sc in each st around (12 sts) Add more stuffing to the top point. Pack it gently but firmly.
- Round 35
*Sc 2, invdec* repeat around (9 sts)
- Round 36
Sc in each st around (9 sts)
- Round 37
*Sc 1, invdec* repeat around (6 sts) Fasten off. Use yarn needle to weave through remaining 6 stitches. Pull tight to close. Weave in end securely inside the body.
The body should have an egg or lemon shape. Wider at the bottom, tapering to a gentle point at the top.
Half Circle Lemon Slice
With pale yellow:
- Round 1
Ch 2, 3 sc in second ch from hook, turn (3 sts)
- Round 2
Ch 1, inc, sc 1, inc, turn (5 sts)
- Round 3
Ch 1, inc, sc 3, inc, turn (7 sts)
- Round 4
Ch 1, inc, sc 5, inc, turn (9 sts)
- Round 5
Ch 1, inc, sc 7, inc, turn (11 sts)
- Round 6
Ch 1, inc, sc 9, inc (13 sts) Do not turn. Continue around the curved edge with sc stitches, working evenly around the half circle shape. Approximately 8 to 10 sc along the curved side.Fasten off with white yarn. Join white to the beginning corner. Sc evenly around the entire half circle edge to create a white border. Fasten off, leaving a tail for sewing.
Feet (Make 4)
With olive green or yellow-green yarn:
- Round 1
5 sc in magic ring (5 sts)
- Round 2
Inc in each st around (10 sts)
- Round 3
and 4: Sc in each st around (10 sts) Sl st to first st. Fasten off, leaving a tail for sewing. Stuff lightly. These are small so do not overstuff.
Each lemon needs 2 feet attached at the bottom front.
Bow (Optional, Make 1)
With mint green yarn: Center piece: Ch 5. Sc in second ch from hook and across (4 sts). Fasten off, leaving a tail.
Bow loops: Ch 12. Sl st in first ch to form a ring. Ch 1, sc 12 around the ring. Sl st to join. Fasten off.
Pinch the ring in the center to form the bow shape. Wrap the center piece around the pinched middle. Secure with yarn tails. Sew to the top of one lemon beside the point.
More shots
Where it goes
- A pair for a kitchen windowsill, where they sit happily near a fruit bowl or a stack of cookbooks.
- A desk companion duo that pairs well with a small potted succulent or a mug of tea.
- A handmade gift set for someone who loves citrus kitchens or bright, cheerful decor.
- A photography prop pair for flat lays or styled shelfies, paired with linen napkins or wooden bowls.
Color ideas
- Classic lemon pair Bright yellow for the main body on both lemons, pale yellow for the inner slice section, white for the slice outline and segment lines, olive green for all four feet.
- Mixed citrus duo Keep one lemon in bright yellow with the standard pale yellow slice, then swap the second lemon's main body to orange yarn for a two-fruit set while keeping the white segment lines and olive green feet the same on both.
Care
Hand wash the finished lemons gently in cool water since the body is worsted weight yarn with fiberfill inside, and avoid wringing to protect the safety eyes and embroidered segments.
Lay flat to dry away from direct heat so the stuffed shape keeps its form and the feet do not lose their blocked, flattened shape.
Store on a shelf or in a soft bag rather than a tight box, which helps the tight amigurumi gauge keep its shape and keeps the bow or appliqué from getting crushed.
Assembly
- Step 1 Step 1: Pin the lemon slice appliqué to the front of the body, centered below the eyes. Sew in place using matching yarn and whip stitch. Work through back loops of the slice edge only for a cleaner look.
- Step 2 Step 2: Pin both feet to the bottom front of the lemon body. Position them so the lemon sits upright and slightly tilted forward. Sew securely. These bear some weight so reinforce your stitches.
- Step 3 Step 3: For the bow lemon, sew the bow near the top point on one side.
- Step 4 Step 4: Using pink embroidery floss, add rosy cheeks beneath and slightly to the outside of each eye. Small oval shapes work best. Just 3 to 4 satin stitches per cheek.
- Step 5 Step 5: Using black yarn or embroidery floss, add a small curved smile between the eyes and slice. A simple curved line of 2 to 3 small stitches creates a sweet expression.
Easy to get wrong
Segment lines look crooked or uneven
Work slowly and count your lines before starting, six to eight for the full circle and three to four for the half circle, so they land evenly spaced around the center.
Appliqué edges show messy stitches
Work through the back loops of the slice edge only and match your sewing tension to the body so the seam stays invisible.
Feet don't support the lemon's tilt
Pin both feet to the bottom front before sewing, position them so the body leans slightly forward, and reinforce your stitches since they bear weight.
Between the songs
- The satisfaction here is in the segment embroidery. Stitching those white lines from the center out, six to eight on the full circle slice and three to four on the half circle, turns a flat pale yellow disc into something that actually reads as lemon. Working a tighter gauge with the 3.5mm hook on worsted weight yarn is its own small win too, since it keeps the fiberfill from peeking through and gives the finished body that firm, sittable shape. Add in the safety eye placement, where pinning and stepping back lets you dial in the expression before it is permanent, and the appliqué sewing through back loops for a clean edge, and you get a project that teaches real amigurumi finishing skills while staying genuinely fun to make.
Listener questions
Can I make just one lemon instead of the pair
Yes, the main pattern, slice, and feet all work as a single set. Just pick either the full circle or half circle slice for your one lemon.
Why does the pattern call for a smaller hook than usual for worsted weight
The 3.5mm hook creates a tighter fabric than typically recommended for worsted weight yarn. This keeps the fiberfill stuffing from showing through the stitches.
How do I decide where to put the safety eyes
Insert them before closing the body and hold them in place with pins first. Step back and look from a distance, since small shifts change the whole expression.
What if my feet curl instead of sitting flat
You can wet block the feet flat before stuffing and attaching them. This gives the lemon a more stable, upright stance once sewn on.
Original pattern: https://crochr.com/sunny-lemon-couple-amigurumi-free-crochet-pattern/
About the Author

Marisol QuinteroWho runs Crochet Obsessed, why a stitch count sits at the end of every round, how a pattern gets written here, and the things this site will never do.
More Patterns
- IntermediateNo. 01

Rose Granny Square Tote Crochet Pattern
Rose granny square tote crochet pattern made from 18 dimensional rose squares for a sturdy, romantic everyday bag.
- IntermediateNo. 02
Tropical octopus baby blanket crochet pattern with appliqués
Tropical octopus baby blanket crochet pattern: a cream filet base with coral and turquoise octopus appliqués, leaves, and…
- IntermediateNo. 03
Rose applique tote bag crochet pattern for market days
Rose applique tote bag crochet pattern using single crochet, coiled roses and a scallop edge for a soft,…