- LevelIntermediate
- Time6-10 Hours
- Hook10 mm
- YarnSuper Bulky
About This Pattern
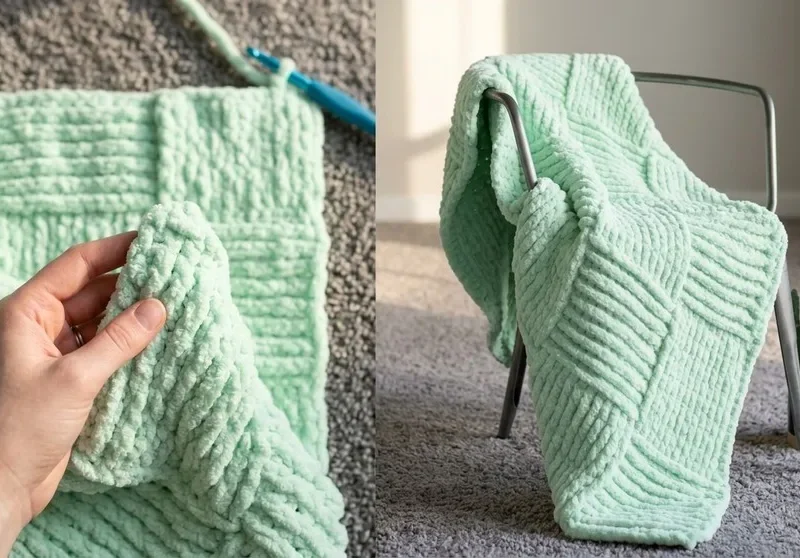
This free pattern gives you a plush, oversized throw built from giant basket weave blocks worked in super bulky velvet yarn. Instead of the fussy little squares you see in traditional basket weave blankets, this one uses generous 12-stitch by 10-row segments of front and back post double crochet, so the texture reads as bold architectural blocks rather than fine weaving. It is perfect for anyone who wants a blanket that looks intricate but relies on just two post stitches, and for crocheters who love a project that grows fast.
The techniques here are refreshingly simple: a foundation row of double crochet, then front post double crochet and back post double crochet worked around the posts of the row below. You alternate direction every 12 stitches horizontally and every 10 rows vertically to build the block grid. Confident beginners who have tried post stitches once before will be comfortable, and true beginners can learn them here. The blanket works up extremely quickly thanks to the super bulky yarn, so a generous throw comes together far faster than a standard blanket.
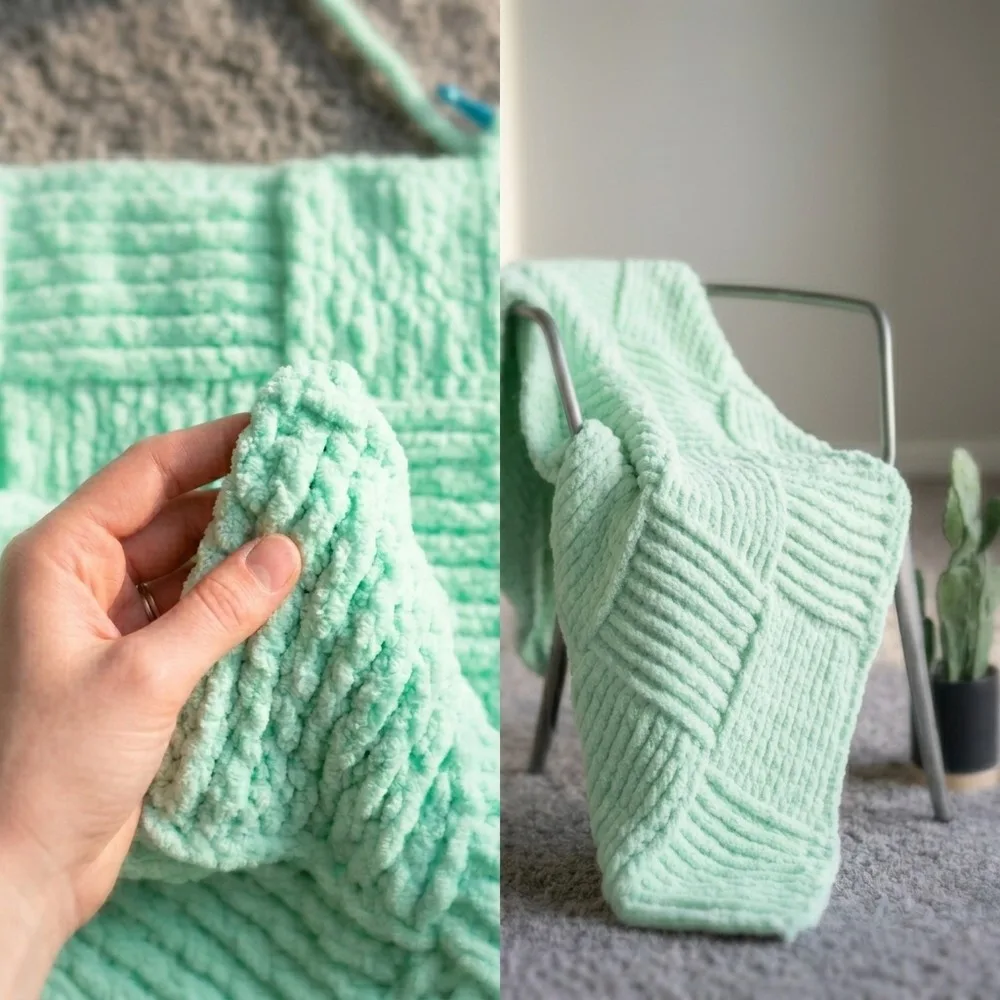
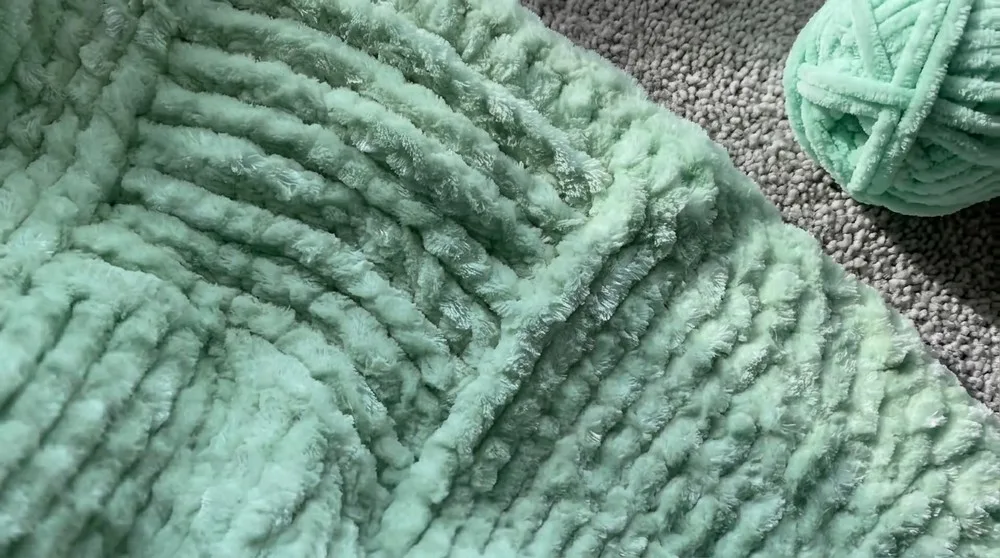
The finished throw is thick, weighty in the best way, and unbelievably soft against the skin thanks to the velvet fibers. The raised blocks catch light differently depending on which way the post stitches lean, giving the surface a subtle shifting sheen that looks expensive draped over a sofa arm. It makes a stunning housewarming or wedding gift, a luxurious nap blanket, or the piece that finally pulls a living room together. Make the sample size or scale it to bed-throw proportions.
- Chain your starting count using the formula blocks x 12 plus 4, which is 64 chains for the standard throw.
- Work a foundation row of double crochet, starting in the 4th chain from the hook, for 61 dc across.
- Mark every twelfth stitch with a removable marker so your block columns stay aligned all the way up.
- Set up the first block row by alternating twelve front post double crochet with twelve back post double crochet, ending with a dc in the turning chain.
- Repeat that same alternating arrangement through Row 11 so each block builds to its full ten-row height.
- Row 12, flip the direction so front post segments become back post and back post become front post, then hold that for Rows 13 to 21.
- Continue alternating block direction every ten rows until the throw reaches your desired length.
- Fasten off, weave each velvet tail in two directions with a tapestry needle, then hand wash and lay flat to dry.
Materials
Yarn
- Bernat Velvet Plus or any #6 super bulky velvet-style yarn
Yarn amount
- Quantity depends on desired size (original sample is for a large throw)
Hook
- 10mm crochet hook (N/P-15); package recommends 9mm, but 10mm is used for easier tension
Notions (optional)
- Darning/tapestry needle for weaving in ends
- Scissors
Crochet Abbreviations
- ch
- chain
- dc
- double crochet
- fpdc
- front post double crochet
- bpdc
- back post double crochet
- st(s)
- stitch(es)
- rep
- repeat
Free Crochet Velvet Plus Basket Weave Throw Pattern
1. Foundation Row
The pattern is based on blocks of front and back post double crochets to achieve the basket weave look. Each block is 12 stitches wide by 10 rows high (customizable). The starting chain is: number of blocks across x 12, then add 4. For a throw: 5 blocks (5 x 12 = 60) + 4 = 64 chains. For a sample: 3 blocks (3 x 5 = 15) + 4 = 19 chains.
Ch 64 (for standard throw; ch 19 for sample swatch). Turning chains do not count as a stitch.
- Row 1
Work 1 dc into the 4th ch from the hook (first 3 ch count as first dc). Dc into each ch across the row.Step by step: you should have 61 (or 16 for swatch) dc at the end of the row, not counting the turning chain. Turn.
2. Basket Weave Section – First Set of Rows
Block Setup (assuming large blanket, 5 blocks across, 12 sts per block). The blanket is assembled in rows, alternating fpdc and bpdc in sets to form the basket weave pattern.
- Row 2
(Ch 2, does not count as a stitch) For each block of 12 stitches: Fpdc in the next 12 sts, Bpdc in the next 12 sts, Rep until across the row, Dc in top of turning ch at end.Step by step: ch 2 at the start of the row, and remember it does not count as a stitch; work fpdc in the next 12 sts; work bpdc in the next 12 sts; repeat that alternation across the row; finish with a dc in the top of the turning ch at the end. Turn.
- Rows 3-11
Ch 2, then match post placement as established (fpdc into fpdc, bpdc into bpdc) across each 12-stitch block.Step by step: end each of these rows with dc in top of turning ch. Turn.
Rep until you have 10 rows in this block pattern.
3. Switch Basket Weave Direction
- Row 12
Ch 2, Where you previously worked fpdc, now begin with bpdc for 12 sts, and vice versa.Step by step: alternate every 12 stitches: bpdc in next 12 sts, fpdc in next 12 sts, rep to end, dc in turning ch. Turn.
- Rows 13-21
Continue to match the post placement as established in Row 12 (bpdc in bpdc, fpdc in fpdc for each block of 12).Each set stays the same for 10 rows.
Continue Pattern: alternate block direction every 10 rows to create the basket weave appearance. Continue until blanket reaches your desired length.
More photos
Assembly Instructions
- Step 1 Fasten off and weave in all ends using a darning/tapestry needle.
- Step 2 Special note for joining new skeins: Tie a tight square knot, weave ends securely into nearby posts, and trim excess as needed. For extra security, use a tapestry needle to hide knots inside post stitches.
- Step 3 Care: hand wash only. Gently squeeze out excess water, roll in a towel, and lay flat to dry to preserve the velvet texture and shape.
Important Notes
- 💡 Each block is 12 stitches wide by 10 rows high, and it is fully customizable. The blocks must stay 12 stitches wide and 10 rows high consistently for a symmetric basket weave.
- 💡 Starting chain formula: number of blocks across x 12, then add 4. For a throw that is 5 blocks (5 x 12 = 60) + 4 = 64 chains; the sample swatch uses 19 chains. Make sure your starting chain is a multiple of 12, then add 4 for the turning edge.
- 💡 Turning chains do not count as a stitch. Always place a standard dc in the last stitch, the top of the turning chain, of each row to maintain straight edges.
- 💡 Maintain consistent tension, especially with velvet yarns, as they may slip more easily than standard yarns. For transitions between balls of yarn, tie knots tightly and hide them within the posts for best results.
- 💡 Care instructions: hand wash only. Gently squeeze out excess water, roll the throw in a towel, and lay it flat to dry to preserve the velvet texture and shape.
- 💡 Use a 10mm hook (N/P-15) even though the Bernat Velvet Plus label recommends 9mm. The larger hook keeps velvet post stitches loose enough to drape instead of stiffening into a board, and it makes wrapping around thick posts far easier on your hands.
- 💡 Mark every 12th stitch on your foundation row with removable stitch markers and leave them in place for the entire blanket. Velvet hides stitch definition so well that recounting mid-project is genuinely painful, and these markers keep every block column perfectly aligned.
- 💡 Yarn quantity depends entirely on the size you choose, so buy the same dye lot generously upfront. The original sample is a large throw, and velvet yarn is thirsty. Running out and matching a new dye lot mid-blanket will show as a visible band.
- 💡 Feel for the post rather than looking for it. Slide your fingertip down the front of the stitch below to locate the vertical bar, then insert the hook horizontally. Working velvet by touch instead of by sight is the single biggest speed improvement you can make.
- 💡 Keep the yarn ball in a bag or yarn bowl while you work. Velvet strands cling to themselves, pick up lint and pet hair like a magnet, and tangle fast when the ball rolls loose across the floor.
- 💡 Do not press or steam block this throw. Heat flattens the velvet pile and kills exactly the plushness and light-catching shine that makes the basket weave blocks look so dimensional. A gentle lay-flat is all it needs.
Common Mistakes and Fixes
- Working front post double crochet
The hook goes horizontally, in the front of the fabric, around the vertical bar of the stitch below, and back out to the front on the other side of that same stitch. You should never insert into the V at the top. Velvet yarn hides stitch definition, so run your fingertip down the post first to feel where it starts and ends before you insert the hook. If the row looks flat instead of raised, you almost certainly worked into the top.
- Forgetting to count the 10 rows
Keep a physical row counter, a tally on paper, or a marker moved up the edge every time you finish a row. After 10 rows you flip which segments use front post and which use back post. Because velvet rows are thick and squishy, counting finished rows by eye is unreliable, so track them as you go rather than trying to reconstruct the count later.
- Pulling velvet yarn too tight
Velvet has almost no elasticity, so a tight tension turns a plush throw into cardboard. This is exactly why the pattern uses a 10mm hook instead of the 9mm on the label. Keep your loops relaxed and let the yarn glide. Maintain consistent tension throughout, since velvet yarns slip more easily than standard yarns. If your fabric is not draping softly after a few rows, go up another half size rather than fighting your natural tension.
- Skipping or double-working the stitch
Post stitches are worked around posts, but the turning chain is not a post you can wrap around, so the first and last stitches of each row need attention. Always place a standard dc in the last stitch, the top of the turning chain, of each row to maintain straight edges, and count the stitch total at the end of every row. Edges that gradually narrow or flare are almost always a turning chain miscount.
- Weaving in velvet ends the normal way
Velvet yarn is slippery and famous for worming its way loose. Weave each tail in one direction for several inches with a tapestry needle, then reverse and weave back through a different path so the tail locks against itself. When joining a new ball, tie the knot tightly and hide it inside a post stitch. Leave a generous tail before you start, since a short tail on velvet will not hold.
Variations
- Color is where this throw gets really fun. The stock version in a single deep shade lets the block texture do all the talking, and I love it in charcoal, forest green, or a dusty terracotta. But try working each 10-row band in a different tonal shade of the same color family, so you get a gradient of blush into mauve into plum climbing up the blanket. Changing color at the start of a new band lines the shift up perfectly with the block grid. For a bolder look, alternate two high-contrast colors band by band, cream against navy, and the blocks read like a woven checkerboard. Sizing is completely flexible because the block grid is modular. Every horizontal repeat is 12 stitches wide, so add or remove foundation stitches in multiples of 12, then add 4 for the turning edge, to scale the width up to a bed throw or down to a lap blanket or a chunky pillow front. Vertically, each block is 10 rows tall, so add blocks in groups of 10 rows to lengthen. Keep the foundation count in that multiple and the pattern stays balanced edge to edge. Yarn substitution opens more doors. Bernat Velvet Plus is the original, but any number 6 super bulky velvet-style yarn works, and a super bulky chenille gives a similar plush hand. If you want the texture crisper and more defined, swap to a non-velvet super bulky wool blend. Post stitches pop dramatically in a matte fiber, giving a completely different, more rustic personality to the same pattern.
Frequently Asked Questions
Can I make this blanket bigger or smaller than the sample?
Absolutely, and it is easy because the design is modular. Use the pattern's own formula: number of blocks across x 12, then add 4 for the starting chain. Add or remove blocks in groups of 10 rows to change the length. Keeping those multiples intact means the basket weave blocks stay balanced from edge to edge.
Do I have to use velvet yarn, or can I substitute something else?
Any number 6 super bulky yarn will work with the same 10mm hook. Velvet gives that plush, light-catching finish the pattern is built around, but a super bulky wool blend produces crisper, more sculptural post stitches. Just check your fabric drape after a few rows and adjust hook size if needed.
Is this pattern suitable for a beginner?
It is a great first post-stitch project. The only stitches you need are double crochet, front post double crochet, and back post double crochet, and the long 12-stitch segments give you plenty of repetition to build muscle memory. Confident beginners usually pick it up within the first block.
Why does my basket weave texture look flat instead of raised?
The most common cause is working into the top of the stitch rather than around the post. Front and back post stitches must wrap horizontally around the vertical bar of the row below to create that raised effect. The second cause is tension that is too tight, which flattens the blocks.
How do I keep from losing my place in velvet yarn?
Stitch markers every 12 stitches and a row counter are non-negotiable with this fiber. Velvet obscures stitch definition, so counting after the fact is far harder than tracking as you go. Marking your segments once at the foundation row saves hours of frustration later.
How should I wash and care for the finished throw?
Hand wash only. Gently squeeze out the excess water, roll the throw in a towel to draw out more moisture, then lay it flat to dry. This preserves both the velvet texture and the shape of the basket weave blocks, and it avoids the heat that would crush the pile.
Original pattern: https://redagapeblog.com/free-crochet-velvet-plus-throw-pattern/
About the Author

Marisol QuinteroWho runs Crochet Obsessed, why a stitch count sits at the end of every round, how a pattern gets written here, and the things this site will never do.
More Patterns
- IntermediateNo. 01

Slouchy everyday beanie worked flat in half double crochet
Crochet beanie pattern for a slouchy everyday look worked flat with hdc rows, then seamed into a soft,…
- IntermediateNo. 02
Crochet amigurumi doll with dress, shoes, and hat
Crochet amigurumi doll pattern with dress, shoes, and hat details for a soft, huggable keepsake you build one…
- IntermediateNo. 03
Chunky moss stitch crochet sweater with raglan-free shoulders
Chunky crochet sweater pattern using moss stitch, worked flat with a 10mm hook for a soft, fast, cool-weather…


