- LevelIntermediate
- Time4-6 hours
- Hook4.0 mm
- YarnChunky
About This Pattern
This one has that easy, Sunday-morning feel. It is a sweater built for stepping outside without overthinking the weather. Nothing fussy, nothing fitted too close, just a comfortable shape that works whether you are heading out for coffee or staying in to read.
Your hands get to settle into a rhythm here. The body is worked flat in long rows, back loops only, so you find the groove fast and stay in it. Once you have the stitch count memorized across the row, it almost becomes meditative.
Finished and folded over a chair, it reads like a wardrobe staple rather than a craft project. Someone picking it up would not guess it started as a chain of 72. It just looks like the sweater you reach for first.
- Chain a long foundation row and work the first row in extended half double crochet with a stretch of single crochet at one end.
- Flip your work and repeat back loop only rows, keeping the same stitch pattern consistent across each pass.
- Keep working rows until the body reaches the length you want before shaping the neckline.
- Work across for the neck stitches and skip a gap of stitches to open up the neckline.
- Continue the established stitch pattern on each side until the shoulders reach a matching length.
- Seam the sides of the sweater together from the wrong side to set up for sleeve construction.
- Decrease gradually around each sleeve until it fits snugly at the wrist, then fasten off and weave in your ends.
On the desk
- Chunky Robin yarn, 100% acrylic (8 x 100g balls)
- Crochet hook size 4.0 mm
- Tape measure
- Stitch markers
- Scissors
Stitch shorthand
- ch — chain
- st — stitch
- sl st — slip stitch
- sc — single crochet
- hdc — half double crochet
- dc — double crochet
- inc — increase
- dec — decrease
- mr — magic ring
- fo — finish off
A relaxed unisex crochet sweater for spring layering
Body
After several rows, measure the length; once the body reaches 6.5 inches, prepare to work on the neck and shoulders.
- Round 1
(Foundation Chain): Start by creating a slip knot; chain 72 stitches (adjust number based on your size; this is for a medium size)
- Round 1
Extended Half Double Crochet Row Add one chain (this does not count as a stitch); skip the first stitch from the hook and work in the second stitch; yarn over, insert the hook into the stitch, yarn over and pull up a loop (four loops on hook), yarn over and pull through one loop (three loops on hook), yarn over again and pull through all three loops on the hook; repeat across until you have 62 extended half double crochets; for the remaining 10 stitches of the row, switch to single crochet stitches; place a stitch marker after completing the first single crochet to differentiate between the stitch types in the row
- Round 2
(Back Loop Single Crochet and Extended Half Double Crochet): Chain one and turn your work; start with 10 back loop single crochets; then work 62 back loop extended half double crochets for the rest of the row
- Round 3
and Beyond: Continue repeating the pattern established in row 2, maintaining 10 back loop single crochets at the start of each row, followed by 62 back loop extended half double crochets
Sleeves
Make 2- Round 1
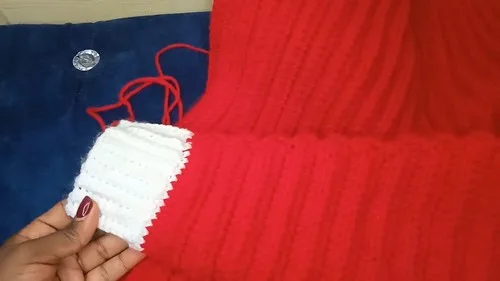
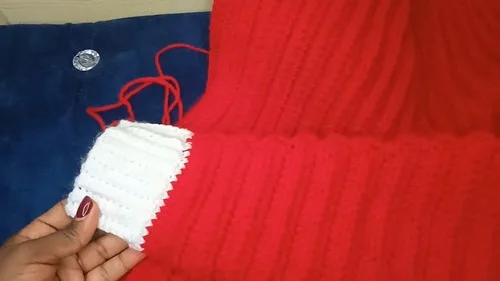
Sleeve Setup Start by slip stitching the sides of your sweater together, working from the wrong side for a seamless look
- Round 2
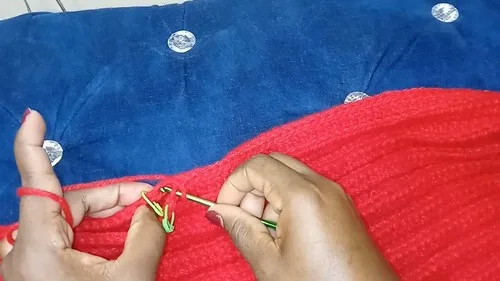
Sleeve Foundation Begin at the center underarm point, working single crochets around the armhole to establish the base round for the sleeve
- Round 3
Sleeve Pattern Continue with extended back loop half double crochets; to gradually decrease the sleeve width, skip the first stitch at the beginning of each row, then slip stitch to join and chain two to turn; use stitch markers as necessary to keep track of decreases
- Round 4
Finishing Sleeve Repeat the decrease method until the sleeve fits snugly around the wrist; fasten off and weave in ends
Neck and Shoulders
- Round 1
Neck Opening Work 57 stitches for the neck, incorporating the existing stitches; leave a gap of 15 stitches for the neck space
- Round 2
Shoulder Formation After shaping the neckline, continue working on the sweater body until you achieve your desired length for the shoulders, maintaining the pattern established
- Round 3
Final Rows for Shoulders For accurate length, measure and adjust the number of rows as necessary to match both shoulders evenly
More shots
Where it goes
- A layering piece over a t-shirt for cool spring mornings that warm up by afternoon.
- An easy throw-on sweater for weekend errands, paired with jeans and simple sneakers.
- A relaxed topper for a picnic or outdoor market trip, worn over a light button-down.
- A gift-worthy unisex make that pairs well with simple trousers for a no-fuss everyday look.
Color ideas
- Soft neutral Work the entire body, neck, shoulders, and both sleeves in one oatmeal or stone colorway for a clean, minimal finish.
Care
This yarn is 100% acrylic, so a gentle machine wash on cold with a mild detergent is fine, no special hand-washing needed.
Lay the sweater flat to dry rather than hanging it, since acrylic can stretch under its own wet weight.
Store it folded rather than on a hanger to keep the shoulders and neckline from losing their shape over time.
Assembly
- Step 1 Depending on the style you prefer, you can add ribbing around the neckline and hem; this usually entails switching to a smaller hook size and working in a ribbing pattern that complements the sweater.
- Step 2 If not already done, seam any open sides or shoulders together using a tapestry needle or slip-stitching method for a clean finish.
Easy to get wrong
Crocheting into both loops by accident
Back loop only rows are what give this sweater its texture, and grabbing both loops flattens that effect. Slow down at the start of each row until the back-loop habit feels automatic.
Uneven shoulder lengths
Working each shoulder separately after the neck gap can lead to mismatched rows if you are not counting carefully. Lay the two sides flat against each other often to check they match before moving to the sleeves.
Listener questions
Can I make this sweater in a different size than medium?
Yes, the foundation chain of 72 stitches is given for a medium, so you would adjust that starting chain up or down for your size. Just keep the same ratio between the single crochet and extended half double crochet sections as you resize.
Why does the pattern use extended half double crochet instead of a regular stitch?
The extra yarn-over step in extended half double crochet creates a taller, slightly stretchier fabric than standard half double crochet. It gives the sweater more drape without feeling as open as a double crochet fabric would.
Do I need to seam the sleeves separately before attaching them?
No, the sleeves are built directly onto the seamed body starting at the underarm point, so there is no separate sleeve cap to sew in. You work the single crochet base round right around the armhole opening.
How do I know when to stop working the body and start the neck?
The pattern has you measure the body length and move on to the neck and shoulders once it reaches the target length noted in the pattern. Checking with a tape measure as you go keeps both sides even.
Original pattern: https://crocheteverything.com/unisex-stylish-crochet-sweater-pattern-for-spring-wear/
About the Author

Marisol QuinteroWho runs Crochet Obsessed, why a stitch count sits at the end of every round, how a pattern gets written here, and the things this site will never do.
More Patterns
- IntermediateNo. 01

Rose Granny Square Tote Crochet Pattern
Rose granny square tote crochet pattern made from 18 dimensional rose squares for a sturdy, romantic everyday bag.
- IntermediateNo. 02
Tropical octopus baby blanket crochet pattern with appliqués
Tropical octopus baby blanket crochet pattern: a cream filet base with coral and turquoise octopus appliqués, leaves, and…
- IntermediateNo. 03
Sunny lemon couple amigurumi crochet pattern
Sunny lemon couple amigurumi crochet pattern with embroidered slices and safety eyes for a cheerful handmade shelf pair.


