- LevelIntermediate
- Time4-6 hours
- Hook2.25 mm
- YarnFingering/Sport
About This Pattern
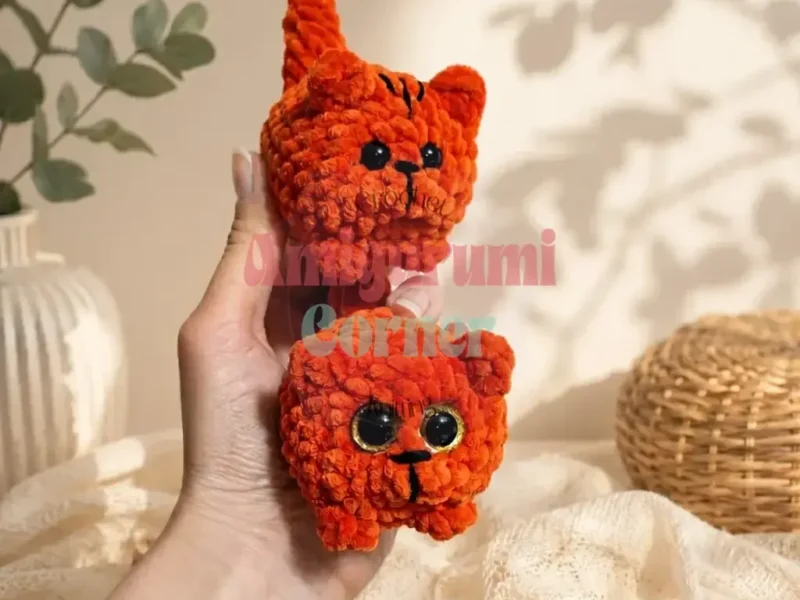
There's something cozy about making two cats at once, like a pair of radio hosts trading shifts. The big one feels grounded and a little dignified. The mini one is all curiosity, small enough to perch on a windowsill or ride in a pocket. Together they read like a conversation.
Your hands stay busy with a continuous spiral the whole time, no joining, no turning, just round after round in fingering or sport weight on a small hook. You'll work ears straight into the fabric using front loop only stitches, and legs that pop forward from bobble stitches. It's hands-on sculpting more than it is following a flat diagram.
Set on a shelf, the pair looks like they're mid-conversation, one keeping watch while the other naps. They don't need a stand or a frame, just a little floor space to sit upright. A desk, a bookshelf nook, or the corner of a kid's bed all work fine.
This is an intermediate-friendly pattern that any crocheter comfortable with basic spiral rounds can tackle confidently. The larger cat builds through about 13 rounds of body shaping before transitioning into the neck and head, and the mini cat follows the same logic at a smaller scale.
Written in US crochet terms, this pattern isn't fussy about gauge — what matters is a fabric dense enough that the stuffing doesn't peek through. If you spot gaps, tighten your tension or drop to a smaller hook.
- Start each cat at the center with a magic ring and build the head outward in a continuous spiral.
- Increase steadily around the first several rounds to round out the head before narrowing toward the body.
- Lock in the safety eyes early and double-check their position before you crochet past that point.
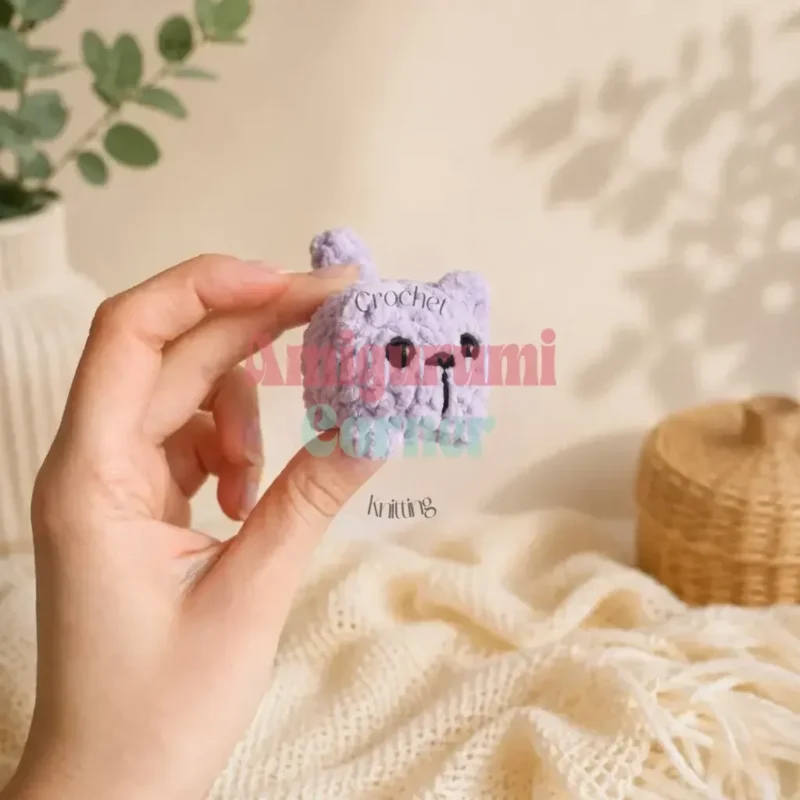
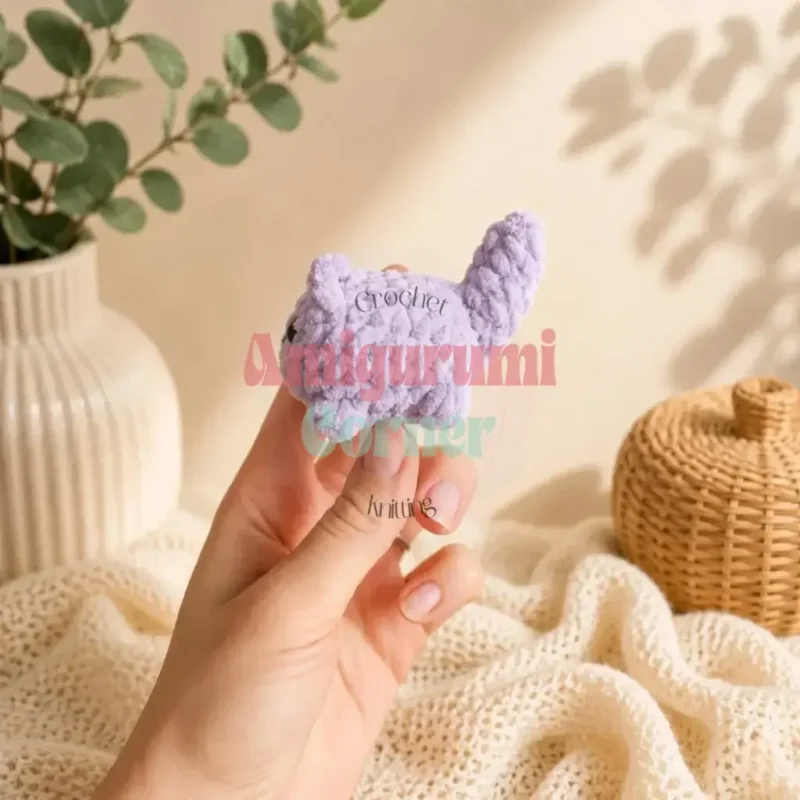
- Work the ears directly into the fabric using front loop only stitches on the mini cat's head round.
- Shape the legs with bobble stitches worked into the body rather than crocheting separate limb pieces.
- Stuff continuously as you close each round so the fiberfill fills every curve without lumps.
- Finish the head opening by closing it completely once you've confirmed the eyes are locked and centered.
- Shape the muzzle afterward by threading yarn through the face and anchoring it for that soft indent.
On the desk
Yarn
- Fingering or Sport weight yarn in your chosen cat color(s); small amount of contrasting color for facial embroidery if desired
Hook
- US B-1 / 2.25 mm (or size needed to achieve a tight, stuffing-hiding fabric)
Safety eyes
- 6 mm, 2 per cat (4 total for the pair)
Stuffing
- Polyester fiberfill
Stitch markers
- 1–2 locking stitch markers
- Yarn needle / tapestry needle
- Scissors
Stitch shorthand
- ch — Chain
- dc — Double Crochet
- dec — Invisible Decrease (insert hook through front loops of next 2 sts together)
- FLO — Front Loop Only
- hdc — Half Double Crochet
- inc — Increase (2 sc in same stitch)
- MR — Magic Ring
- sc — Single Crochet
- SM — Stitch Marker
- st(s) — Stitch(es)
- Special Stitch — 3-dc Bobble (Paw / Leg) — [Yo, insert hook in st, pull up a loop, yo, pull through 2 loops] 3 times in the same stitch; yo, pull through all 4 loops on hook. Counts as 1 stitch in the round total.
Two-in-one amigurumi cats in big and mini sizes
Larger Cat
Stuff continuously as you work.
- Round 1
6 sc in MR. (6)
- Round 2
Inc in each st around. (12)
- Round 3
(1 sc, inc) × 6. (18)
- Round 4
(2 sc, inc) × 6. (24)
Ears are worked directly into the body round by crocheting into the front loop only (FLO) of a single stitch; the back loop of that stitch stays active and is worked normally in the following round, so the ear stitches don't add to the round's stitch count. Paws are each a single 3-dc bobble worked into one stitch and also count as just 1 stitch in the total.
- Round 5
8 sc, [ Ear: into FLO of next st work (hdc, dc, ch 1, hdc)], 5 sc, [ Ear: into FLO of next st work (hdc, dc, ch 1, hdc)], 6 sc, [ Paw: 3-dc bobble in next st], 2 sc. (24)
- Round 6
1 sc, [ Paw: 3-dc bobble in next st], 22 sc. (24)
- Rounds 7–11(24)
24 sc in each st around. (24) [5 rounds]
- Round 12
22 sc, [ Paw: 3-dc bobble in next st], 1 sc. (24)
- Round 13
2 sc, [ Paw: 3-dc bobble in next st], 21 sc. (24)Insert safety eyes now. Stuff the body firmly before continuing.
- Round 14
12 dec. (12)
- Round 15
6 dec. (6)
- Rounds 16–17(6)
6 sc in each st around. (6) [2 rounds — neck]
- Round 18
(1 sc, inc) × 3. (9)
- Rounds 19–21(9)
9 sc in each st around. (9) [3 rounds — head]
- Round 22
(1 sc, dec) × 3. (6)
- Rounds 23–24
6 sc in each st around. (6) [2 rounds] Add final stuffing. Fasten off, close opening, weave in end. Optional: thread a yarn needle with matching yarn and cinch through the face to shape the muzzle.
Mini Cat
Stuff continuously as you work.
- Round 1
6 sc in MR. (6)
- Round 2
Inc in each st around. (12)
- Round 3
(1 sc, inc) × 6. (18)
Ears are worked directly into the body round by crocheting into the front loop only (FLO) of a single stitch; the back loop of that stitch stays active and is worked normally in the following round, so the ear stitches don't add to the round's stitch count. Legs are each a single 3-dc bobble worked into one stitch and also count as just 1 stitch in the total. The Mini Cat's ears use a shorter (hdc, ch 2, hdc) rather than the Larger Cat's (hdc, dc, ch 1, hdc), since a full double crochet would make them oversized at this scale.
- Round 4
6 sc, [ Ear: into FLO of next st work (hdc, ch 2, hdc)], 3 sc, [ Ear: into FLO of next st work (hdc, ch 2, hdc)], 4 sc, [ Leg: 3-dc bobble in next st], 2 sc. (18)
- Round 5
1 sc, [ Leg: 3-dc bobble in next st], 16 sc. (18)
- Rounds 6–8(18)
18 sc in each st around. (18) [3 rounds]
- Round 9
16 sc, [ Leg: 3-dc bobble in next st], 1 sc. (18)
- Round 10
2 sc, [ Leg: 3-dc bobble in next st], 15 sc. (18)Insert safety eyes and stuff before the opening closes further.
- Round 11
9 dec. (9)
- Round 12
3 dec, leave remaining 3 sts unworked. Place SM here — this point becomes the new beginning of round. (6)
- Rounds 13–19
6 sc in each st around. (6) [7 rounds — neck and head tube] Add final stuffing. Fasten off, close opening, weave in end. Optional: cinch the muzzle area to shape.
More shots
Where it goes
- A matched pair for a bookshelf or desk, sitting side by side like bookends with personality.
- A low-effort travel companion since the mini cat is light and compact enough for a bag pocket.
- A thoughtful handmade gift set for someone who collects small figures or loves cats specifically.
- A photo prop pairing with cozy knit blankets or a mug of tea for a still-life shelf arrangement.
Care
Hand wash in cool water if needed, since fingering or sport weight yarn can felt or shrink under heat and agitation.
Reshape both cats by hand while damp, gently pressing the body round and smoothing the ears flat before they dry.
Air dry fully on a towel away from direct heat, then store on a shelf rather than stuffed in a bin to keep the shape from flattening.
Assembly
- Step 1 Both cats are complete pieces worked entirely in the round — ears, paws, and legs are built into the body and require no separate sewing.
- Step 2 Confirm both safety eyes are fully locked before closing each head. Once the opening is sewn shut, there is no easy way to reposition them.
- Step 3 To shape the muzzle on either cat, thread a yarn needle with a short length of matching yarn. Enter at the base of the head, exit through the front of the face, and pull gently to create a soft indent. Anchor the yarn inside the piece and trim.
- Step 4 Weave in all remaining yarn ends securely on the wrong side of each piece.
Easy to get wrong
Losing track of the round start
Place a locking stitch marker at the first stitch of every round and move it up as you go, since there's no join or turning chain to mark the spot for you.
Sewing the head shut before checking eyes
Pause before closing either head and tug gently on both safety eye posts to confirm they're fully locked, because repositioning after sewing isn't realistic.
Loose tension letting fiberfill peek through
If you can see white through the stitches, drop to a smaller hook or tighten your tension so the fabric stays dense enough to hide the stuffing.
Paws that blend into the body
Work tighter than you think you need to — the 3-dc bobble paws stand out best against a firm fabric. Drop a hook size before you start rather than trying to compensate mid-project.
Skipping the invisible decrease
Both cats close down to just 6 stitches at the top of the head, where a standard decrease leaves a visible ridge. Insert your hook through the front loops of the next two stitches simultaneously, then complete the stitch as normal for a result that lies completely flat.
Overstuffing the neck tube
Stuff firmly at the base to keep the cat upright, but add fiberfill more lightly toward the head — an overstuffed neck can look stiff or cause the head to tilt. Add stuffing in small pinches and check the shape as you go.
Swapping ear styles between cats
The Larger Cat's ears use (hdc, dc, ch 1, hdc) while the Mini Cat's use (hdc, ch 2, hdc), which is proportional to its smaller size. Don't swap the two ear constructions between the patterns or the mini ears will look oversized.
Missing the Mini Cat's SM shift
Round 12 of the Mini Cat, placing the stitch marker shifts the beginning of the round. Skip it and the 7-round neck-and-head tube that follows will be offset from center, landing the muzzle cinch in the wrong spot.
Between the songs
- What I love here is how much shaping happens without a single seam. The ears on the mini cat are worked right into the head through front loop only stitches, so they pop up mid-round instead of getting sewn on after. The legs use a 3-dc bobble worked straight into the body, giving you that paw silhouette with one cluster stitch instead of a separate piece. Because both cats are continuous spirals, you're stuffing as you go, which means less fussing with stuffing tools and more pausing to check the shape with your fingers. Making the big and mini side by side also teaches you how the same stitch logic scales down, which is a satisfying kind of repetition.
Listener questions
Can I make these cats with worsted weight yarn?
Yes — worsted weight yarn produces a noticeably larger finished cat, which some makers prefer for a chunkier, more huggable toy. Use a hook sized to give you a tight, dense fabric (try a US G-6 / 4 mm as a starting point) and expect the finished piece to be roughly double the size of the original. All stitch counts remain the same.
Do the ears and paws need to be sewn on separately?
No — this is one of the pattern's best features. The ears are formed by working directly into the front loop only of a single body stitch as you pass it in the round. The paws and legs are each a 3-dc bobble worked into one stitch. Everything is integrated into the body rounds with no separate attachment needed.
When is the right time to insert the safety eyes?
Insert safety eyes before the main decrease rounds begin: before Rnd 14 on the Larger Cat and before Rnd 11 on the Mini Cat. Once those decreases narrow the opening, getting your fingers in to lock the eye backing becomes genuinely difficult. Position both eyes symmetrically and press the backings on firmly before you proceed.
Are these cats suitable as toys for toddlers?
children under three years old, replace the plastic safety eyes with embroidered eyes using a contrasting yarn color. This removes the small-part risk entirely while keeping the finished piece just as expressive. Use a satin stitch or French knot worked securely into the fabric so there are no loose threads.
Original pattern: https://amigurumicorner.com/crochet-2-in-1-amigurumi-cats/
About the Author

Marisol QuinteroWho runs Crochet Obsessed, why a stitch count sits at the end of every round, how a pattern gets written here, and the things this site will never do.
More Patterns
- IntermediateNo. 01

Rose Granny Square Tote Crochet Pattern
Rose granny square tote crochet pattern made from 18 dimensional rose squares for a sturdy, romantic everyday bag.
- IntermediateNo. 02
Tropical octopus baby blanket crochet pattern with appliqués
Tropical octopus baby blanket crochet pattern: a cream filet base with coral and turquoise octopus appliqués, leaves, and…
- IntermediateNo. 03
Sunny lemon couple amigurumi crochet pattern
Sunny lemon couple amigurumi crochet pattern with embroidered slices and safety eyes for a cheerful handmade shelf pair.


