- LevelIntermediate
- Time4-6 hours
- Hook5.5 mm
- YarnWorsted
About This Pattern
This one has an easy, open feel to it, like a cardigan that decided to be casual about buttons. Three simple panels come together into something you'd actually reach for on a cool evening. It reads polished without trying too hard, which is exactly the vibe I'm after.
Your hands get a nice mix here: steady rows of alternating single and double crochet, then the focus work of shaping the armholes and neckline. You'll measure yourself before you even pick up the hook, which makes the whole thing feel personal. Then it's rhythm, decrease, rhythm, decrease, until the shoulders line up.
Draped over a chair or worn over a tank top, this vest has presence without shouting. The shell stitch edging catches the light and gives it a finished, boutique look. It's the kind of piece that makes a plain room, or a plain outfit, feel considered.
- Measure your widest part first, then divide by two to set the width for the back piece.
- Build the back piece in alternating single crochet and double crochet until it reaches just below the armpit.
- Shape the back armholes with a short run of decrease rows, then work straight again toward the shoulder.
- Chain and work each front panel using the back chain count to figure its width, mirroring the pair.
- Shape the armhole and neckline on each front panel, marking the armhole side so decreases land correctly.
- Align the two front panels over the back piece to check the fit, then sew the shoulder and side seams.
- Finish by working the shell stitch edging around the outer edges, the back neckline, and each armhole, then weave in ends.
- Add the optional beaded cord closure at the neckline if you want a way to cinch the vest closed.
On the desk
- Height : 59 cm
Width
- 45 cm (customizable)
Crochet hooks
- 5.5 mm (for chain) and 4.5 mm (for rest)
- 4 mm (for optional closure cords)
Yarn
- Lidia Crochet Tricot Classic (100% acrylic) – 3.5 skeins
- Measuring tape
- Wool needle
- Sewing needle (for optional beads)
- Beads or small button for closure (optional)
Stitch shorthand
- st — stitch
- sts — stitches
- sl st — slip stitch
- sc — single crochet
- dc — double crochet
Three-panel crochet bolero vest with shell edging
Construction – Main Pieces
The vest is made from 3 pieces: 1 back and 2 front panels.
Measure your widest part (bust, hips, or stomach). Divide by 2 to get the width for the back piece. For each front panel, divide the back chain count by 2 and add 4 stitches.
Use 5.5 mm hook to chain a multiple of 2 stitches. Example: 60 chains = 45 cm.
Foundation Row
This row works a single crochet foundation across the starting chain, giving you a stable base before the main textured pattern begins.
- Row 1
Chain 1, skip chain 1, work 1 single crochet (sc) in each stitch across
Main Stitch Pattern (Reversible Texture)
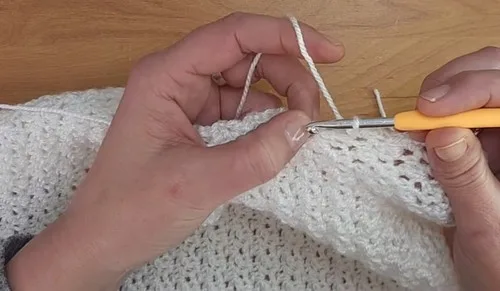
This pattern builds a reversible textured fabric by alternating single crochet and double crochet across each row, always placing sc over dc and dc over sc in the following rows. Continue this pattern until the piece reaches just below the armpit.
- Row Start
Chain 1, turn. Row Start: sc in first stitch, dc in next. Alternate sc and dc across. Always place sc over dc and dc over sc in following rows. Continue until the piece reaches just below the armpit.
Back Piece Shaping
Work 51 rows straight (approx. 37.5 cm)
Begin armhole shaping:
- Row 1
Chain 1, 3 unfinished sc together (first 3 sts), continue pattern, 3 unfinished sc together at endRow 2: Work pattern normally. Repeat these 2 rows again. After 4 shaping rows, continue pattern with no decreases. Work until mid-shoulder (23 rows post-decrease, approx. 21 cm). Fasten off, leave long tail.
Front Panels (Make 2)
Each panel = half the back chains + 4. Example: 60 back chains → 34 front panel chains. Work 51 rows straight. Begin armhole and neckline shaping.
Mark back side (armhole)
Armhole Decrease (Marked Side):
- Row 1
Decrease
- Row 2
No decrease
- Row 3
Decrease
- Row 4
No decrease
Neckline Decrease (Unmarked Side):
- Neck Row 1
Decrease
- Neck Row 2-3
No decrease
- Neck Row 4
Decrease
- Neck Row 5-6
No decrease
- Neck Row 7
DecreaseDo not decrease in last 4 rows. Total shaping rows = 23. Fasten off, leave tail.
Assembly
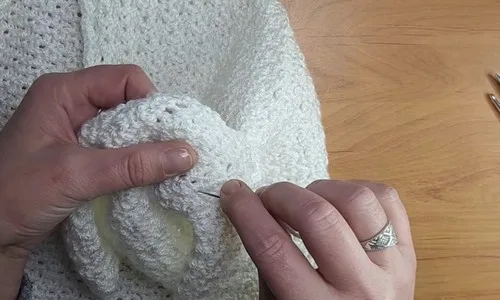
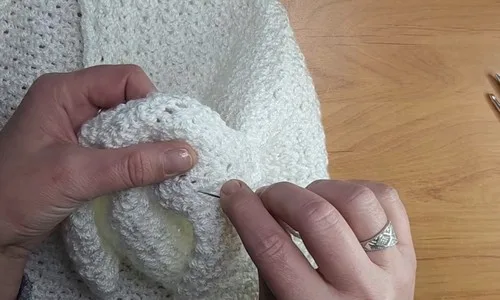
Shoulder Seams Align front panels over the back. Count stitches for shoulder seams (e.g., 16 each). Use wool needle to sew, stitch to stitch. Knot and weave in ends.
Side Seams Fold bolero with right sides facing. Match edges and place markers at armpits. Sew side seams up to marker. Knot and weave in ends.
Edging (Shell Stitch)
Attach yarn to front panel bottom Pattern: 2 sc in first stitch Skip space, sl st 3 sc in next space Repeat (3 sc, skip, sl st) around edges
Curve and neckline: adjust spacing for flat finish Back neckline: 3 sc, skip 1, sl st in next End with 2 sc in final stitch, sl st to starting stitch
Fasten off, weave in end
Sleeve Edging
Use same shell stitch method around each armhole. Match shell count on both sides. Finish with 2 sc in last, sl st to first sl st. Fasten off and weave in ends.
Closure (Optional Cord with Beads)
Use 4 mm hook. Chain approx. 70 for each cord.
Attach to neckline using sl st through two stitches. Fasten off, weave in tail.
Use sewing needle to thread beads onto tail. Tie knot under beads, trim excess. Repeat for second side.
More shots
Where it goes
- Layer it over a simple tank or fitted top for an easy throw-on piece heading out the door.
- Wear it open over a dress to add shape and texture without extra warmth.
- Pair it with jeans and boots for a relaxed, textured outfit that still looks put together.
- Keep it folded on a chair or hook as a grab-and-go layer for cool evenings indoors.
Color ideas
- Classic neutral Work the back piece and both front panels in one oatmeal or sand shade, then work the shell stitch edging in a soft charcoal for contrast along the edges.
Care
Hand wash this acrylic yarn in cool water with a gentle detergent, since acrylic doesn't need much coaxing and rough handling can stretch the panels.
Lay the vest flat on a towel to dry rather than hanging it, so the shoulders and front panels keep their shape instead of pulling long.
Fold it gently for storage rather than hanging, and reshape the shell stitch edging by hand if it gets squashed in a drawer.
Easy to get wrong
Losing the sc/dc alternation
Keep checking that you're placing sc over dc and dc over sc as you go, since one missed row throws off the texture for the rest of the piece. Lay the work flat every few rows to spot-check the pattern.
Front panel width miscalculated
Double-check that each front panel chain equals half your back chain count plus 4 before you start the first row. Recount rather than estimate, since this sets the whole fit.
Shell edging spacing drifts
Keep the 3 sc, skip, slip stitch rhythm consistent, especially around the curved neckline where spacing naturally wants to shift. Pause at the curve and adjust gaps slightly so the edge lies flat instead of rippling.
Between the songs
- What I love about this vest is how the alternating single crochet and double crochet rows build a subtle basketweave texture without any fancy stitch names to memorize. You just place sc over dc and dc over sc, row after row, and the fabric does the rest. The armhole and neckline shaping on the front panels is where it gets interesting, decreasing on the marked side while keeping the fabric even. Then the shell stitch edging, that rhythm of 3 sc, skip, slip stitch, ties the whole piece together and turns raw edges into a clean, finished line. It's a project that rewards paying attention without demanding perfection.
Listener questions
Can I make this vest bigger or smaller than the example?
Yes, the whole pattern is built from your own bust, hip, or stomach measurement divided by two for the back piece. The front panels and all the shaping scale from that same number, so the proportions stay correct at any size.
Why does the pattern use two different hook sizes?
The 5.5 mm hook is used just for the starting chain, which keeps that foundation row loose enough to work into easily. The 4.5 mm hook works the rest of the fabric a bit tighter, giving the vest more structure and drape.
How do I know which side of the front panel to mark for decreases?
Mark the side of each front panel that will sit at the armhole before you start the shaping rows. That marker keeps your decreases on the correct edge through all the rows, especially since you're making two panels that mirror each other.
Do I need to add a closure to this vest?
No, the closure with beads or a small button is listed as optional in the materials. The vest is designed to be worn open as a layering piece, so you can skip the closure entirely if you prefer that look.
What's the best way to check my panels will fit together before finishing?
Align both front panels over the back piece before you work the edging, matching them up at the shoulders and armholes. This lets you confirm the fit and spacing while you can still adjust, rather than after the shell stitch edging is in place.
Original pattern: https://crocheteverything.com/stylish-crochet-bolero-vest-pattern-you-can-wear-anywhere/
About the Author

Marisol QuinteroWho runs Crochet Obsessed, why a stitch count sits at the end of every round, how a pattern gets written here, and the things this site will never do.
More Patterns
- IntermediateNo. 01

Rose Granny Square Tote Crochet Pattern
Rose granny square tote crochet pattern made from 18 dimensional rose squares for a sturdy, romantic everyday bag.
- IntermediateNo. 02
Tropical octopus baby blanket crochet pattern with appliqués
Tropical octopus baby blanket crochet pattern: a cream filet base with coral and turquoise octopus appliqués, leaves, and…
- IntermediateNo. 03
Sunny lemon couple amigurumi crochet pattern
Sunny lemon couple amigurumi crochet pattern with embroidered slices and safety eyes for a cheerful handmade shelf pair.


