- LevelIntermediate
- Time4-6 hours
- Hook4.5 mm
- YarnWorsted
About This Pattern
This one has a playful, tinkering energy, more craft-table project than heirloom. I think of it as the piece you make on a Sunday afternoon with the radio on, half paying attention, because the shapes come together fast. There is something cheerful about a five-pointed star showing up out of a plain round of single crochet.
Your hands stay busy but not stressed here. You work the base in simple increasing rounds, then shift into short decrease rows for each point, turning and chaining as the star takes shape. It is repetitive in the best way, five times over, so by the third point your fingers know the rhythm without much thinking.
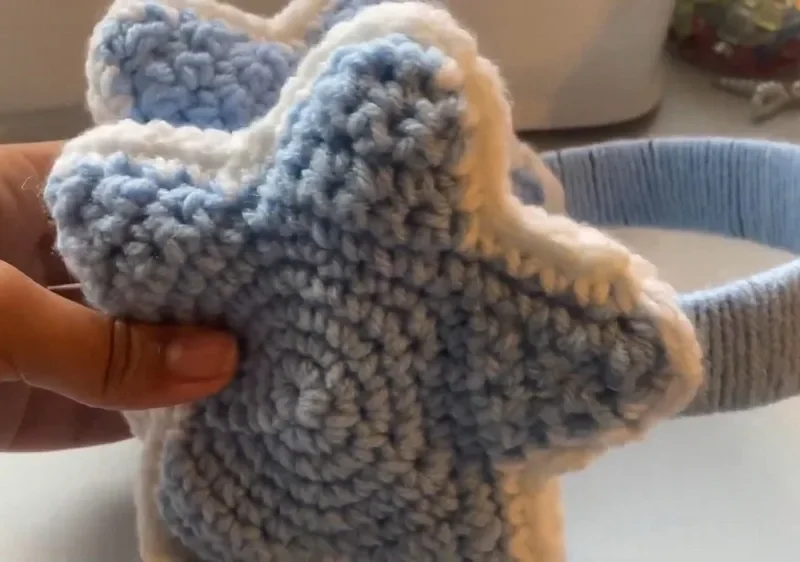
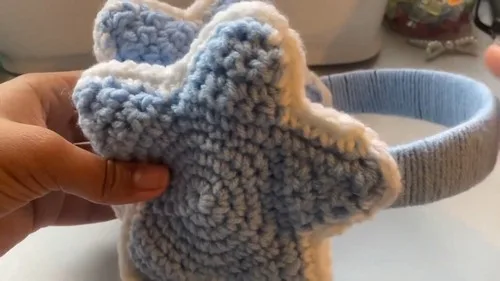
Finished, the star muffs sit clipped to a headband like a small constellation caught mid-orbit. They read as a fun, wearable accent rather than a serious statement piece, something you would toss on for a walk or leave on a hook by the door. On a shelf next to other yarn projects, the star shape is what catches the eye first.
- Begin the base with a magic ring and build outward through increasing rounds until the circle is wide enough.
- Work six single crochets along the base round to start the first point of the star.
- Turn and decrease by skipping a stitch at the start of each row, chaining one between rows.
- Repeat the decrease rows on that section until the point narrows to a complete tip.
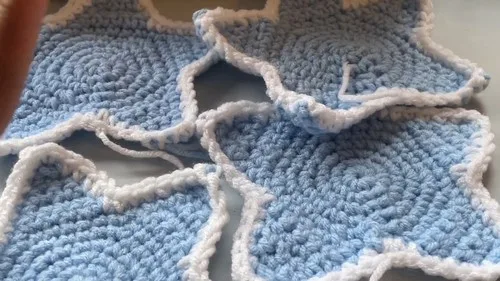
- Work the same six-stitch start and decrease sequence four more times to shape all five points.
- Make a second matching star using the same base and point method.
- Hold the two stars wrong sides together and single crochet around both layers, leaving a gap for stuffing.
- Stuff each point and the center with polyfill, close the opening, then glue the finished stars onto a yarn-wrapped headband.
On the desk
- Acrylic yarn in two colors (primary and trim)
- Crochet hook (4.5 mm)
- Scissors
- Darning needle
- Polyfill for stuffing
- Headband (purchased)
- Hot glue gun
Optional
- Tape measure for precise placement of star muffs on the headband
Stitch shorthand
- ch — chain
- st — stitch
- sl st — slip stitch
- sc — single crochet
- hdc — half double crochet
- dc — double crochet
- inc — increase
- dec — decrease
- mr — magic ring
- fo — finish off
Star-shaped crochet ear warmers on a headband
Start with the Base
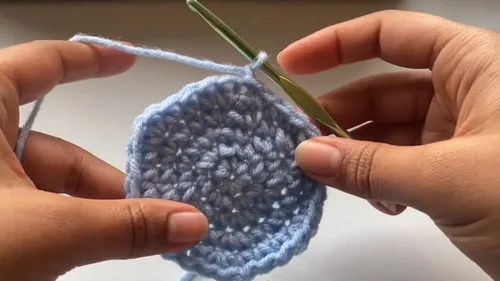
Magic Ring: Start by creating a magic ring.
- Round 1
Work 6 single crochets into the magic ring. Pull the tail to close the ring and slip stitch into the first single crochet to complete the round.
- Round 2
Chain 1. Work 2 single crochets in each stitch all around (total 12 stitches). Slip stitch into the first stitch of this round to complete.
In Round 3:
Chain 1. Work 2 single crochets in the next stitch, then 1 single crochet in the next stitch. Repeat from to around (total 18 stitches).
- Round 4
Chain 1. Work 2 single crochets in the next stitch, then 1 single crochet in each of the next two stitches. Repeat from to around (total 24 stitches).
- Round 5
Chain 1. Work 2 single crochets in the next stitch, then 1 single crochet in each of the next three stitches. Repeat from to around (total 30 stitches). Complete the base by slip stitching to the first stitch of this round.
Start each Point
- Round 1(1)
Work 1 single crochet in each of the next 6 stitches from the base round.
- Round 2
Decrease for Points:
- Round 3
Turn the work, skip the first stitch, single crochet in each of the next 5 stitches. Chain 1 and turn. Continue decreasing by one stitch in every row until you have made a complete point. Repeat this for all five points of the star.
More shots
Where it goes
- Wear it as a quick outdoor accessory for a crisp-weather walk, paired with a plain knit scarf.
- Give it as a handmade gift for someone who collects small, playful crochet accessories.
- Display it on a shelf or hook near other finished amigurumi and stuffed crochet pieces as a decorative accent.
- Photograph it for a crochet portfolio or social feed, since the star shape reads clearly even in a small image.
Color ideas
- Two-tone contrast Work the base rounds and points entirely in the primary color, then wrap the headband itself in the trim color for a clean split between star and band.
- Matching wrap Use the same primary color for both the star points and the headband wrap, so the trim color appears only in a thin accent line where the two stars are joined together.
Care
Since this pattern uses acrylic yarn, hand wash the star muffs in cool water only if needed, since the hot glue holding them to the headband is not machine-wash safe.
Let the piece air dry flat, away from direct heat, so the glued joins between the stars and the headband do not soften or shift.
Store the finished piece flat or gently cupped in a drawer rather than hung, so the polyfill-stuffed points keep their shape over time.
Assembly
- Step 1 Put the wrong sides of two star shapes together, matching up the points. Single crochet around, working through both layers to join them. Leave an opening for stuffing.
Easy to get wrong
Losing count during point decreases
Mark the first stitch of each decrease row with a stitch marker so you always know where to skip. This keeps every point the same size across all five sections.
Overstuffing before closing the seam
Add polyfill gradually into the points and center as you slip stitch the opening closed, not all at once beforehand. This keeps the star flat enough to sit nicely against the headband.
Gluing stars before checking symmetry
Lay the wrapped headband flat and position both stars with a tape measure before any hot glue touches the yarn. Hot glue sets fast, so this is the one step where a dry run really pays off.
Between the songs
- The satisfaction here is in watching a flat circle turn into a pointed star using nothing fancier than single crochet and a steady decrease. You start with a magic ring, build up through increasing rounds, then break the round into five separate point sections worked back and forth in short rows. Each point narrows on its own until it comes to a neat tip, which is a nice little lesson in shaping without any special stitches. Stuffing the points and center with polyfill gives the star real dimension instead of leaving it floppy. Then joining two stars wrong sides together and single crocheting around both layers feels like sealing a little pillow. Wrapping the headband in yarn and gluing the stars in place is the fast, satisfying finish that turns a stitched shape into a wearable object.
Listener questions
Do I need to know how to decrease before starting this pattern?
You just need to be comfortable skipping a stitch at the start of a row and chaining one before turning. The decrease sequence repeats five times, so it becomes familiar quickly.
How many stars do I need to make for one headband?
The assembly step joins two star shapes together, wrong sides facing, to make one stuffed star muff. Make as many pairs as you want star muffs on the finished headband.
Can I skip the hot glue and sew the pieces instead?
The pattern is written around hot glue for both wrapping the headband and attaching the stars, since it sets fast and holds firmly. If you prefer stitching, a darning needle and matching yarn can replace the glue at both stages.
What if my points come out uneven?
Uneven points usually come from missing the skip at the start of a decrease row. Check that you are skipping the first stitch every row and chaining one before turning, on every point.
Is a purchased headband necessary, or can I crochet my own band?
The materials list calls for a purchased headband as the base you wrap in yarn. This keeps the project quick, since all your stitching energy goes into the star shapes themselves.
Original pattern: https://crocheteverything.com/easy-crochet-starmuffs-pattern-for-beginners/
About the Author

Marisol QuinteroWho runs Crochet Obsessed, why a stitch count sits at the end of every round, how a pattern gets written here, and the things this site will never do.
More Patterns
- IntermediateNo. 01

Rose Granny Square Tote Crochet Pattern
Rose granny square tote crochet pattern made from 18 dimensional rose squares for a sturdy, romantic everyday bag.
- IntermediateNo. 02
Tropical octopus baby blanket crochet pattern with appliqués
Tropical octopus baby blanket crochet pattern: a cream filet base with coral and turquoise octopus appliqués, leaves, and…
- IntermediateNo. 03
Sunny lemon couple amigurumi crochet pattern
Sunny lemon couple amigurumi crochet pattern with embroidered slices and safety eyes for a cheerful handmade shelf pair.


