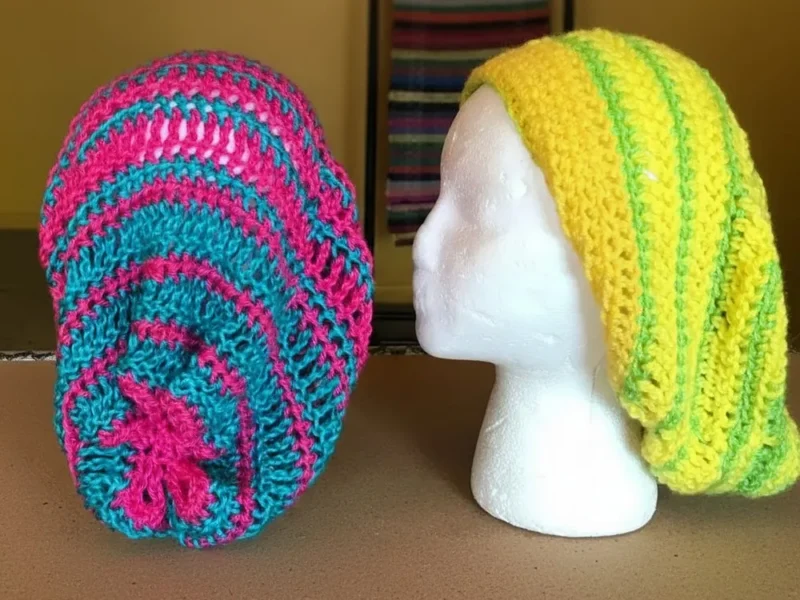
- LevelBeginner
- Time2-3 Hours
- Hook5.5 mm
- YarnWorsted
About This Pattern
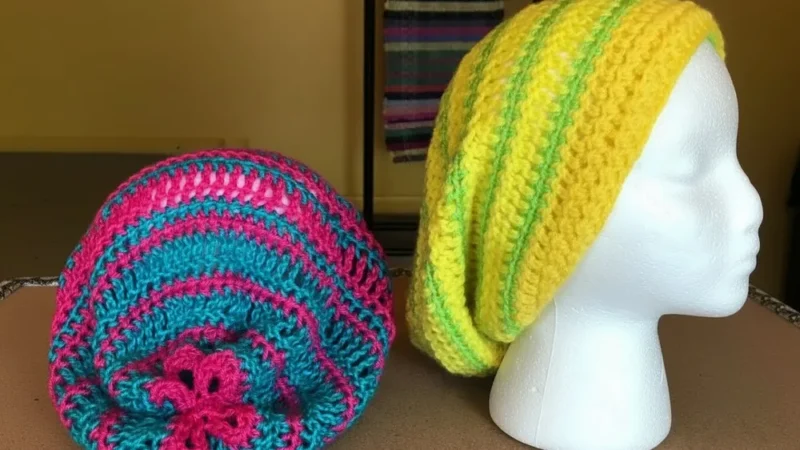
This slouchy crochet hat is the kind of project that makes you fall in love with crochet all over again — simple, satisfying, and finished before you know it. Worked in two contrasting colors, it creates that effortlessly cool, oversized-yet-fitted look that slouchy hats are known for. It's perfect for anyone who wants a stylish accessory without a complicated pattern, and it's an especially great choice if you're newer to crochet but still want a piece that looks intentional and polished.
The finished hat has that relaxed, draping crown that pools softly at the back — cozy without bulk, and stylish without fuss. Worked up in medium weight yarn, it has a nice substantial feel that holds its shape while still being soft against the skin. Because it comes together so quickly, it also makes a wonderful last-minute gift; pick two colors that suit the recipient and you've got a handmade present that looks far more polished than the time invested.
- Begin at the crown center and work the first rounds close together to form a small, flat circle.
- Increase evenly around the following rounds so the crown gradually widens into a rounded shape.
- Continue working the remaining rounds even, without increasing, so the hat begins to taper into its slouchy shape.
- Keep the tension relaxed throughout so the fabric drapes softly instead of sitting stiff and structured.
- Work the final rounds in your chosen color combination to complete the brim and overall silhouette.
- Finish off and weave in all yarn tails securely, especially around the color-change sections.
- Give the hat a gentle stretch and try it on to see that signature slouchy fit take shape.
Materials
Yarn
- Medium weight (Size 4) yarn in two colors (e.g., Red and Gray).
Hook
- 5.5 mm crochet hook.
Tools
- Scissors and a tapestry needle.
Skill Level
- Easy/Beginner.
Crochet Abbreviations
- ch
- chain
- st
- stitch
- sl st
- slip stitch
- hdc
- half double crochet
- tr
- treble crochet (yarn over twice)
Snug Crochet Slouchy Hat Pattern That Stays Stylish
Main Pattern
Phase 1: The Foundation and Rim
Special Technique: Work into the back bump of the foundation chain for a professional edge.
Foundation: Create an adjustable loop and chain 60. Run your fingers along the chain to ensure it isn't twisted.
Join: sl st into the first chain to form a circle.
- Round 1
Ch 1. hdc into the back bump of each chain around. sl st to the first hdc to close.
- Round 2-3
Ch 2. hdc in each stitch around. Join with a sl st.
Phase 2: The Textured Body (Part A)
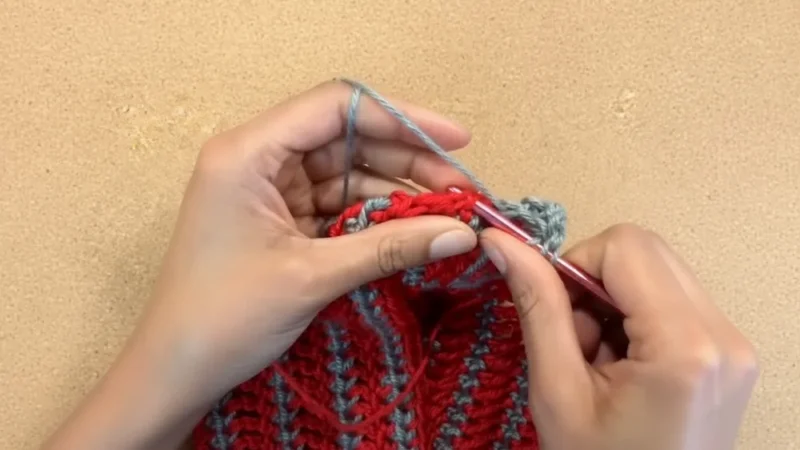
Keep both yarns connected throughout. Leave slack when carrying yarn up the inside to prevent the hat from pulling/puckering.
- Round 4
Join Yarn B (Gray). hdc in each stitch around. Join with a sl st.
- Round 5
Switch back to Yarn A (Red). Ch 4. tr in each stitch around. Join with a sl st.
- Round 6-10
* Repeat hdc rounds with Yarn B . Repeat tr rounds with Yarn A . (End Part A after a Round 10 hdc row with Yarn B).
Phase 3: The Yin-Yang Color Flip (Part B)
Now, you will reverse which color does which stitch.
- Round 11
Switch to Yarn A (Red). hdc in each stitch around.
- Round 12
Switch to Yarn B (Gray). Ch 4. tr in each stitch around.
- Round 13-17
* Continue alternating: hdc rounds in Yarn A and tr rounds in Yarn B . Stop after Round 17 (the final hdc round).Skip 9 stitches, sl st into the 10th. Repeat this around the top opening. This creates 6 "petals."
Center Seal: sl st 1 or 2 times across the very center of the hole to close it completely.Finish Top: Fasten off and pull the tail to the inside to weave in.Attach: Find the tail at your original foundation chain. Attach Yarn B.Final Row: Ch 1. hdc into each foundation chain around. Working into the "leftover" loops from Step 1 creates a clean, professional rim.Finish: sl st to close, fasten off, and weave in all ends.
Phase 4: Closing the Hat
The Petal Method: Instead of weaving a thread, you will "cinch" the top.
Phase 5: The Bottom Trimming
More photos
Important Notes
- 💡 Use a 5.5mm hook consistently throughout — if your tension runs tight or loose, adjust hook size slightly before starting rather than mid-project, since consistent gauge matters for that even slouch.
- 💡 Place a stitch marker in the first stitch of every round — with 8 rounds total, it's easy to lose your place, especially during increase rounds.
- 💡 Keep your yarn tension slightly looser than you would for a flat project, since this hat needs to stretch comfortably over the head.
- 💡 If working with two full skeins, don't cut your yarn between color sections unless necessary — carrying it up inside the hat keeps things tidy and saves ends to weave in.
- 💡 Try the hat on (or measure against a similar hat) after round 5 or 6 if possible, so you can gauge whether you want the slouch a bit deeper or more fitted before finishing the remaining rounds.
Common Mistakes and Fixes
- Starting the first round too tightly
Keep your first few stitches loose and deliberate — if your gauge tends to be tight, consider going up half a hook size just for that opening round.
- Losing track of stitch count
Place a stitch marker at the start of each round and count your stitches before moving on — this is especially important during rounds with evenly spaced increases.
- Carrying the unused color yarn
Leave the carried yarn slightly loose and let the work relax between stitches so the fabric doesn't pucker or pull when the hat stretches to fit.
- Working all 8 rounds too tightly
Remember this pattern is meant to slouch — resist the urge to cinch your tension tight, and trust the increases to create that soft, draping crown.
- Forgetting to weave in ends
Weave in each yarn tail securely along a color-change line using your tapestry needle, going in a few different directions to lock it in place.
Frequently Asked Questions
What yarn weight works best for this slouchy hat pattern?
Medium weight (Size 4) yarn is ideal, as specified in the materials list. Brands like Super Saver, Bernat Blanket, or Caron Simply Soft all work well and give the hat a nice structured-yet-soft feel.
Can I make this hat with just one color instead of two?
Absolutely — the pattern is written for two colors, but you can easily work all 8 rounds in a single color if you prefer a solid look. Just skip the color-change steps and continue with the same yarn throughout.
Is this pattern really beginner-friendly?
Yes, with only 8 rounds and simple increase stitches, this is a great project for beginners who know the basics of working in the round. The trickiest part is the color changes, but those are simple to master with a little practice.
How long does this hat take to make from start to finish?
Most crocheters can finish this hat in about 2-3 hours, making it a perfect single-sitting or weekend project. Your exact time will depend on your stitching speed and how comfortable you are with color changes.
Original pattern: https://redagapeblog.com/snug-crochet-slouchy-hat-pattern/
About the Author

Marisol QuinteroWho runs Crochet Obsessed, why a stitch count sits at the end of every round, how a pattern gets written here, and the things this site will never do.
More Patterns
- IntermediateNo. 01

Slouchy everyday beanie worked flat in half double crochet
Crochet beanie pattern for a slouchy everyday look worked flat with hdc rows, then seamed into a soft,…
- IntermediateNo. 02
Crochet amigurumi doll with dress, shoes, and hat
Crochet amigurumi doll pattern with dress, shoes, and hat details for a soft, huggable keepsake you build one…
- IntermediateNo. 03
Chunky moss stitch crochet sweater with raglan-free shoulders
Chunky crochet sweater pattern using moss stitch, worked flat with a 10mm hook for a soft, fast, cool-weather…


