- LevelIntermediate
- Time4-6 hours
- Hook5.0 mm
- YarnWorsted
About This Pattern
This one has that low-key, coffee-in-hand kind of energy. It is not fussy or fancy, it is the beanie you grab on your way out the door because it just works. There is a steady, ribbed rhythm to it that feels calm rather than complicated, like a favorite song you already know the words to.
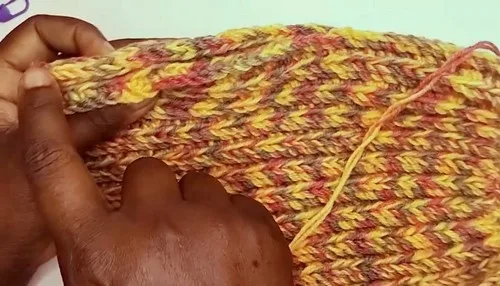
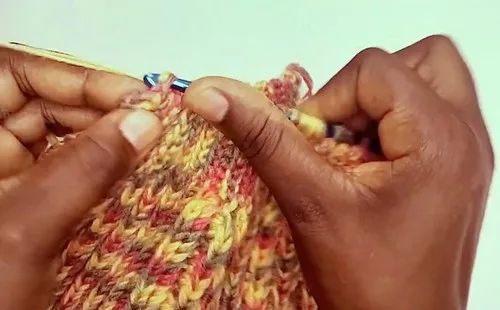
Your hands get to settle into one motion for most of this: half double crochet, row after row, with slip stitches bookending each side to keep the edge tidy. Working into the back loop only on the return rows is the one thing that asks for attention. Once you catch that rhythm, the rest moves fast.
Finished, it sits on a shelf or hook by the door looking soft and a little slouchy, in the best way. It is the kind of piece that does not need styling, it just gets worn. On a rainy afternoon it looks like the most reasonable thing in the room.
- Start with a single foundation chain and work your first row straight across it in single crochet, half double crochet, and slip stitch.
- Turn your work at the end of every row using a single chain, keeping the edge consistent.
- Work the return rows in back loop only so the slip stitch sections and the half double crochet sections build a distinct texture.
- Alternate between the two return rows steadily until your rectangle reaches the length you want for your head size.
- Fold the finished rectangle in half so the starting edge meets the ending edge.
- Sew up the side seam with a yarn needle using whip stitch or mattress stitch.
- Weave your yarn tail around the open top edge and pull it tight to close the crown.
- Weave in every loose end so the inside sits smooth against your head.
On the desk
Yarn
- 4-ply yarn, approximately 140g (or substitute with chunky yarn)
- 5.0mm crochet hook
- Stitch marker (optional)
- Tape measure
- Scissors
- Yarn needle
Stitch shorthand
- Sc — Single Crochet
- Hdc — Half Double Crochet
- Ch — Chain
- R — Row
- BLO — Back Loop Only
- FLO — Front Loop Only
- Sl St — Slip Stitch
Slouchy everyday beanie worked flat in half double crochet
Main Pattern
Starting Chain: Chain 51 (you can use two strands of yarn held together or opt for a chunky yarn as an alternative).
- Row 1
Skip the first chain from the hook; Work 1 single crochet; Work 42 half double crochet stitches; Work 7 slip stitches; Chain 1 and turn your work
- Row 2
Work 7 slip stitches in front loop only (FLO); Work 1 single crochet in back loop only (BLO); Work 41 half double crochet in BLO; Work 1 single crochet in BLO; Chain 1 and turn your work
- Row 3
Work 1 single crochet in BLO; Work 42 half double crochet in BLO; Work 7 slip stitches in FLO; Chain 1 and turn your workRepeat Row 2 and Row 3 alternately; continue until the length of the beanie measures your desired head circumference (recommended size: approximately 44 cm in width and 25 cm in height).
More shots
Where it goes
- A grab-and-go hat for dog walks or a quick coffee run, paired with a wool scarf and a canvas jacket.
- A cozy travel accessory to stuff in a bag pocket, worn with a chunky cardigan on a plane or train.
- A quick handmade gift for a friend who lives somewhere cold, paired with matching mittens if you have time.
- An everyday layer for outdoor work or yard time, worn with sturdy gloves and a flannel shirt.
Color ideas
- Soft neutral fade Work the whole rectangle in one oatmeal or stone shade, then use a slightly darker brown for the top cinch and seam thread so the crown reads as a subtle accent.
Care
Hand wash your beanie in cool water with a gentle detergent, since 4-ply yarn holds its shape best without hot water or a washing machine cycle.
Lay it flat on a towel to dry and gently reshape the brim and crown by hand while it is still damp.
Store it folded flat in a drawer rather than on a hook, so the slouchy shape does not stretch out of place over time.
Assembly
- Step 1 Fold the crocheted fabric in half so the starting and ending rows meet
- Step 2 Sew the sides together using a yarn needle and your preferred method (e.g., whip stitch or mattress stitch)
- Step 3 Once the side is sewn, use the yarn needle to weave the working yarn around the top edge
- Step 4 Pull tightly to cinch the top closed, forming the crown of the beanie
- Step 5 Secure and weave in all loose ends neatly
Easy to get wrong
Losing track of BLO on return rows
Slip a stitch marker into the front loop of the last stitch you worked so you can glance down and confirm you are still catching only the back loop. This keeps the ribbed texture even on both return rows.
Skipping the turning chain count
Chain 1 and turn at the end of every row without exception, even though it is a small stitch. Missing it shifts your edge and makes the slip stitch borders uneven when you fold the piece.
Rushing the crown cinch
Weave your yarn needle around the entire top edge in one smooth pass before pulling tight, rather than tugging as you go. A slow, complete weave gives a rounder, less puckered crown.
Between the songs
- What I like here is that the whole hat is worked flat, no fussy round-and-round shaping, just rows of half double crochet with slip stitch borders on each side. Working in back loop only on the return rows builds a texture that reads almost ribbed once it is folded and seamed. That little detail does a lot of visual work for very little extra effort. Then there is the satisfaction of the fold-and-sew step, watching a flat rectangle turn into a hat shape in under a minute. Cinching the top closed to form the crown is genuinely fun, it is the moment the project stops looking like a swatch and starts looking like a beanie you would actually wear.
Listener questions
Can I use chunky yarn instead of the 4-ply?
Yes, the pattern notes chunky yarn as a direct substitute, or you can hold two strands of the 4-ply together. Either option will give you a thicker, quicker fabric with the same row structure.
How do I know when my rectangle is long enough?
Wrap the unfinished piece around your head before seaming and compare it to your desired circumference. The pattern recommends aiming for roughly 44 cm in width and 25 cm in height as a general guide.
Why does one side use FLO and the other BLO?
Working the slip stitch section in front loop only on one return row and back loop only on the main stitches creates the alternating texture that gives this beanie its distinctive edge. It also keeps the working loops available for the following row.
Do I need a stitch marker for this pattern?
The materials list it as optional, but I find it useful for tracking your place on the back loop only rows. It is a small habit that saves you from unpicking rows later.
What is the best way to sew the side seam?
The pattern suggests either whip stitch or mattress stitch, and both work fine here. Mattress stitch tends to give a nearly invisible seam if you want a cleaner finish.
Original pattern: https://crocheteverything.com/crochet-beanie-pattern-for-a-slouchy-everyday-look/
About the Author

Marisol QuinteroWho runs Crochet Obsessed, why a stitch count sits at the end of every round, how a pattern gets written here, and the things this site will never do.
More Patterns
- IntermediateNo. 01

Crochet amigurumi doll with dress, shoes, and hat
Crochet amigurumi doll pattern with dress, shoes, and hat details for a soft, huggable keepsake you build one…
- IntermediateNo. 02
Chunky moss stitch crochet sweater with raglan-free shoulders
Chunky crochet sweater pattern using moss stitch, worked flat with a 10mm hook for a soft, fast, cool-weather…
- BeginnerNo. 03
A five-pointed amigurumi star keychain for beginners
Amigurumi star keychain pattern using magic circle rounds, simple single crochet increases, and a quick beginner-friendly finish for…