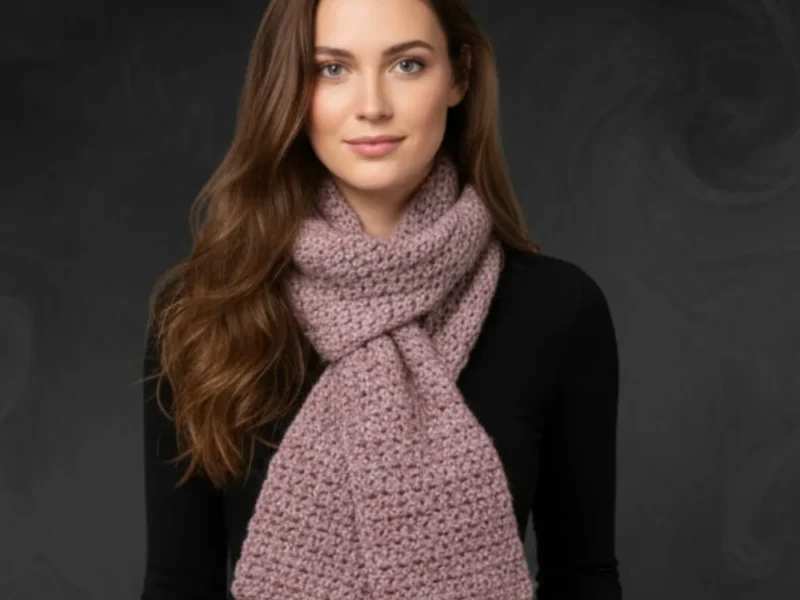
- LevelBeginner
- Time4-6 Hours
- Hook2 mm
- YarnSport/Fine
About This Pattern
This scarf solves a problem every crocheter knows: how do you keep a scarf closed without fumbling with pins or losing a button? The answer here is a genuinely clever split-and-rejoin construction that creates a natural buttonhole using nothing but your existing stitches. It's perfect for anyone who wants a functional, wearable accessory that still feels special, and it's an especially satisfying make for gift-giving since the buttonhole detail feels like a designer touch.
The whole scarf is built on the extended half double crochet stitch, a lovely dense-but-drapey stitch that's slightly taller and more textured than a standard hdc. Once you've got that stitch down, the rest of the pattern is pure meditative repetition, making this an ideal project for beginners who want to build confidence, or for experienced crocheters who want mindless TV-watching stitching. Expect to spend a handful of relaxed evenings, roughly 4 to 6 hours total, to reach the finished length.
When it's off the hook, you'll have a long, elegant rectangle measuring about 95 cm (37.5") long by 18 cm (7") wide, fully reversible so there's no 'wrong side' to worry about. The fabric has a soft, structured drape thanks to the angora-blend yarn, and the built-in buttonhole closure gives it a polished, tailored look that elevates it well beyond a basic scarf. It's a wonderful handmade gift for a friend, parent, or partner who appreciates thoughtful, functional design.
- Chain an odd number of stitches to set your desired scarf width as the foundation row.
- Work the first row of extended half double crochet stitches across the entire chain to establish your stitch pattern.
- Repeat the ex-hdc and chain-1 space pattern row after row until the scarf reaches your desired length before the buttonhole.
- Divide your stitches roughly in half and place a marker to separate the scarf into two working sections.
- Work each half separately for a matching number of even rows to open up the built-in buttonhole gap.
- Try the scarf on to check that the buttonhole width and overall fit feel comfortable before continuing.
- Rejoin both halves and continue the same repeating stitch pattern until you reach your final desired length.
- Fasten off and weave in your ends, leaving a soft, fully reversible scarf ready to wear or gift.
Materials
Yarn
- 85g soft synthetic angora yarn, approx. 2 mm thick
Hook
- US Size H/8 (5 mm) crochet hook
Notions
- Scissors, tapestry needle, stitch markers, measuring tape
Crochet Abbreviations
- ch
- chain
- st
- stitch
- hdc
- half double crochet
- ex-hdc
- extended half double crochet (see Special Stitches)
- rep
- repeat
Simple Crochet Scarf with Built-In Buttonhole Pattern
1. Foundation Chain
Ch 33 (or any odd number for your desired width; 33 ch yields approx. 18 cm / 7” after working a few rows).
2. Row 1
Ch 1 (does not count as a st),
Ex-hdc in 2nd ch from hook (working in the back bump of the foundation chain is recommended for neat edges) , Ch 1 , skip next ch, ex-hdc in next ch, ch 1 ; rep from * to last ch,
Ex-hdc in last ch.
(You should have 17 ex-hdc and 16 ch spaces.)
3. Pattern Row
- Pattern Row
Ch 1, turn. Ex-hdc in next ex-hdc, ch 1; skip next ch-1 space; rep from * to last st, Ex-hdc in last ex-hdc. Repeat this row until the scarf measures 70-73 cm (27.5-28.5”) from the starting edge—about 73 rows, or your desired length before the buttonhole.
Tip Always ensure you have an odd number of ex-hdc at the end of each row. Count regularly, especially in the first few rows.
4. Buttonhole Opening
Step by step Divide your stitches: Subtract 1 from your current ex-hdc count (should be 17 ex-hdc after Row 73; 17-1=16). Place a marker after the 8th ex-hdc. You will now work first on only half of the scarf width.
Left Side of Buttonhole
- Round 1
Ch 1, turn. Work across first 8 ex-hdc (with ch-1 between each as in body).
- Round 2-4
Ch 1, turn. Continue over just these 8 ex-hdc, always separated by a ch-1. Fasten off and leave a long tail to weave in.
Right Side of Buttonhole
Join yarn to the 9th ex-hdc from the end or where your marker is.
- Round 1
Ch 1, ex-hdc in same st, continue in pattern across next 7 ex-hdc (8 ex-hdc in total, as before).
- Round 2-4
Ch 1, turn. Continue over just these 8 ex-hdc, always separated by a ch-1. Do not fasten off.
Tip You now have two sets of 4 rows over 8 ex-hdc each, separated by an opening/buttonhole. Always work an even number of buttonhole rows to allow the next joined row to sit flat.
5. Rejoining and Continuing the Scarf
- Next Row
Ch 1, turn, work ex-hdc in each ex-hdc with ch-1 between up to the opening, then Ch 3, skip the buttonhole gap, continue in pattern across the ex-hdc on the other side. Continue as established until you reach the end (about 17 more rows or to match the pre-buttonhole section). Fasten off.
More photos
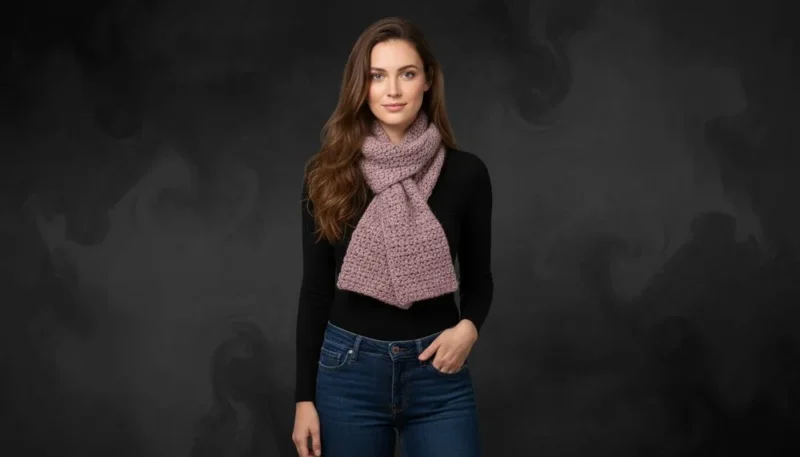
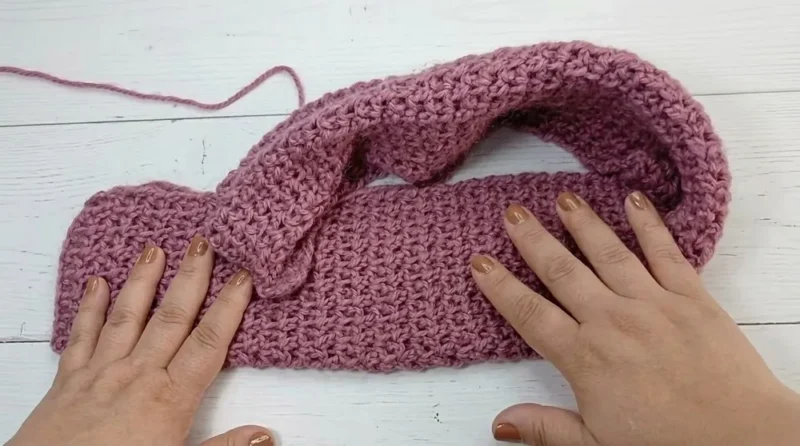
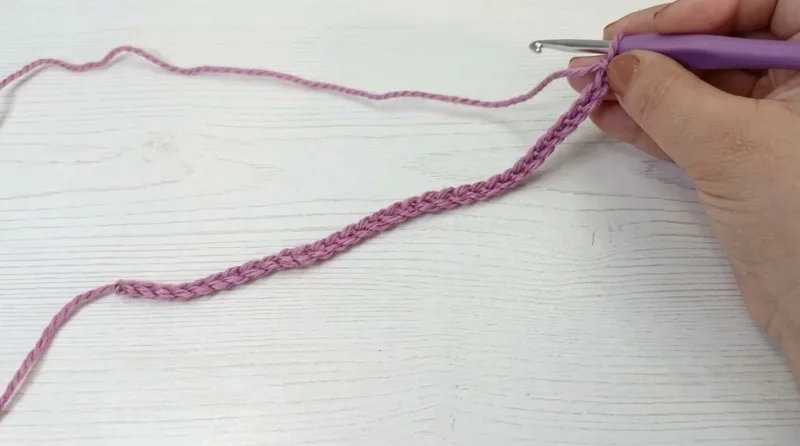
Assembly Instructions
- Step 1 Use a tapestry needle to weave in all ends neatly.
- Step 2 Gently block for best appearance, if desired.
Important Notes
- Extended Half Double Crochet (ex-hdc): Yarn over, insert hook into designated st, yarn over and pull up a loop (3 loops on hook). Yarn over and pull through the first loop only (creates a chain). Yarn over and pull through all three loops on hook to complete the stitch.
- 💡 Use a US H/8 (5mm) hook with a lighter, finer yarn like the 2mm angora blend called for here — this combination is what gives the scarf its soft drape without being too dense or stiff.
- 💡 Place a locking stitch marker right after the 8th ex-hdc before you divide the work; this small step prevents miscounting when you split the scarf for the buttonhole section.
- 💡 Keep a simple tally or row counter going while working the buttonhole sides since it's easy to lose track when you're working two matching halves separately.
- 💡 Because the scarf is fully reversible, you don't need to worry about marking a 'right side' — just make sure your tension stays consistent throughout so both faces look equally neat.
- 💡 Always try the scarf on before finishing the final section; this pattern is designed to be customized to your body, and skipping this step is the most common reason scarves end up the wrong length.
- 💡 If you want a wider or narrower scarf, adjust your foundation chain in increments of 2 to keep it an odd number, which keeps the ex-hdc and chain-1 space pattern working correctly.
- 💡 The buttonhole is cleverly created with no need to cut or rejoin unnecessary amounts of yarn on the right side, keeping the construction efficient and mostly seamless.
Common Mistakes and Fixes
- Getting the extended half double
Slow down on your first few stitches and count your loops: yarn over, insert, pull up a loop (3 loops), yarn over and pull through just the first loop, then yarn over and pull through all three remaining loops. Practice a swatch of 10 stitches before starting the scarf if the rhythm feels unfamiliar.
- Miscounting stitches when dividing
Before placing your marker, lay the row flat and physically count each ex-hdc from the edge, subtracting 1 from your total ex-hdc count and placing the marker after the 8th stitch as directed. Double-check your count twice since an off-by-one error here shifts the whole buttonhole.
- Working an odd number of rows
Track your buttonhole rows with a row counter or tally marks, and always work in pairs of rows (2, 4, 6) so both sides match up perfectly when you rejoin them.
- Skipping the fitting check before
Try the scarf on exactly as instructed before finishing the last portion. Wrap it around your neck the way you'd normally wear it and adjust your remaining rows before binding off, rather than guessing at the length.
- Losing track of the chain-1 spaces in
Remember the row logic: ex-hdc in the next ex-hdc, chain 1, skip the next chain-1 space, repeat across, ending with an ex-hdc in the last stitch. Place a stitch marker at the start of each row until the rhythm feels automatic.
- Starting with an even number
Always chain an odd number for your foundation row so the ex-hdc and chain-1 space pattern lines up evenly on both edges. If you want to adjust width, add or subtract chains in multiples of 2 to preserve the odd count.
Variations
- This scarf is incredibly easy to customize once you understand the basic construction. For width, just remember the starting chain must stay an odd number, so you can add or subtract 2 chains at a time to make it narrower for a skinny scarf or wider for an oversized wrap-style piece. For the buttonhole itself, the pattern already tells you to keep your row count even, so try adding 2 extra rows on each side for a looser buttonhole that accommodates a chunkier button or toggle, or reduce by 2 rows for a snugger closure. Yarn-wise, the original uses a soft synthetic angora around 2mm thick with an H/8 (5mm) hook, but this pattern adapts beautifully to other weights. Try a worsted-weight yarn like Vanna's Choice or Soft with a matching size H or I hook for a chunkier, cozier scarf, or size down to a fingering-weight mohair blend like Drops Kid-Silk with a smaller hook for a delicate, lacy drape. Color-wise, a single rich jewel tone like emerald or burgundy gives it an elegant, boutique feel, while a soft ombre or self-striping yarn (Caron Cakes is a great option) lets the buttonhole detail contrast beautifully against a gradient background. For a themed twist, work it in cream and rust for an autumn palette, or icy blue and white for a winter-ready accessory. You could also add a small crocheted button loop tab in a contrasting color at the buttonhole edge for a pop of detail, or weave a coordinating ribbon through a few stitch rows near the buttonhole for a decorative finish. Because the pattern is just one repeating row, it's endlessly forgiving when you want to experiment with stripes, color blocking, or even a variegated novelty yarn for extra texture.
- I love this scarf because it's proof that a simple stitch pattern can still feel clever and special. The extended half double crochet gives the fabric a slightly raised, textured look that's more interesting than a plain hdc scarf, but it's still totally approachable if you're newer to crochet. The real magic, though, is the buttonhole construction. Splitting your stitches in half, working each side separately for a few rows, and then rejoining them creates a functional closure without ever cutting your yarn or sewing on a button afterward. There's something so satisfying about watching that gap form exactly where you want it. I also appreciate that the pattern builds in a fitting check, trying the scarf on before finishing the last section, so you're never guessing at the final length or buttonhole placement. And because it's fully reversible, you don't have to stress about which side faces out when you're wrapping it around your neck in a hurry. It's a small, smart project that feels far more special than the simple stitch count would suggest.
Frequently Asked Questions
Can I make this scarf wider or narrower than the original pattern?
Yes, just adjust your foundation chain length as long as you keep it an odd number. Add or subtract chains in multiples of 2 to maintain the stitch pattern's symmetry across the width.
Do I need an actual button for this scarf to close?
No, the buttonhole is built directly into the fabric and simply loops one end of the scarf through the gap created when you split and rejoin the stitches. It's a clever no-notions closure, though you could still sew on a decorative button if you like the look.
What yarn weight works best if I don't have the angora blend used in the pattern?
A sport or light worsted weight yarn works well as a substitute, paired with a hook size that matches your yarn's recommended range, generally somewhere around a 5mm to 5.5mm hook. Just be sure to swatch first so your extended hdc stitches have the same soft, drapey feel.
How do I know if my buttonhole gap is the right size?
The pattern lets you control the buttonhole width by working more or fewer rows on each side, as long as the number stays even. Try the scarf on before finishing to check the gap comfortably fits through the opposite end.
Is the extended half double crochet stitch hard to learn?
It's very approachable even for newer crocheters since it only adds one extra yarn-over-and-pull-through step compared to a regular hdc. Working a small practice swatch of about ten stitches before starting the scarf will help the rhythm feel natural quickly.
Original pattern: https://redagapeblog.com/simple-free-crochet-scarf-with-buttonhole-pattern/
About the Author

Marisol QuinteroWho runs Crochet Obsessed, why a stitch count sits at the end of every round, how a pattern gets written here, and the things this site will never do.
More Patterns
- IntermediateNo. 01

Slouchy everyday beanie worked flat in half double crochet
Crochet beanie pattern for a slouchy everyday look worked flat with hdc rows, then seamed into a soft,…
- IntermediateNo. 02
Crochet amigurumi doll with dress, shoes, and hat
Crochet amigurumi doll pattern with dress, shoes, and hat details for a soft, huggable keepsake you build one…
- IntermediateNo. 03
Chunky moss stitch crochet sweater with raglan-free shoulders
Chunky crochet sweater pattern using moss stitch, worked flat with a 10mm hook for a soft, fast, cool-weather…


