- LevelIntermediate
- Time4-6 hours
- Hook4 mm
- YarnWorsted
About This Pattern
This doll has that quiet, satisfying energy of a project built in small, countable pieces. Arms, legs, a joined body, a head — each part finishes fast enough that you keep going just to see the next one take shape. There is no fuss here, just a steady, cheerful build.
Your hands will spend most of their time with a 4 mm hook and single crochets, with the occasional increase or decrease keeping the shape honest. You will work in the back loop only for one round on the legs, which is a nice small skill to practice. Stuffing happens gradually, a pinch at a time, as the body grows upward.
Once finished, this doll sits well on a shelf or in a reading nook, sturdy enough to hold its own shape. The firm, thick yarn keeps the limbs from flopping, so it stands up to being picked up and set down again. It reads as a handmade companion rather than a precious display piece.
- Start with the arms, working two short magic-circle tubes that get stuffed lightly before finishing off.
- Move to the legs, shaping each foot with increases, a back-loop-only round, and a decrease round.
- Stuff each foot as you close it, then continue upward before setting the legs aside.
- Join both legs in one continuous round so the feet line up and the body becomes a single piece.
- Work several plain rounds for the torso, adding stuffing bit by bit as the body grows.
- Attach the stuffed arms to the sides of the torso around the middle of the body.
- Finish with the head, using the leftover tails from each part to sew everything together.
On the desk
- 4 mm crochet hook
- Stitch marker
- Tapestry needle
- Scissors
- 10mm safety eyes (optional hot glue for security)
- Polyfill for stuffing
Yarn
- Caron One Pound or any stiff, thick four-ply yarn
Stitch shorthand
- sc — single crochet
- hdc — half double crochet
- inc — increase
- dec — decrease
- blo — back loops only
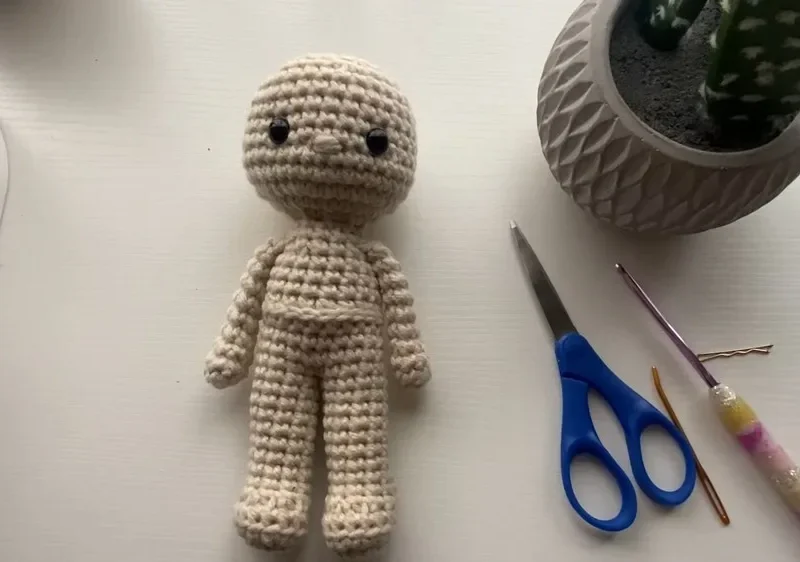
Simple amigurumi doll pattern with shaped legs and head
Arms (Make 2)
- Round 1(6)
6 sc into a magic circle. (6 stitches)
- Round 2(9)
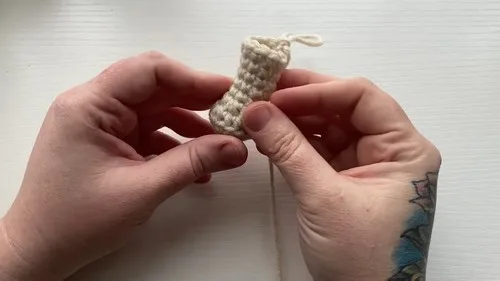
1 sc, inc repeat around. (9 stitches) For Round 3-10: 1 sc in each stitch around. Stuff lightly if needed. (9 stitches)Finish off, leaving a tail for sewing. Attach the arms to the sides of the body at about mid-way of the torso.
Legs (Make 2)
In Round 1: 5 single crochets (sc) into a magic circle. (5 stitches)
- Round 2(10)
2 sc in each stitch around. (10 stitches)
- Round 3(15)
1 sc, 1 increase (inc) repeat around. (15 stitches) In Round 4: 1 sc in the back loop only (BLO) of each stitch around. (15 stitches)
- Round 5(10)
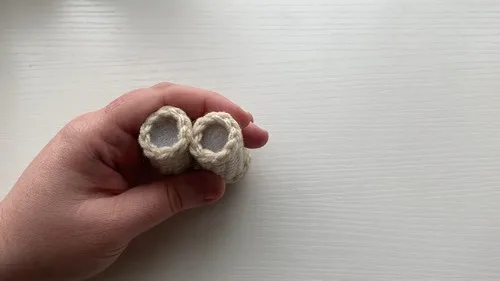
Decrease Round 1 sc in the next 3 stitches, then 5 single crochet decreases (dec), 1 sc in the last 2 stitches. (10 stitches)Close the foot, and start stuffing the foot portion.
- Rounds 6–14(15)
1 sc in each stitch around. Begin stuffing at round 10, continue till round 14. (15 stitches)
Join Legs
Join the legs by crocheting across both, starting from where the yarn is attached, ensuring the feet are aligned correctly. You'll have 30 stitches.
- Rounds 15–17(30)
1 sc in each stitch around. (30 stitches) For Round 18: Half-double crochet (hdc) in each stitch around. (30 stitches)
- Round 19(28)
Decrease Round for Waist Shaping In the third loop of hdc, 1 sc in the next 8 stitches, dec, twice. (28 stitches)Continue to add stuffing to the body proportionally as you work upwards.
Head
- Rounds 20–22(30)
1 sc in each stitch around. Keep stuffing the body. (30 stitches)
- Round 23(25)
4 sc, dec repeat around. (25 stitches) For Round 24-25: 1 sc in each stitch around. (25 stitches)
- Round 26(50)
Increase for Head 2 sc in each stitch around. (50 stitches)
- Rounds 27–30
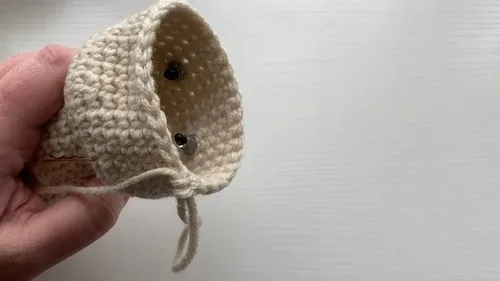
1 sc in each stitch around. (50 stitches) Begin to shape the head and continue to add stuffing.
More shots
Where it goes
- A shelf companion for a kids' room, paired with a small knit blanket or a tiny crocheted chair.
- A handmade gift for a baby shower, worked up small and soft enough to hand off right away.
- A desk or reading-nook mascot that sits upright next to a stack of books.
- A teaching project for a crochet beginner ready to practice shaping, worked alongside a simple scarf pattern.
Care
Hand wash the finished doll in cool water with a gentle detergent, since Caron One Pound is an acrylic yarn that does not need harsh treatment.
Lay it flat to dry rather than hanging it, so the stuffed limbs keep their shape instead of stretching under their own weight.
Reshape the arms and legs gently by hand while damp, and store the doll upright or on its back to avoid flattening the stuffed head.
Easy to get wrong
Skipping the back loop only round
Working the BLO round in both loops by accident flattens the ankle ridge on the legs. Slow down on that single round and check you are only catching the back loop before continuing.
Uneven stuffing before joining legs
If one foot is stuffed firmer than the other, the joined body will sit crooked. Stuff both feet to the same firmness before you start the joining round.
Between the songs
- What I love about this doll is how the shaping does real work in just a few rounds. The legs go from a 5-stitch magic circle to a decrease round that closes the foot, and that back-loop-only round gives the ankle a visible, deliberate ridge. Joining both legs into one body is the moment the doll stops being parts and becomes a shape you recognize. The waist shaping round, with its double decreases worked into the third loop of the hdc round, is a small technical flex that pays off in a figure that actually narrows. Using a stiff, thick yarn like Caron One Pound means every stitch holds its definition, so the increases and decreases read clearly instead of blurring together.
Listener questions
Can I use a different yarn than Caron One Pound?
Yes, as long as you pick a stiff, thick four-ply yarn so the stitches hold their shape through the increases and decreases. A softer yarn will make the limbs feel floppy instead of sturdy.
Do I need safety eyes, or can I embroider the face?
The pattern lists 10mm safety eyes as optional, so embroidered eyes work just as well if you prefer not to use hardware. Either way, plan the placement before you finish stuffing the head.
Why does the leg pattern mention a back loop only round?
That single BLO round creates a visible ridge that defines the ankle before the decrease round closes the foot. It is a small detail but it keeps the foot from looking like a plain rounded ball.
How much should I stuff the body as I work the joined-leg rounds?
Add stuffing gradually as you work upward through the torso rounds rather than waiting until the end. This keeps the shape even and makes it easier to reach into the narrower waist later.
When do I attach the arms during assembly?
The arms get sewn to the sides of the torso at about the mid-way point of the body, using the tail left from finishing off each arm. It helps to attach both at the same height so the doll sits level.
Original pattern: https://crocheteverything.com/crochet-red-queen-doll-amigurumi-pattern-step-by-step/
About the Author

Marisol QuinteroWho runs Crochet Obsessed, why a stitch count sits at the end of every round, how a pattern gets written here, and the things this site will never do.
More Patterns
- IntermediateNo. 01

Rose Granny Square Tote Crochet Pattern
Rose granny square tote crochet pattern made from 18 dimensional rose squares for a sturdy, romantic everyday bag.
- IntermediateNo. 02
Tropical octopus baby blanket crochet pattern with appliqués
Tropical octopus baby blanket crochet pattern: a cream filet base with coral and turquoise octopus appliqués, leaves, and…
- IntermediateNo. 03
Sunny lemon couple amigurumi crochet pattern
Sunny lemon couple amigurumi crochet pattern with embroidered slices and safety eyes for a cheerful handmade shelf pair.


