- LevelIntermediate
- Time4-6 hours
- Hook12 mm
- YarnBulky
About This Pattern
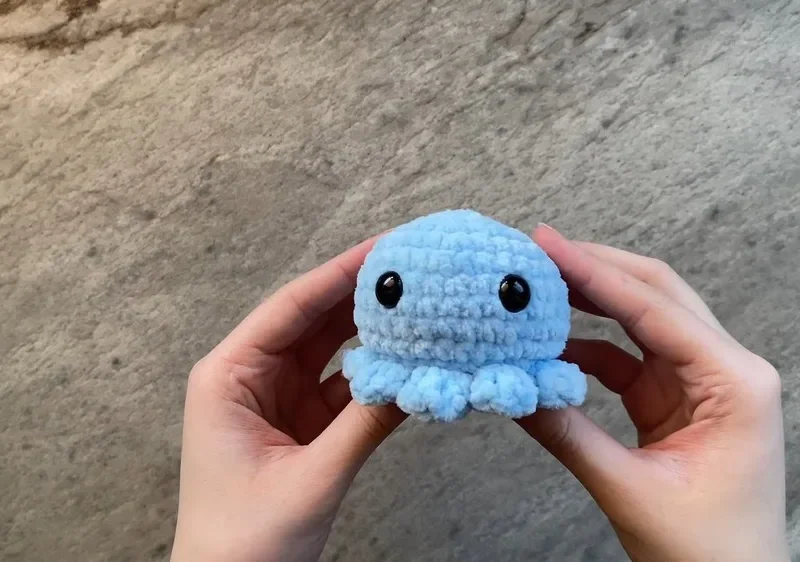
There is something cheerful about a toy with too many limbs and not a single straight edge. This octopus leans into that silliness on purpose. It is round where you expect round and curly where you least expect curly, and that mismatch is the whole charm of the piece.
Your hands stay busy but never confused. Most of the work is steady single crochet increases building a dome, then a quick, satisfying burst of double crochet clusters around the base. It is the kind of project where the second half moves so much faster than the first that you forget you are almost done.
Set it on a shelf, a windowsill, or a kid's bed and it holds its own without needing a big pile of friends around it. The bulky yarn keeps the head substantial rather than floppy. It reads as a toy first and a decoration second, which is exactly right for something with a face.
- Start the head with a magic ring and build it upward through steady single crochet increases.
- Keep a stitch marker moving each round so you never lose track of where you started.
- Pause partway through the head to seat the safety eyes before the opening gets too small.
- Stuff the head firmly with polyfill before the final rounds close it up.
- Flip the piece over and work into the front loops left free at the base.
- Build each tentacle from a cluster of double crochets, skipping a stitch, then slip stitching along.
- Repeat the tentacle sequence around the base until the ring of legs is complete.
- Fasten off, sew the closing seam, and weave in every loose end.
On the desk
- Crochet hook
- Scissors
- Sewing or darning needle
- Stitch marker (a bobby pin can be used)
- Polyfill stuffing
- Bulky yarn
- 12 mm safety eyes
Stitch shorthand
- sc — single crochet
- inc — increase
- dec — decrease
- MR — Magic Ring
- st — stitch
- sl st — slip stitch
- dc — double crochet
- FO — Fastening Off
- FLO — Front Loop Only
- BLO — Back Loop Only
Round and curly octopus amigurumi to crochet
Head
- Round 1
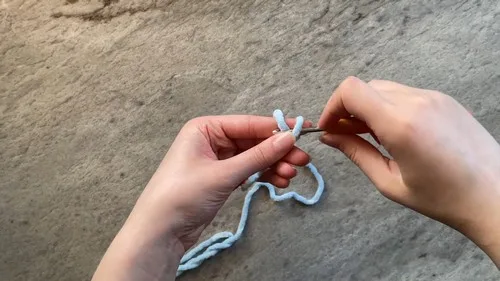
Create a magic ring and work 6 sc into it. (6 sc)
- Round 2
2 sc in each stitch around. (12 sc)
- Round 3
[1 sc, inc] x6. (18 sc)
- Round 4
[2 sc, inc] x6. (24 sc)
- Round 5
[3 sc, inc] x6. (30 sc)
- Rounds 6–10(30)
Sc in each stitch around for 5 rows. (30 sc per row)
- Round 11
[3 sc, dec] x6. (24 sc)Insert safety eyes between rows 7 and 8, six stitches apart.
- Round 12
Working in BLO, perform 12 decreases around. (12 sc)Fill the octopus to desired firmness before closing.
- Round 13
Perform 6 decreases around. (6 sc)
Tentacles
- Round 1
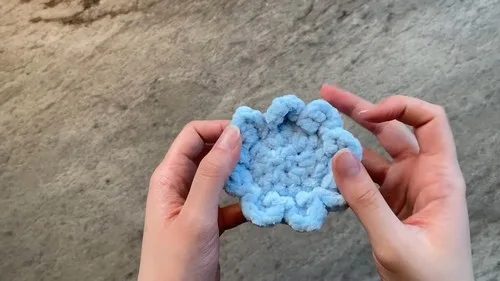
Holding your octopus upside-down, insert your crochet hook into one of the front loops, attach your yarn and in the same stitch, work 5 dc. Skip a stitch, then slip stitch into the next. Each tentacle occupies three stitches. Continue creating tentacles around the octopus.
More shots
Where it goes
- A soft companion for a kid's bed, sized to sit against a pillow without sliding off.
- A desk or shelf toy that adds personality to a home office without taking up much room.
- A handmade gift for a new baby's nursery, paired with a simple knit blanket in a matching color.
- A car or backpack toy, since the compact head and curling tentacles hold up to being carried around.
Color ideas
- Two-tone dive Crochet the head in a deep teal, then change to a bright purple or pink just for the tentacle round so the legs pop against the body.
Care
Hand wash the finished octopus in cool water with a mild detergent, since bulky yarn can felt or shrink under heat and agitation.
Reshape the head and tentacles gently while damp, easing the double crochet clusters back into their curl, then lay flat to dry.
Store it stuffed and upright on a shelf rather than squashed in a bin, so the polyfill keeps its shape between uses.
Assembly
- Step 1 Finish the head: slip stitch into the next stitch, cut a tail, and sew the opening closed.
- Step 2 Weave in all ends to finish.
Easy to get wrong
Losing the round marker
Move your stitch marker up into the first stitch of every new round the moment you start it, not at the end. Bulky yarn grows fast, so a missed marker is easy to lose track of within a round or two.
Seating the eyes too early
Hold off placing the safety eyes until you reach the round the pattern specifies, spacing them six stitches apart. Placing them earlier on a smaller dome throws off the spacing and the finished gaze.
Skipping the front-loop-only step
Work the tentacle round strictly into the front loops left open at the base of the head, not through both loops. Missing this leaves no back-loop ridge and the tentacles sit flat instead of curling forward.
Between the songs
- The satisfaction here is in the contrast between the two parts. The head is a patient, meditative build: six rounds of plain increases that turn a magic ring into a solid, stuffable dome, with safety eyes seated precisely between two rounds for a fixed, forward gaze. Then the tentacles flip the mood entirely. Working into front loops only around the base, each one is just five double crochets fanned into a single stitch, skip a stitch, slip stitch, repeat, and a whole ring of curling legs appears in one round. It is a lesson in how differently two techniques can feel even in the same yarn weight. You finish with a toy that has real personality, not just a stitch count.
Listener questions
Can I use a different yarn weight than bulky?
You can, but the head will come out smaller and the tentacles less substantial with anything thinner. Bulky yarn is what gives this particular octopus its plump, huggable proportions.
Why does only the head have rounds while the tentacles are just one round?
The head is built up gradually with increases to form a dome, which takes multiple rounds. The tentacles are worked as repeated clusters within a single round around the base, which is what makes that part so quick.
What if I do not have safety eyes on hand?
You can substitute embroidered eyes or buttons sewn on securely instead. Just place them between the same rounds and spacing noted in the pattern so the face stays balanced.
How firm should the stuffing be?
Fill the head until it feels solid and holds its round shape without any soft dents. The pattern calls for filling to desired firmness before closing, so go by feel rather than a fixed amount.
Why work the tentacles into the front loop only?
Working into the front loop leaves the back loop free, which is what makes the tentacle round possible in the first place. It also gives the tentacles a slight ridge where they meet the head, helping them curl outward instead of lying flat.
Original pattern: https://crocheteverything.com/15-minutes-crochet-octopus-amigurumi-pattern-step-by-step/
About the Author

Marisol QuinteroWho runs Crochet Obsessed, why a stitch count sits at the end of every round, how a pattern gets written here, and the things this site will never do.
More Patterns
- IntermediateNo. 01

Rose Granny Square Tote Crochet Pattern
Rose granny square tote crochet pattern made from 18 dimensional rose squares for a sturdy, romantic everyday bag.
- IntermediateNo. 02
Tropical octopus baby blanket crochet pattern with appliqués
Tropical octopus baby blanket crochet pattern: a cream filet base with coral and turquoise octopus appliqués, leaves, and…
- IntermediateNo. 03
Sunny lemon couple amigurumi crochet pattern
Sunny lemon couple amigurumi crochet pattern with embroidered slices and safety eyes for a cheerful handmade shelf pair.


