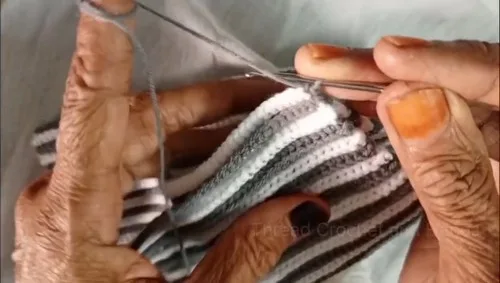
- LevelIntermediate
- Time4-6 hours
- Hook4.0 mm
- YarnDK/Light Worsted
About This Pattern
This one has that cozy, tucked-in feeling I love in a baby make. It starts from a single magic ring and spirals outward, round by round, until you've got a soft little dome sitting in your lap. There's something quietly satisfying about watching a hat appear from almost nothing.
Your hands stay busy but never stressed here. You're counting stitches between increases, keeping the ring snug at the start, and settling into the rhythm of the jointless spiral once the crown rounds are behind you. It's the kind of project where your fingers learn the pattern faster than your brain does.
Picture this beanie on a shelf next to burp cloths and tiny socks, waiting for someone new. It's small enough to finish in a sitting or two, but it reads as a real, considered gift. Set on a nursery dresser or tucked into a gift bag, it looks like more effort than it actually took.
- Start with a magic ring to form a tight, adjustable center for the crown.
- Work the first round of double crochet into the ring to lay the foundation circle.
- Double your stitch count in the next round so the crown begins to widen evenly.
- Space out increases across the following rounds, moving them farther apart as the circle grows.
- Continue the increase pattern until the crown rounds are complete and the shape sits flat.
- Keep working even rounds until the hat reaches the length you want from crown to edge.
- Finish with single crochet rounds around the brim, then cut the yarn and weave in ends.
On the desk
Yarn
- Baby-friendly DK or light worsted weight yarn
Hook
- 4.0 mm or size recommended for yarn
Tools
- Scissors and yarn needle
Stitch shorthand
- CH — Chain
- SL ST — Slip Stitch
- SC — Single Crochet
- DC — Double Crochet
- ST — Stitch
- REP — Repeat
Quick spiral crochet baby beanie hat pattern
The Crown
Make a Magic Ring
- Round 1
CH 2, work 10–12 DC into the ring
- Round 2
2 DC in every ST around (20–24 ST)
- Round 3
1 DC in next ST, 2 DC in next ST, REP around
- Round 4
1 DC in next 2 ST, 2 DC in next ST, REP around
- Round 5+
Continue increasing by adding one extra DC between increases each round until circle reaches 4.5–5 inches in diameter
The Body
- Body
Work 1 DC in every ST around without increasing. REP until the hat measures the desired length from crown to edge
More shots
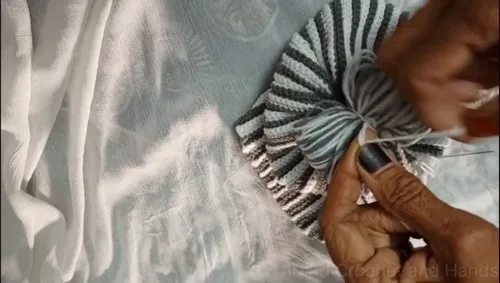
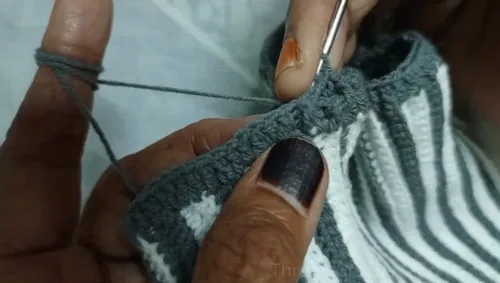
Where it goes
- A soft first hat for a newborn coming home from the hospital, paired with a matching knit blanket.
- A handmade baby shower gift, wrapped alongside a onesie in a coordinating color.
- A quick-turnaround donation piece for hospital or shelter newborn drives.
- A photo-session prop for a baby's first portraits, paired with a simple neutral outfit.
Color ideas
- Customizable This design can be customized with different yarn colors and embellishments, making it a versatile piece for everyday wear or as a thoughtful handmade gift.
Care
Hand wash the finished beanie in cool water with a gentle detergent, since baby-friendly DK yarn often blends delicate fibers that don't love agitation.
Lay it flat on a towel to dry and gently reshape the crown and brim while damp so the spiral sits evenly.
Store it flat or loosely folded in a drawer rather than hung, to keep the brim from stretching out of shape.
Assembly
- Step 1 Work 1–2 rounds of SC in every ST around for a neat brim
- Step 2 Cut yarn and weave in ends securely
Easy to get wrong
Loose magic ring center
Pull the tail firmly before working the first round so the center closes tight with no visible gap. Check it again after your first few stitches, since it can loosen as you work.
Losing track of increase placement
Place a stitch marker at the start of each round so you can see exactly where the increase pattern shifts. This keeps the crown lying flat instead of cupping or rippling.
Skipping the jointless join check
Since there's no slip stitch closing each round, it's easy to drift off your round marker. Recount stitches every few rounds to confirm you haven't added or dropped any along the spiral.
Between the songs
- The satisfaction here is in the crown shaping. You start with a magic ring, work an even round of double crochet into it, then double the stitch count and space out increases across the following rounds so the circle lies flat without puckering. Because the whole hat works in a jointless spiral, there's no round-end seam interrupting the fabric, so the surface stays smooth all the way to the brim. Finishing with single crochet rounds firms up that edge and gives it a cleaner, more structured line than the taller double crochet body. It's a compact project that still teaches real increase math, and you get to see the payoff fast.
Listener questions
What size hook do I need for this beanie?
The pattern calls for a 4.0 mm hook, or whatever size is recommended for your chosen yarn. Always check your gauge against the intended head size before committing to a full crown.
Why is there no visible seam on this hat?
The crown and body are worked using a jointless spiral method, so rounds flow into each other without a slip-stitch join. That's what gives the finished hat its smooth, professional look.
What does the brim add besides a finished edge?
The single crochet rounds at the brim create a denser, more structured band compared to the taller double crochet body. It helps the hat hold its shape around a baby's head.
Original pattern: https://crocheteverything.com/easy-crochet-baby-beanie-hat-pattern-made-in-few-minutes/
About the Author

Marisol QuinteroWho runs Crochet Obsessed, why a stitch count sits at the end of every round, how a pattern gets written here, and the things this site will never do.
More Patterns
- IntermediateNo. 01

Slouchy everyday beanie worked flat in half double crochet
Crochet beanie pattern for a slouchy everyday look worked flat with hdc rows, then seamed into a soft,…
- IntermediateNo. 02
Crochet amigurumi doll with dress, shoes, and hat
Crochet amigurumi doll pattern with dress, shoes, and hat details for a soft, huggable keepsake you build one…
- IntermediateNo. 03
Chunky moss stitch crochet sweater with raglan-free shoulders
Chunky crochet sweater pattern using moss stitch, worked flat with a 10mm hook for a soft, fast, cool-weather…


