- LevelIntermediate
- Time4-6 hours
- Hook4.0 mm
- YarnWorsted
About This Pattern
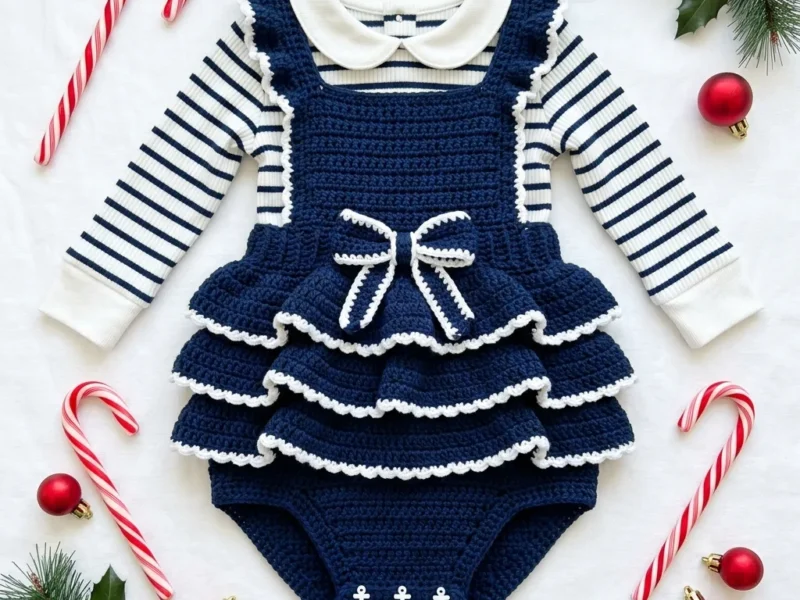
There's something about navy and white together that just says clean, crisp, put-together. This romper leans into that feeling from the first stitch. It's the kind of piece that makes you want to hum while you work, because the color story alone does half the styling.
Your hands get a nice mix here, so nothing drags. You'll settle into the ribbed texture across the bodice, shift gears for the ruffle tiers, then finish up with a little bow that feels like dessert after dinner. Shaping the straps asks for a bit of attention, but nothing that will trip up an intermediate maker.
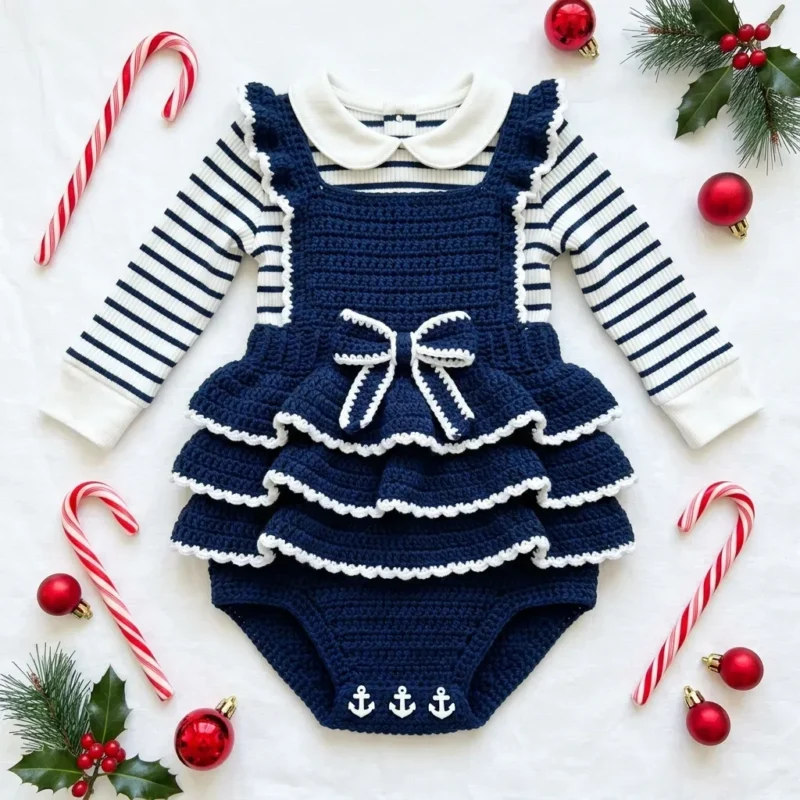
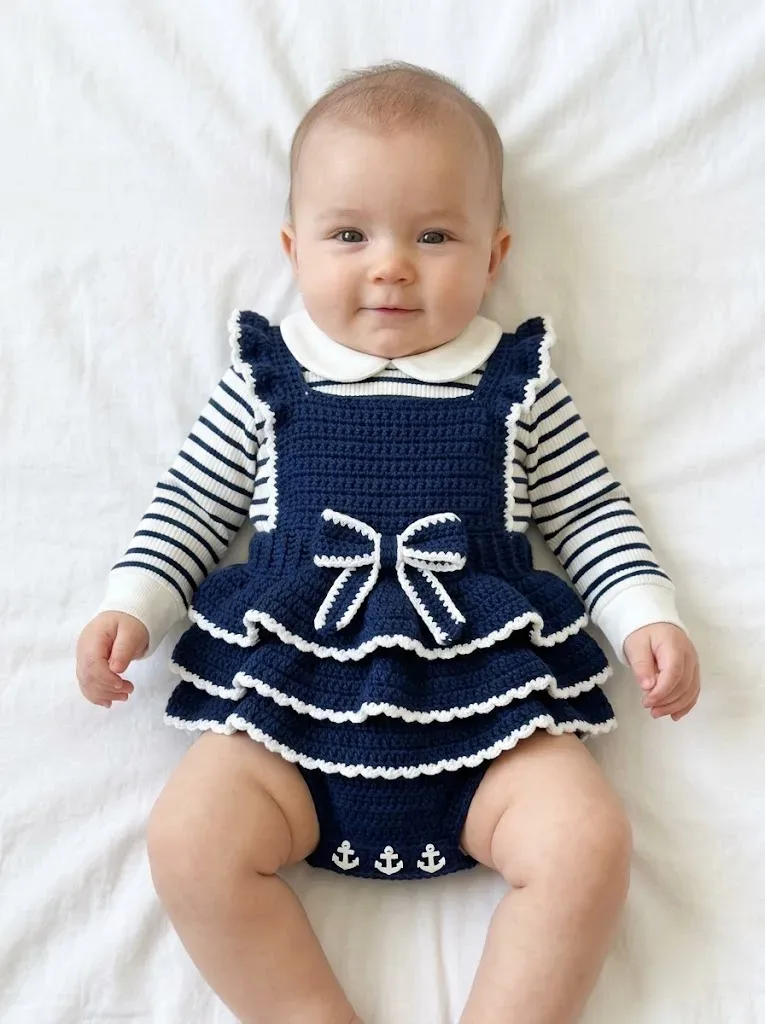
Picture this folded on a shelf, navy and white catching the light, anchor buttons winking from the front. It reads finished the second you set it down. This is the piece guests pick up first and ask who made it.
- Start the front bodice by working straight rows in back loop only to build that ribbed chest texture.
- Work the back panel the same way, then split the stitches to shape two separate straps.
- Seam the front and back panels together at the sides, leaving the armholes open above.
- Join navy yarn around the bottom edge and build the ruffle skirt tier by tier in double crochet.
- Cap off each ruffle tier with a round of white single crochet for that crisp trim look.
- Decide whether to sew the straps shut or add buttons and buttonholes for easy dressing.
- Finish with the decorative bow and anchor buttons, then weave in every loose end.
On the desk
Yarn
- Navy blue worsted weight yarn, approximately 200 yards (I recommend a soft acrylic or cotton blend for easy washing)
- White worsted weight yarn, approximately 50 yards for trim and bow details
Hook
- 4.0mm (G/6) crochet hook
- 3.5mm (E/4) crochet hook for trim work
Notions
- Yarn needle for weaving ends
- Stitch markers (at least 4)
- Scissors
- Two small buttons for shoulder straps (optional)
- Three small anchor buttons or appliqués for decoration
Finished Measurements
- Gauge
- Getting your gauge right matters for fit, especially with baby garments. Using the 4.0mm hook and worsted weight yarn:
- 14 stitches and 16 rows = 4 inches in single crochet
- Take time to make a gauge swatch. If your swatch is too small, go up a hook size. If it is too large, go down a hook size. This extra step saves frustration later.
Stitch shorthand
- Ch — Chain. Wrap yarn over hook and pull through the loop on your hook. This creates the foundation for most crochet projects.
- Sl st — Slip stitch. Insert hook into stitch, yarn over, pull through both the stitch and the loop on your hook in one motion. Used for joining rounds and creating invisible seams.
- Sc — Single crochet. Insert hook into stitch, yarn over and pull up a loop (2 loops on hook), yarn over and pull through both loops. A short, tight stitch that creates sturdy fabric.
- Hdc — Half double crochet. Yarn over, insert hook into stitch, yarn over and pull up a loop (3 loops on hook), yarn over and pull through all 3 loops. Slightly taller than single crochet.
- Dc — Double crochet. Yarn over, insert hook into stitch, yarn over and pull up a loop (3 loops on hook), yarn over and pull through 2 loops, yarn over and pull through remaining 2 loops. Creates a taller, more open fabric.
- Inc — Increase. Work 2 stitches into the same stitch. Adds one stitch to your count.
- Dec — Decrease (sc2tog). Insert hook into first stitch, pull up a loop, insert hook into next stitch, pull up a loop (3 loops on hook), yarn over and pull through all 3 loops. Removes one stitch from your count.
- BLO — Back loop only. Work into just the back loop of the stitch instead of both loops. Creates a ribbed texture.
Navy nautical baby romper crochet pattern with ruffle skirt
Bodice Front Panel
This creates the ribbed texture you see across the chest area. The back loop only technique gives those horizontal ridges.
Fasten off and weave in ends after the first strap.
Fasten off after the second strap.
- Round 1
Ch 33, sc in 2nd ch from hook and in each ch across, turn. (32 sts)
- Round 2
Ch 1, sc in BLO of each st across, turn. (32 sts)
- Rounds 3–6
Repeat Row 2. (32 sts)
- Round 7
Ch 1, sc in both loops of each st across, turn. (32 sts)
- Rounds 8–14
Ch 1, sc in each st across, turn. (32 sts)
- Round 15
Shape Armholes Ch 1, skip first 3 sts, sc in next 26 sts, leave remaining 3 sts unworked, turn. (26 sts)
- Round 16
Ch 1, dec over first 2 sts, sc in each st to last 2 sts, dec over last 2 sts, turn. (24 sts)
- Rounds 17–20
Ch 1, sc in each st across, turn. (24 sts)
- Round 21
Shape First Strap Ch 1, sc in first 6 sts, turn. Leave remaining stitches unworked. (6 sts)
- Rounds 22–30
First Strap Ch 1, sc in each st across, turn. (6 sts)
- Round 21
Shape Second Strap Skip center 12 stitches; join navy yarn to next stitch with a sl st; ch 1, sc in same st and next 5 sts, turn. (6 sts)
- Rounds 22–30
Second Strap Ch 1, sc in each st across, turn. (6 sts)
Ruffle Skirt Section
Three layers of navy ruffles edged in white create movement and dimension.
- Round 1
First Ruffle Tier With right side facing, join navy yarn at the side seam along the bottom edge of the bodice; ch 1, work 64 sc evenly around the entire bottom edge of the bodice, sl st to first sc to join. (64 sts)
- Round 2
First Ruffle Tier Ch 3 (counts as dc), dc in same st, 2 dc in each st around, sl st to top of ch-3 to join. (128 sts)
- Round 3
First Ruffle Tier Ch 3, dc in each st around, sl st to top of ch-3 to join. (128 sts)
- Round 4
First Ruffle Tier Ch 3, dc in each st around, sl st to join. (128 sts)White Trim (First Ruffle Tier): Change to white yarn; ch 1, sc in each st around, sl st to join; fasten off white.
- Round 1
Second Ruffle Tier Join navy yarn to any stitch on Round 1 of the First Ruffle (the round attached to the bodice); working in the unused loops of Round 1 from the first tier, ch 3, dc in same st, 2 dc in each st around, sl st to join. (128 sts)
- Rounds 2–3
Second Ruffle Tier Ch 3, dc in each st around, sl st to join. (128 sts)White Trim (Second Ruffle Tier): Change to white yarn; ch 1, sc in each st around, sl st to join; fasten off.
- Round 1
Third Ruffle Tier This tier attaches slightly lower, working into Round 1 of the Second Ruffle (where it joins the first tier); join navy yarn, ch 3, dc in same st, 2 dc in each st around, sl st to join. (128 sts)
- Rounds 2–3
Third Ruffle Tier Ch 3, dc in each st around, sl st to join. (128 sts)White Trim (Third Ruffle Tier): Change to white yarn; ch 1, sc in each st around, sl st to join; fasten off.
Bottom Section (Diaper Cover)
Make 2Fasten off after each side.
Make a second identical bottom panel for the back.
- Round 1
Ch 41, sc in 2nd ch from hook and in each ch across, turn. (40 sts)
- Rounds 2–4
Ch 1, sc in each st across, turn. (40 sts)
- Round 5
Ch 1, dec, sc to last 2 sts, dec, turn. (38 sts)
- Rounds 6–8
Ch 1, sc in each st across, turn. (38 sts)
- Round 9
Ch 1, dec, sc to last 2 sts, dec, turn. (36 sts)
- Rounds 10–12
Ch 1, sc in each st across, turn. (36 sts)
- Round 13
Ch 1, dec, sc to last 2 sts, dec, turn. (34 sts)
- Rounds 14–20
Ch 1, sc in each st across, turn. (34 sts)
- Round 21
Shaping for Leg Openings - First Side Ch 1, sc in first 10 sts, turn. Leave remaining stitches unworked. (10 sts)
- Rounds 22–26
First Side Ch 1, sc in each st across, turn. (10 sts)
- Round 21
Second Side Skip center 14 stitches; join yarn to next stitch; ch 1, sc in same st and next 9 sts, turn. (10 sts)
- Rounds 22–26
Second Side Ch 1, sc in each st across, turn. (10 sts)
Decorative Bow
The bow is crocheted separately and sewn on.
Fasten off, leaving a long tail.
- Round 1
Ch 31, sc in 2nd ch from hook and in each ch across, turn. (30 sts)
- Rounds 2–8
Ch 1, sc in each st across, turn. (30 sts)White Edging: Join white yarn at any corner; work sc evenly aro
Bodice Back Panel
The back panel is nearly identical to the front. This keeps construction simple while ensuring a good fit.
Fasten off after each strap.
- Rounds 1–20
Repeat Rows 1-20 of the Bodice Front Panel exactly.
- Round 21
Shape First Back Strap Ch 1, sc in first 6 sts, turn. (6 sts)
- Rounds 22–28
First Back Strap Ch 1, sc in each st across, turn. (6 sts)
- Round 21
Shape Second Back Strap Skip center 12 stitches; join navy yarn to next stitch; ch 1, sc in same st and next 5 sts, turn. (6 sts)
- Rounds 22–28
Second Back Strap Ch 1, sc in each st across, turn. (6 sts)
More shots
Where it goes
- A photo-ready outfit for a baby's first trip to the beach or a backyard summer gathering.
- A handmade baby shower gift that pairs beautifully with a white knit blanket or bonnet.
- A keepsake piece for a nursery shelf, displayed alongside other nautical-themed nursery decor.
- A layering piece worn over a plain white onesie for a simple, coordinated daytime look.
Color ideas
- Classic Navy and White Navy yarn covers the bodice front and back panels plus all three ruffle tiers on the skirt, while white yarn handles the trim rounds between tiers and the bow.
Care
Hand wash the finished romper in cool water since worsted weight yarn holds its shape best without heat or agitation.
Lay it flat to dry on a towel, gently reshaping the ruffle tiers with your fingers while damp.
Store folded rather than hung, so the shoulder straps and bodice don't stretch out of shape over time.
Assembly
- Step 1 Place front and back panels with right sides together. Using your yarn needle and navy yarn, whip stitch the side seams from the bottom edge up to the armhole shaping.
- Step 2 For the shoulder straps, you have two options. You can sew them together permanently, or you can add small buttons to the back straps and create buttonholes on the front straps. The button option makes dressing baby much easier.
- Step 3 To create buttonholes (optional): On the front straps at Row 28, work: sc in first 2 sts, ch 2, skip 2 sts, sc in last 2 sts. This creates a small opening for the button.
- Step 4 Place front and back bottom panels with right sides together.
- Step 5 Sew the side seams and the inner leg seams using whip stitch.
- Step 6 Turn right side out.
- Step 7 Pin the top edge of the bottom section to the inside of the bodice, just above where the third ruffle attaches.
- Step 8 Whip stitch securely in place, ensuring the ruffles drape naturally over the seam.
Easy to get wrong
Uneven strap counts on the back panel
Count your stitches after skipping the center stitches for the second strap before you start the row, so both straps end up the same width.
Ruffle tiers curling instead of lying flat
Check your tension on the doubled stitch count rounds; working too tightly here is what makes the ruffle pull instead of flare.
Between the songs
- What I love here is the contrast between the disciplined ribbing on the bodice and the loose, layered movement of the ruffle skirt. Working in back loops only for those first several rows gives you a real textural payoff, those horizontal ridges you can feel with your fingers. Then the skirt flips the mood entirely, building tier after tier of double crochet finished in crisp white trim. Shaping two separate straps on the back panel is a satisfying little puzzle, and it teaches you something about garment construction you can carry into other projects. By the time you're stitching on anchor buttons, the whole thing already looks like it came from a shop, not your lap.
Listener questions
Can I skip the buttons and just sew the straps
Absolutely, sewing the straps together permanently is the simpler of the two finishing options. The button route is only worth the extra step if you want easier on-and-off dressing.
What does the back loop only technique actually do here
It creates those horizontal ridges you see across the chest of the bodice. It's a purely textural choice, so your stitch count stays the same throughout.
How many ruffle tiers does the skirt have
The skirt builds in layered tiers, each one edged with a white trim round before starting the next. That repetition is what gives the skirt its dimension.
Is this a good pattern for my first baby garment
It's better suited to someone who already feels comfortable with increasing, decreasing, and working in rows. If you've made a hat or a simple sweater before, this is a reasonable next challenge.
Original pattern: https://crochetwithmia.com/navy-blue-nautical-baby-romper-free-crochet-pattern/
About the Author

Marisol QuinteroWho runs Crochet Obsessed, why a stitch count sits at the end of every round, how a pattern gets written here, and the things this site will never do.
More Patterns
- IntermediateNo. 01

Slouchy everyday beanie worked flat in half double crochet
Crochet beanie pattern for a slouchy everyday look worked flat with hdc rows, then seamed into a soft,…
- IntermediateNo. 02
Crochet amigurumi doll with dress, shoes, and hat
Crochet amigurumi doll pattern with dress, shoes, and hat details for a soft, huggable keepsake you build one…
- IntermediateNo. 03
Chunky moss stitch crochet sweater with raglan-free shoulders
Chunky crochet sweater pattern using moss stitch, worked flat with a 10mm hook for a soft, fast, cool-weather…


