- LevelIntermediate
- Time4-6 hours
- Hook10 mm
- YarnSuper Bulky
About This Pattern
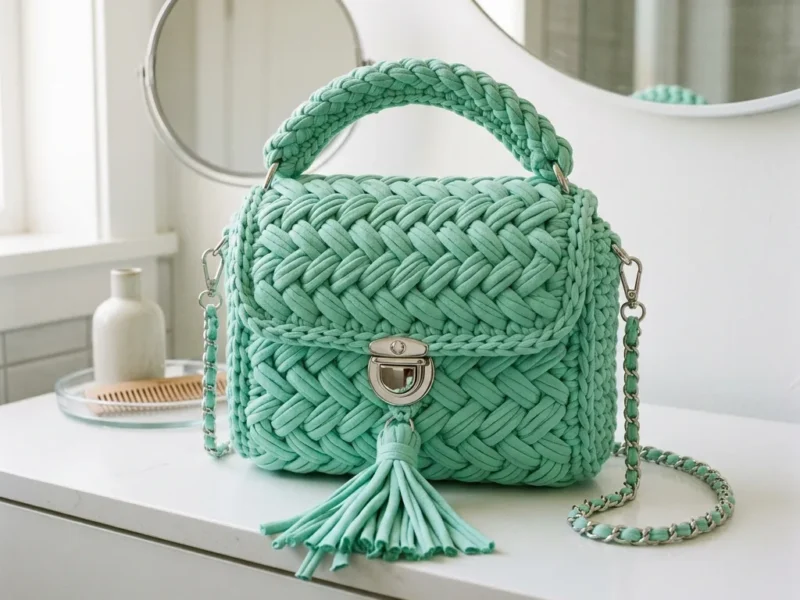
There's something almost architectural about this bag before you even pick up the hook. Mint green t-shirt yarn has that soft, matte hush to it, nothing shiny, nothing fussy. The whole project feels like a deep exhale after a week of fiddly fingering-weight work.
Your hands get to move in big, satisfying arcs here. You're working an oval base up through rounds of hdc, then shifting into herringbone stitch to build the sides, which changes the rhythm completely. Add in the hardware install at the end, punching holes and setting rivets, and this becomes a project that uses more than just your hook hand.
Set on a hallway hook or the crook of a dining chair, this bag reads as a made object, not a craft project. The mint green keeps it fresh rather than precious, and the structured base means it holds its shape even sitting empty. It looks like something you'd find in a small design shop, not a yarn aisle.
- Chain a foundation and work rounds of hdc around it, increasing at both short ends to turn the corners smoothly.
- Keep working hdc rounds outward until the oval base reaches its full width and length.
- Shape the top opening with decrease rows that taper the stitch count down at each edge.
- Join yarn at the back opening to crochet the flap piece separately in herringbone stitch.
- Crochet small tabs for the D-rings and attach them so the strap hardware has somewhere to sit.
- Cut and sew in the fabric lining so the bag interior is finished and sturdy.
- Mark, punch, and install the rivets, D-rings, clasps, and push lock by hand.
On the desk
- Yarn
- T-shirt yarn / Trapillo yarn in mint green or seafoam
- Approximately 200-250 yards (180-230 meters)
- Super bulky weight, typically around 2-3 skeins depending on yardage per skein
- T-shirt yarn is made from recycled jersey fabric cut into continuous strips. It’s thick, soft, and has a slight stretch. Popular brands include Hoooked Zpagetti , Lion Brand Fettuccini , and Lily Sugar’n Cream Scrub Off . You can also make your own from old t-shirts if you’re feeling resourceful.
- Hook
- 10mm (US N/15) crochet hook or 12mm (US P/16) crochet hook
- Check your gauge and adjust hook size as needed. T-shirt yarn varies quite a bit between brands, so your perfect hook might be different from mine.
- Hardware
- 2 D-rings, approximately 1 inch (2.5 cm)
- 2 swivel lobster clasps
- 4 metal rivets or Chicago screws (for attaching D-rings)
- Additional Supplies
- Tapestry needle with large eye
- Stitch marker
- Scissors
- Small piece of cardboard (for tassel making)
Optional
- fabric for lining, approximately 1/2 yard
Optional
- leather hole punch or awl for hardware installation
Stitch shorthand
- ch — chain
- st — stitch
- sts — stitches
- sl st — slip stitch
- sc — single crochet
- hdc — half double crochet
Mint green woven tote bag in chunky t-shirt yarn
Main Pattern
- Round 1
Hdc in 3rd ch from hook (skipped chains count as first hdc), hdc in next 11 ch, 4 hdc in last ch (this turns the corner), working along opposite side of foundation chain, hdc in next 11 ch, 3 hdc in last ch, sl st to join. Place stitch marker. (32 sts)
- Round 2
Ch 2 (does not count as stitch throughout), hdc in same st, hdc in next 12 sts, 2 hdc in each of next 3 sts, hdc in next 12 sts, 2 hdc in each of next 3 sts, sl st to join. (38 sts)
- Round 3
Ch 2, hdc in each st around, working 2 hdc in corner stitches (every 6th and 7th st on short ends), sl st to join. (44 sts)
- Round 4
Ch 2, hdc in each st around, sl st to join. (44 sts) Your base should now measure approximately 8 inches by 3 inches. It will look like a rounded rectangle or elongated oval.The Body Now we build up the sides using the herringbone stitch. This is where the magic happens.
- Round 5
Ch 2, working in back loops only (this creates a sharp edge at the base), hbhdc in each st around, sl st to join. (44 sts)Don’t panic if your first round of herringbone looks a little wonky. It takes about 10-15 stitches to find your rhythm. The key is pulling through one loop at a time. Think of it as climbing a ladder with your yarn.
- Rounds 6–18(44)
Ch 2, hbhdc in each st around (working through both loops now), sl st to join. (44 sts each round)You’ll work 13 rounds total for the body. This creates approximately 6 inches of height.
As you work, you’ll see beautiful diagonal lines forming. Each stitch leans in the same direction, creating that woven herringbone texture.Quick tip: Try not to pull too tight at the beginning of each round. This can cause the sides to pull inward. Keep your tension even and let the yarn do the work.
Creating the Opening and Shaping the Flap Area
- Round 19
Ch 2, hbhdc in next 15 sts, ch 14, skip 14 sts (this creates the opening where the flap will sit), hbhdc in remaining 15 sts, sl st to join. (30 hbhdc + 14 ch = 44 sts)
- Round 20
Ch 2, hbhdc in each st and ch around, sl st to join. (44 sts) Fasten off. Weave in ends on the body.
The Flap The flap is worked separately and attached to the back of the bag.
Part 2
Row 1: Join yarn at center back of bag opening. Ch 2, hbhdc in next 14 sts across the back edge. Turn. (14 sts)
Row 2: Ch 2, hbhdc in each st across. Turn. (14 sts)
Rows 3-8: Repeat Row 2. (14 sts each row)
- Round 9
Decrease row Ch 2, skip first st, hbhdc in next 12 sts, skip last st. Turn. (12 sts)Row 10: Ch 2, skip first st, hbhdc in next 10 sts, skip last st. Turn. (10 sts)
- Round 11
Ch 2, hbhdc in each st across. Turn. (10 sts) Border: Ch 1, sc evenly around entire flap edge, working 3 sc in each corner to keep it flat. Sl st to join.Fasten off. Weave in ends.
The Handle The braided handle adds beautiful texture and comfort.
Make 3 strands: For each strand, ch 50. Fasten off. You’ll have 3 long chains.
Push Lock Clasp
Position the clasp on the flap, centered and approximately 1 inch from the bottom edge. Mark where the prongs will go through. Use an awl or leather punch to create small holes. Push prongs through from the front, and secure with the backing plate on the inside.
Position the catch plate on the bag body, aligning it with the clasp. Mark, punch holes, and install with backing plate.
If you’ve never installed bag hardware before, I recommend watching a quick YouTube tutorial. It’s easier than it sounds, I promise.
D-Rings:
Crochet two small tabs: Ch 8, sl st to join in a ring, ch 1, sc 12 around the ring, sl st to join. Fasten off.
Thread each tab through a D-ring, fold in half, and attach to the sides of the bag at the top corners using rivets or by sewing securely.
Chain Strap:
If your chain strap doesn’t come with lobster clasps attached, add them now. Then simply clip each end to a D-ring. The yarn woven through the chain links matches the bag and adds a cohesive designer touch.
Optional: Adding a Fabric Lining For a truly professional finish, consider adding a simple fabric lining.
Cut two pieces of fabric slightly smaller than the bag dimensions. Sew them together, leaving the top open. Insert into the bag and hand stitch to the top edge using small, invisible stitches.
A lining protects your items, hides any interior imperfections, and prevents small items from poking through the stitches.
Care Instructions
T-shirt yarn bags can be spot cleaned with mild soap and water. Lay flat to dry. Avoid machine washing, as the hardware can be damaged and the yarn may stretch.
Store your bag stuffed with tissue paper to help it keep its shape.
Customization Ideas This crochet bag pattern is wonderfully versatile. Here are some ways to make it your own: Try bold colors like coral, mustard, or classic black
Swap silver hardware for gold or antique brass
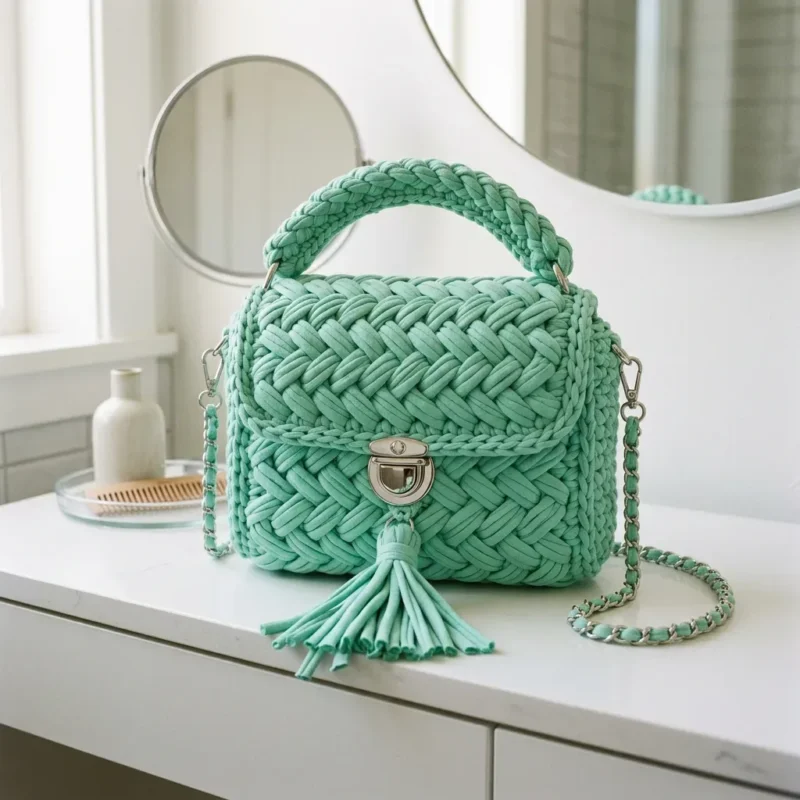
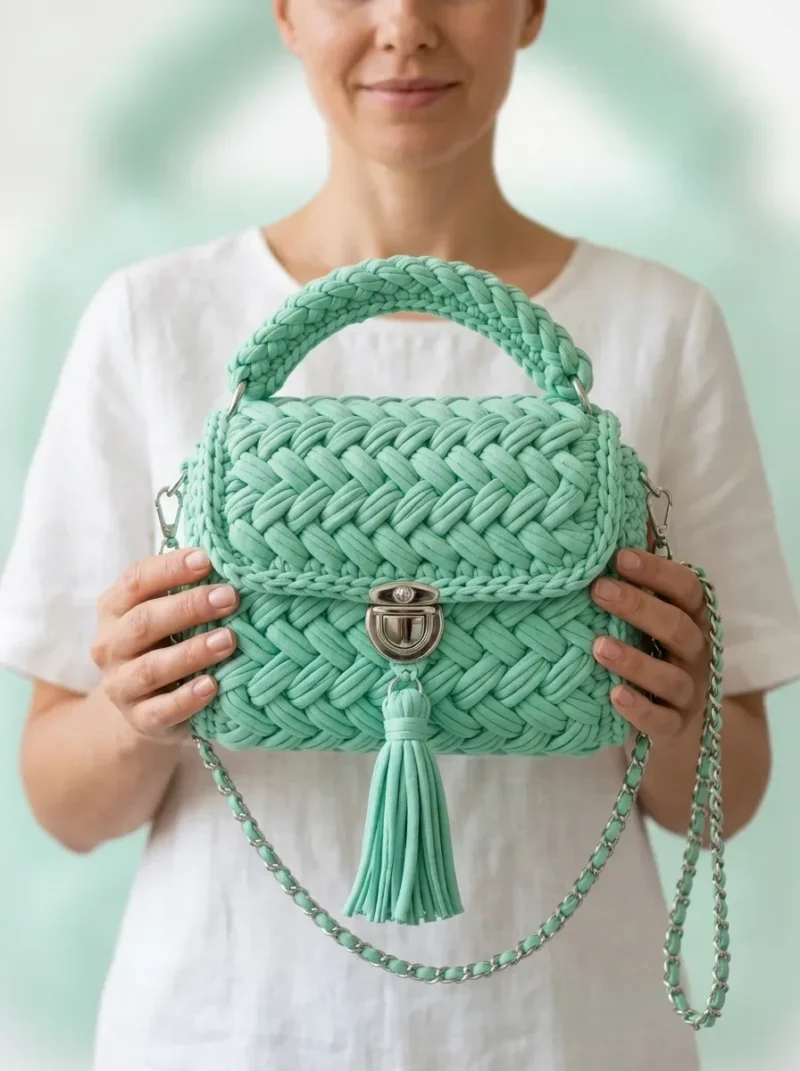
More shots
Where it goes
- An everyday market or grocery tote that can take the weight of produce and jars without stretching out of shape.
- A structured shoulder bag for errands, paired with denim and a plain cotton top for a put-together, unfussy look.
- A beach or pool bag, since t-shirt yarn shrugs off sand and dries quickly if it gets damp.
- A stylish project bag for carrying yarn and hooks to a knit night, roomy enough for a work in progress.
Color ideas
- Solid mint calm Work the entire main pattern, part 2 flap, and D-ring tabs in the same mint green for a clean, monochrome finish.
- Mint and natural contrast Crochet the base and body rounds of the main pattern in mint green, then work part 2 (the flap) in an undyed or cream t-shirt yarn for a two-tone bag.
Care
Hand wash the finished bag in cool water with a mild detergent, since t-shirt yarn is recycled jersey and behaves like a cotton knit.
Reshape the bag while damp, pressing the base flat and rounding the sides, then let it air dry fully before use.
Store it stuffed lightly with tissue or a spare bag to help it hold its shape, away from direct sun so the mint green doesn't fade.
Easy to get wrong
Losing the corner increases
Place a stitch marker at the join and count out the 4-hdc and 3-hdc corner groups in round 1 carefully, since a missed increase there throws off every round after it.
Mixing up hdc and herringbone hdc
Herringbone hdc has a distinct two-loop pull-through that regular hdc doesn't, so check your stitch before starting the body rows to keep the texture consistent.
Rushing the hardware installation
Mark and test-fit the clasp and D-rings against the bag before punching any holes, since t-shirt yarn stitches don't hide a misplaced hole the way tighter fabric can.
Listener questions
Can I use a different hook size than what's listed?
Yes, the pattern notes both a 10mm and 12mm option since t-shirt yarn thickness varies by brand. Check your gauge against the base measurement before committing to a hook size.
How much yarn do I actually need?
Plan on roughly 200-250 yards of super bulky t-shirt yarn, which usually works out to about 2-3 skeins depending on the brand's yardage per skein. Buying an extra skein is a reasonable safety net given how much yarn per stitch this weight uses.
Do I need to know herringbone half double crochet before starting?
Some familiarity helps since the body of the bag relies on it entirely, but it's a stitch you can practice on a small swatch first. Once you get the rhythm it moves quickly in this bulky yarn.
Is the hardware installation hard if I've never done it before?
It's more about careful marking than skill, and a leather hole punch or awl makes the job straightforward. Watching a short tutorial before you start is a smart way to feel confident with the rivets and clasp.
Can I make my own t-shirt yarn instead of buying it?
Yes, cutting old t-shirts into continuous strips works fine for this pattern. Just keep the strip width as consistent as you can so your gauge stays even across the base and sides.
Original pattern: https://crochetwithmia.com/mint-green-woven-bag-on-vanity-free-pattern/
About the Author

Marisol QuinteroWho runs Crochet Obsessed, why a stitch count sits at the end of every round, how a pattern gets written here, and the things this site will never do.
More Patterns
- IntermediateNo. 01

Slouchy everyday beanie worked flat in half double crochet
Crochet beanie pattern for a slouchy everyday look worked flat with hdc rows, then seamed into a soft,…
- IntermediateNo. 02
Crochet amigurumi doll with dress, shoes, and hat
Crochet amigurumi doll pattern with dress, shoes, and hat details for a soft, huggable keepsake you build one…
- IntermediateNo. 03
Chunky moss stitch crochet sweater with raglan-free shoulders
Chunky crochet sweater pattern using moss stitch, worked flat with a 10mm hook for a soft, fast, cool-weather…


