- LevelIntermediate
- Time4-6 hours
- YarnWorsted
About This Pattern
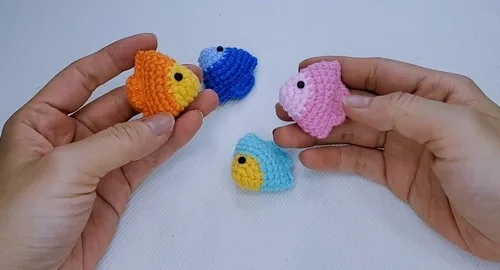
This little fish has that cheerful, pocket-sized energy I love in a quick make. It starts round and plain, then flips into something with a face and fins before you've even reached for a second skein. There's a playful snap to it, like a small joke you get to finish in one sitting.
Clipped to a bag zipper or hanging from a hook by the door, this fish reads as a little burst of color rather than clutter. It's small enough to tuck into a pocket, sturdy enough to survive keys knocking against it, and cheerful enough that people ask where it came from. On a shelf next to other minis, it holds its own without needing company.
- Start with a magic ring and build a simple domed shape in your main color using single crochet increases.
- Work a couple of plain single crochet rounds once the width you want is reached.
- Attach safety eyes symmetrically before the body closes up so the face sits where you want it.
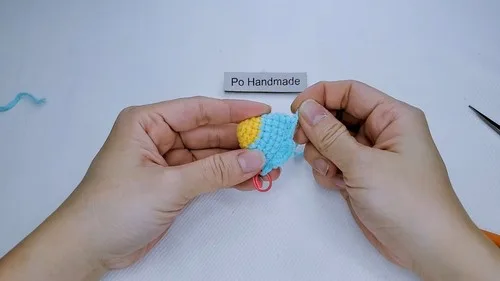
- Fold the piece flat and single crochet through both layers to seal one edge shut.
- Pause partway across that seam to build two half double crochet fins in neighboring stitches.
- Stuff the body with fiberfill before closing the remaining folded edge the same way.
- Cut your yarn, leave a tail, and weave in ends with a tapestry needle to finish.
On the desk
- Yarn in your preferred colors
- Crochet hook
- Stitch marker
- Scissors
- Tapestry needle for weaving ends
- Polyester fiberfill stuffing
- Safety eyes
Stitch shorthand
- MR — Magic Ring
- Ch — Chain
- Sc — Single Crochet
- Inc (V) — Increase (2 SC in one stitch)
- Hdc — Half Double Crochet
- Sl st — Slip Stitch
Little fish keychain crochet pattern with fins
Main Body (Using Yellow Yarn or Your Main Color)
- Round 1(6)
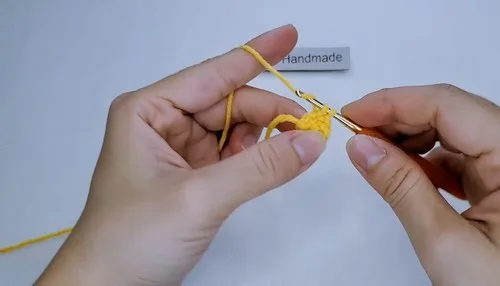
Create a magic ring, chain 1. Work 6 single crochets into the ring. Pull tight to close. Slip stitch to join. (6 stitches)
- Round 2(9)
Chain 1. (1 Sc, 1 Inc) repeat around. (9 stitches)
- Round 3(12)
Chain 1. (1 Sc, 1 Inc, 1 Sc) repeat around. (12 stitches)
- Round 4(15)
Chain 1. (3 Sc, 1 Inc) repeat around. (15 stitches)
Color Change to Orange (or another color)
Pull up a loop with new yarn through last stitch of previous round.
Secure ends by tying off.
- Round 5(18)
Chain 1. (2 Sc, 1 Inc, 2 Sc) repeat around. (18 stitches)
- Round 6(21)
Chain 1. (5 Sc, 1 Inc) repeat around. (21 stitches)
- Rounds 7–8(21)
Chain 1. Work 1 Sc in each stitch around. (21 stitches per round)
Shaping the Fish and Adding Fins
- Round 9
Fold piece in half. Work single crochets through both loops of the fold to join edges. Work 4 Sc stitches across folded edge. Chain 1. In the next stitch, work 4 half double crochets to form the first fin. In the following stitch, work 4 half double crochets to form the second fin. Chain 1. Stuff the fish with fiberfill. Continue 4 Sc stitches across the remaining folded edge. Chain 1, cut yarn leaving a tail, and weave in ends using tapestry needle.
More shots
Where it goes
- Clip it to a backpack or diaper bag zipper so it's easy to spot the right bag at a glance.
- Hang it from a car rearview mirror along with a set of keys for a small pop of color on the commute.
- Give it as a quick handmade gift paired with a notebook or a small succulent.
- Line a few up on a shelf with other amigurumi minis for a tiny, colorful collection.
Color ideas
- Cool water fish A soft blue for the Main Body rounds, then a teal or seafoam for the Color Change section, keeping the fins in whichever shade you used last.
Care
Hand wash the finished fish gently in cool water if it needs cleaning, since machine washing can mat the yarn fibers and flatten the fiberfill inside.
Reshape the body and fins by hand while damp, gently coaxing the fold back into line, then let it air dry flat away from direct heat.
Store it somewhere it won't get crushed under heavier items, since a flattened fold is harder to puff back out once the fiberfill settles.
Assembly
- Step 1 Attach safety eyes symmetrically between rounds 3 and 4.
Easy to get wrong
Losing track of the fold line
Mark the stitch where you plan to fold with a stitch marker before you reach Round 9, so both folded edges line up evenly when you single crochet through them.
Fins placed too close together
Leave the single chain-1 gaps exactly as given between the two sets of half double crochets, since skipping them crowds the fins and pulls the fold out of shape.
Stuffing after the seam is fully closed
Add the fiberfill during the pause in Round 9, before you finish the second half of the folded edge, or you won't have an opening left to stuff through.
Between the songs
- The satisfying part is the fold. You spend four rounds in yellow building a simple dome, then the Color Change to Orange section takes over and keeps the increases going until the piece widens out. After two plain rounds, you fold the whole thing flat and single crochet straight through both layers to seal it shut, which feels like a clever shortcut compared to sewing a seam. Then you get to place two sets of half double crochet fins right at the fold, stuff the body before closing it fully, and finish with a tail you weave in. It's a small number of techniques, but using them in this order is what makes the fish feel engineered rather than thrown together.
Listener questions
Do I need to know how to sew to finish this fish?
No, the whole closure happens with single crochet worked through both folded edges in Round 9. There's no separate sewing step at any point.
When do I attach the safety eyes?
Attach them symmetrically between Rounds 3 and 4, before you move into the Color Change to Orange section. Doing it early means you're working with a smaller opening and better visibility.
Can I make the fish a different color combination than yellow and orange?
Yes, the pattern notes you can use any main color and any second color for the Color Change section. Just keep the two sections visually distinct if you want that classic two-tone look.
What happens to the loose yarn tail at the end?
After the final chain 1, you cut the yarn leaving a tail, then weave in the ends with a tapestry needle. This keeps the finish clean with no knots showing.
Is there a wrong time to stuff the fish?
Yes, stuff it during the pause in Round 9, after the fins are formed but before you close the remaining folded edge. Stuffing too early or too late makes it hard to get fiberfill evenly into the body.
Original pattern: https://crocheteverything.com/cute-no-sew-mini-fish-keychain-crochet-pattern/
About the Author

Marisol QuinteroWho runs Crochet Obsessed, why a stitch count sits at the end of every round, how a pattern gets written here, and the things this site will never do.
More Patterns
- IntermediateNo. 01

Rose Granny Square Tote Crochet Pattern
Rose granny square tote crochet pattern made from 18 dimensional rose squares for a sturdy, romantic everyday bag.
- IntermediateNo. 02
Tropical octopus baby blanket crochet pattern with appliqués
Tropical octopus baby blanket crochet pattern: a cream filet base with coral and turquoise octopus appliqués, leaves, and…
- IntermediateNo. 03
Sunny lemon couple amigurumi crochet pattern
Sunny lemon couple amigurumi crochet pattern with embroidered slices and safety eyes for a cheerful handmade shelf pair.


