- LevelIntermediate
- Time4-6 Hours
- Hook4.0 mm
- YarnChunky/Bulky
About This Pattern
This Little Squirrel Amigurumi turns a few skeins of plush chunky yarn into the coziest woodland critter you'll ever squeeze. With a rounded body-head worked in one continuous piece, tiny sculpted legs and arms, and that signature big fluffy tail, this pattern captures everything charming about squirrels in stitched form. It's perfect for crocheters who love working up quick, huggable toys and for anyone hunting for a handmade gift that feels a little different from the usual bear or bunny.
You'll work primarily in continuous spiral rounds using a G-6/4.0mm hook for the body pieces and a smaller E-4/3.5mm hook for the tiny nose detail, so comfort with magic rings, single crochet increases, and invisible decreases will serve you well. The muzzle also involves a bit of sculpting with cotton thread and a long needle, which adds a fun new skill to your amigurumi toolkit. Expect to spend a relaxed weekend on this one — it's intermediate-friendly, not a rushed evening project.
When all six pieces come together, you'll have a plump, sit-up squirrel with an expressive sculpted face, a plush tail nearly as big as its body, and soft safety eyes that give it real personality. It's substantial enough to feel like a proper stuffed companion but still compact enough to perch on a shelf, nestle in a nursery, or wrap up for someone who'll treasure a one-of-a-kind handmade critter.
- Start with the legs, working two matching pieces from the base up and setting them aside once stuffed.
- Crochet the arms next, keeping them lightly stuffed so they stay flexible when sewn to the body later.
- Work the long fluffy tail in its own continuous spiral, building up rounds until it reaches its full plush shape.
- Move on to the body-head as one continuous piece, increasing and decreasing to form the rounded silhouette.
- Stuff the body-head firmly as you close the top, keeping the fabric dense enough to hide the fiberfill.
- Make the two ears quickly in just a handful of rounds, then set them aside with the other small parts.
- Sculpt the separate muzzle using cotton thread and a long needle to shape and define the little snout.
- Assemble everything by attaching the safety eyes, then sewing on the muzzle, ears, arms, legs, and tail in sequence.
Materials
Main color yarn
- Himalaya Dolphin Baby (or any chunky/bulky weight plush yarn), main color
Hook size
- G-6 / 4.0 mm (main body); E-4 / 3.5 mm for the nose only
Safety eyes
- 16 mm, 1 pair
Stuffing
- Polyester fiberfill
Tightening thread
- Cotton yarn or strong thread (for sculpting the muzzle)
- Long needle with a large eye (for muzzle sculpting)
- Stitch marker
- Yarn needle / tapestry needle
- Scissors
Crochet Abbreviations
- BLO
- Back Loop Only
- ch
- Chain
- dec
- Invisible Decrease (insert hook in front loops of next 2 sts, pull up a loop, yarn over, pull through all 3 loops)
- inc
- Increase (2 sc in same stitch)
- MR
- Magic Ring
- Rnd
- Round
- sc
- Single Crochet
- sl st
- Slip Stitch
- SM
- Stitch Marker
- spike sc
- Spike Single Crochet (insert hook lower than usual, pull up an elongated loop to the working height, complete as sc — creates a looped, fluffy texture)
- st / sts
- Stitch / Stitches
Little Squirrel Amigurumi Crochet Pattern
Legs (make 2)
this … Begin with contrast color yarn.
Step by step: Begin with contrast color yarn.
Step by step: Work in contrast color yarn.
- Round 1
5 sc in MR. (5)
- Round 2
inc in each st around. (10)
- Round 3
sc, inc repeat 5 times around. (15)Step by step: 2 sc, 3 inc, 6 sc, 3 inc, 2 sc. (22); Now shape the nose bridge (worked flat from this point):.
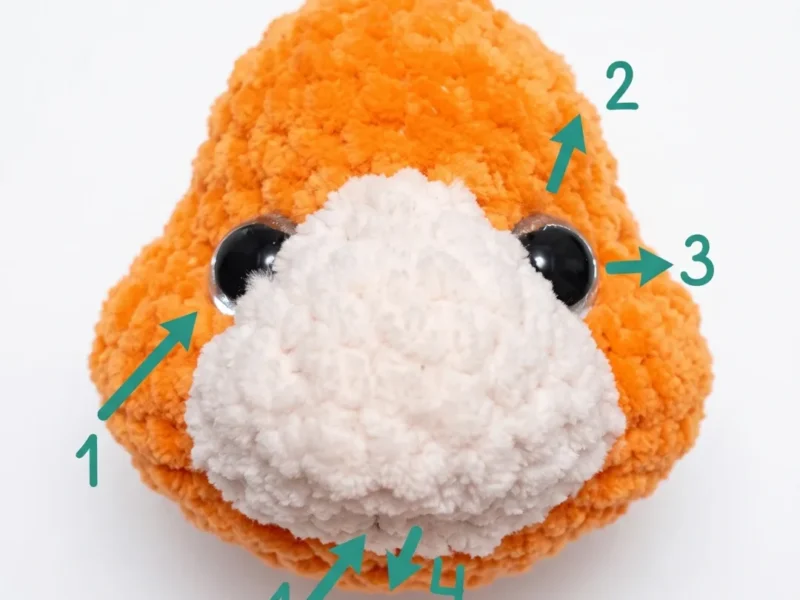
Work 1 sc, 1 sl st, ch 1, turn. From the second stitch after the ch (the next live stitch), work 2 dec, ch 1, turn. Work 1 dec. Then work 3 sl st down along the side of the piece to secure.Fasten off, leaving a long tail for sewing. The elongated/pointed side of the muzzle piece is sewn between the safety eyes, with light stuffing behind it to give it dimension.Step by step: sc in each st around. (15). - Round 4
2 sc, inc repeat 5 times around. (20)
- Round 5-7
sc in each st around. (20)
- Round 8
8 dec, 4 sc. (12)Switch to main color yarn.
- Round 9-13
sc in each st around. (12)Stuff the leg firmly. Flatten the opening and sc across — 6 sc through both layers — to close. Fasten off and weave in ends.
Tail
This piece is worked entirely using spike sc to create a fluffy, looped texture. Work in continuous spiral throughout.
- Round 1
6 sc in MR. (6)
- Round 2
inc (spike sc style) in each st around. (12)
- Round 3
spike sc, inc repeat 6 times around. (18)
- Round 4-6
spike sc in each st around. (18)
- Round 7
spike sc, dec repeat 3 times around, then spike sc in each remaining st. (15)
Note: Rnd 7 works 3 decrease pairs from the total 18 sts: work [spike sc, dec] × 3, leaving the remaining 9 sts as spike sc to reach 15 total.
- Round 8
spike sc in each st around. (15)
- Round 9
3 spike sc, dec repeat 3 times around. (12)
- Round 10-13
spike sc in each st around. (12)
- Round 14
4 sc, dec repeat 2 times around. (10)
- Round 15-16
spike sc in each st around. (10)Do not stuff. Flatten the tail and sc across — 5 sc through both layers — to close. Fasten off, leaving a long tail for attachment.
Body-Head
This is one continuous piece. The legs, arms, and tail are joined into the body during specific rounds — have all three ready before you begin.
- Round 1
6 sc in MR. (6)
- Round 2
inc in each st around. (12)
- Round 3
sc, inc repeat 6 times around. (18)
- Round 4
2 sc, inc repeat 6 times around. (24)
- Round 5
sc in each st around. (24)
- Round 6
3 sc, then sc 6 sts joining the left leg (working through both the body stitches and the closed edge of the left leg simultaneously), 6 sc, then sc 6 sts joining the right leg, 3 sc. (24)
- Round 7
3 sc, sc, inc repeat 3 times, 6 sc, sc, inc repeat 3 times, then sc 5 sts joining the tail. Move your stitch marker — the new beginning of round starts immediately after the tail join. (30)
- Round 8
sc in each st around. (30)
- Round 9
3 sc, dec repeat 6 times around. (24)
- Round 10
2 dec over 4 sts, 5 sc, dec, dec, 2 sc, dec, 3 sc. (20)
Note: Rnd 10 shapes the waist asymmetrically. Read carefully: (2 sc, dec) × 2, 5 sc, (dec, 2 sc) × 2, 3 sc = 20 sts.
- Round 11
sc 5 sts joining the left arm (working through both body and closed edge of left arm), 6 sc, sc 5 sts joining the right arm, 4 sc. (20)Continue stuffing the body as you go.
- Round 12
2 sc, dec repeat 5 times around. (15)
- Round 13
sc, dec repeat 5 times around. (10)
The head begins now — continue without fastening off.
- Round 14
inc in each st around. (20)
- Round 15
sc, inc repeat 10 times around. (30)
- Round 16
sc in each st around. (30)
- Round 17
8 sc, 4 inc, 8 sc, 4 inc, 6 sc. (38)
- Round 18
8 sc, inc, sc repeat 4 times, 8 sc, sc, inc repeat 4 times, 6 sc. (46)
- Round 19-20
sc in each st around. (46)
- Round 21
8 sc, dec, sc repeat 4 times, 8 sc, sc, dec repeat 4 times, 6 sc. (38)
- Round 22
8 sc, 4 dec, 8 sc, 4 dec, 6 sc. (30)
- Round 23
sc, dec repeat 5 times around. (25)Place safety eyes between Rounds 22 and 23 before continuing. Position them in the cheek areas on either side of the muzzle zone. Stuff the head firmly as you proceed.
- Round 24-26
sc in each st around. (25)
- Round 27
3 sc, dec repeat 5 times around. (20)
- Round 28
2 sc, dec repeat 5 times around. (15)
- Round 29
sc, dec repeat 5 times around. (10)Step by step: Switch to main color yarn; sc in each st around. (10).
Stuff lightly. Flatten the opening and sc across — 5 sc through both layers — to close. Fasten off and weave in ends. - Round 30
dec 5 times around. (5)Pull the remaining opening closed. Fasten off and weave in the end.
Ears (make 2)
Begin with main color yarn.
- Round 1
6 spike sc in MR. (6)
- Round 2
inc (in sc) in each st around. (12)
- Round 3
2 sc, inc repeat 4 times around. (16)
- Round 4
sc in each st around. (16)
- Round 5
3 sc, inc repeat 4 times around. (20)
- Round 6-9
sc in each st around. (20)Do not stuff. Flatten and sc across — 10 sc through both layers — to close. Fasten off, leaving a long tail for sewing.
Nose (small separate piece)
Work with contrast color yarn and E-4 / 3.5 mm hook.
Ch 4. Starting in the second ch from hook, work 3 sc. (3)
Fasten off, leaving a tail for sewing. Sew the nose to the tip of the muzzle.
More photos
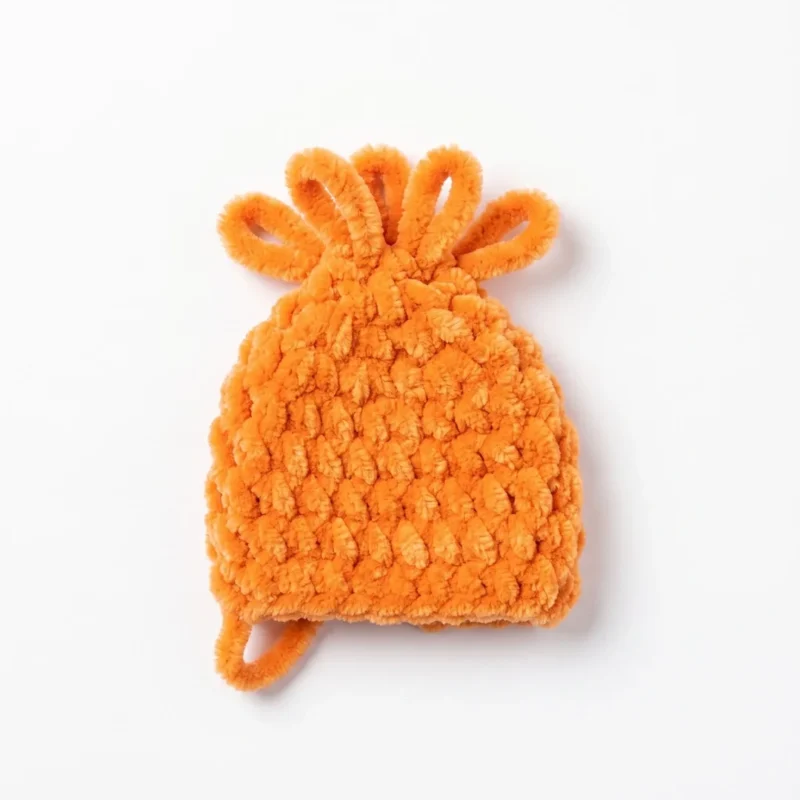
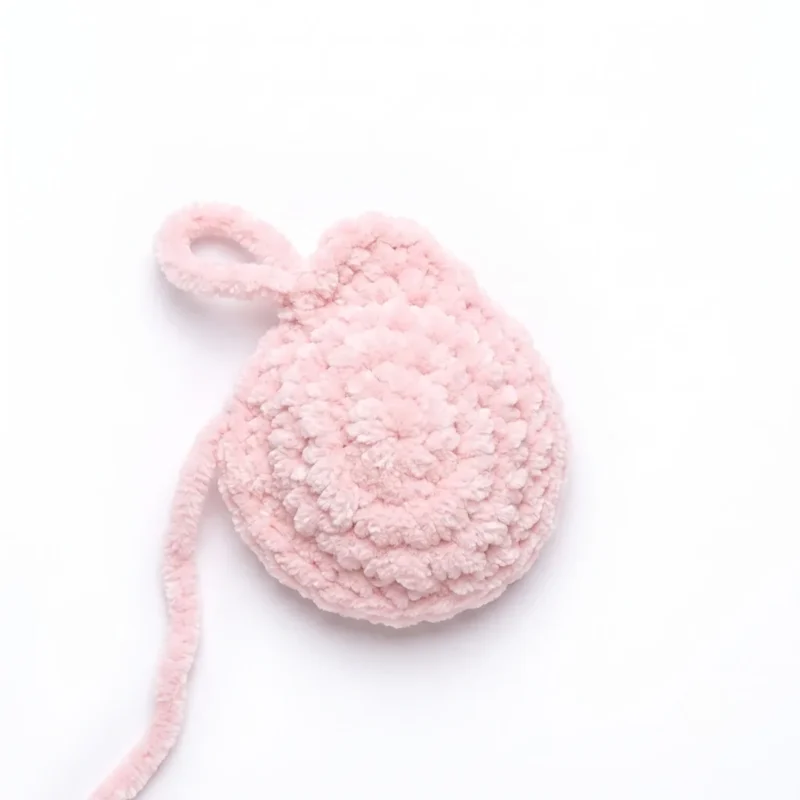
Assembly Instructions
- Step 1 Attach the muzzle. Position it with the pointed/elongated end upward, centered between the safety eyes. Sew in place using the yarn tail and a whipstitch around the edges. Before closing completely, add a small amount of stuffing to give the muzzle a rounded, 3D shape.
- Step 2 Sculpt the muzzle. Thread cotton yarn onto your long needle. Insert the needle from the back of the head, bring it out near the left side of the muzzle, pull gently to create a subtle dimple, and anchor the thread at the “mouth” position. Repeat symmetrically for the right side. Pull firm and knot securely — then bury the thread inside the head so the knot disappears.
- Step 3 Attach the nose. Sew the small 3-stitch nose piece to the tip of the muzzle.
- Step 4 Embroider the face. Using black cotton yarn, embroider small eyebrows above the safety eyes and a simple curved mouth below the muzzle. A few straight stitches are all you need.
- Step 5 Sew on the ears. Position both ears symmetrically on top of the head. The spike-sc side should face forward. Sew firmly through the base of each ear, using the long yarn tail and a whipstitch or mattress stitch.
- Step 6 Final check. Make sure all yarn tails are woven in securely, the toy is stuffed to a satisfying firmness, and all parts are attached without any gaps.
Important Notes
- 💡 Keep two hook sizes on hand — the G-6/4.0mm for all main body pieces and the E-4/3.5mm just for the nose — so you're not scrambling mid-project.
- 💡 Stuff as you go rather than all at once at the end, adding small amounts of fiberfill every few rounds so the shape stays even and firm throughout.
- 💡 Move your stitch marker faithfully every single round, especially through the lengthy 27-round body-head section where it's easiest to lose your place.
- 💡 Have your long needle and cotton thread ready before you start the muzzle so you can sculpt it while the head is still lightly stuffed and easy to manipulate.
- 💡 Test your 16mm safety eye placement with removable stitch markers or pins before locking them in permanently, since repositioning after attachment can damage the fabric.
Common Mistakes and Fixes
- Losing track of the beginning of each round in the continuous spiral construction, especially during the long 27-round body-head piece.
Always place your stitch marker in the first stitch of each new round and move it up as you go — never skip this step, even on rounds that feel repetitive.
- Working stitches too loosely, which causes fiberfill to peek through the fabric on the body and tail.
Go down a hook size from what feels natural, or consciously keep tension tighter than you would for a garment — amigurumi needs dense, snug stitches to hide the stuffing.
- Rushing the muzzle sculpting step and pulling the cotton thread too tight, which distorts the face shape.
Sculpt gradually, checking the muzzle shape from multiple angles as you pull the thread, and take small, even passes with the long needle rather than one big yank.
- Misplacing or crushing the invisible decreases at the top of the head or tail, leaving visible gaps or a lumpy shape.
Use the invisible decrease technique (inserting into front loops only of the next two stitches) rather than a standard decrease, which creates a much smoother, gap-free finish.
- Attaching safety eyes before confirming spacing and placement on the head.
Insert the eye posts loosely first, step back to check symmetry and distance, and only snap the backs on once you're happy with the placement.
Variations
- I fell hard for this pattern the moment I saw how that tail curls up behind the body — it genuinely looks like a squirrel mid-scamper! What I love most is the muzzle sculpting technique; pulling cotton thread through with a long needle to shape that little snout gives the face so much more dimension than a flat embroidered nose ever could. Working the body-head as one continuous 27-round piece means fewer seams to sew later, which my hands always appreciate. The two-color approach — main color for the body, a contrast for paws, muzzle, and nose — lets you play with combinations without adding extra pattern complexity. I also love that the ears are quick 6-round pieces you can knock out while watching TV, so you get little wins throughout the project instead of one long slog. By the time you're stuffing that final tail round, you'll feel like you actually sculpted a woodland creature by hand, and that satisfaction is exactly why I keep coming back to amigurumi like this one.
Frequently Asked Questions
What yarn weight and hook size does this squirrel pattern use?
The pattern calls for chunky/bulky weight plush yarn like Himalaya Dolphin Baby, worked mainly with a G-6/4.0mm hook. The only exception is the tiny nose piece, which uses a smaller E-4/3.5mm hook for a tighter, more defined shape.
How long does it take to finish the whole squirrel?
Most intermediate crocheters can complete this project in about 4-6 hours of focused crafting, though it's easy to break into sessions since each piece (legs, arms, tail, ears) is a manageable standalone round count. The longest single piece is the 27-round body-head.
Do I need special skills for the muzzle sculpting?
You'll want to be comfortable using a long needle with a large eye to pull cotton thread or strong thread through the stuffed muzzle piece to shape it. It's a technique unique to this pattern but very approachable once you see the shaping process in action.
Can I use a different yarn than Himalaya Dolphin Baby?
Absolutely — any chunky or bulky weight plush-style yarn will work well as a substitute, just make sure your gauge keeps the fabric dense enough to hide the fiberfill. Look for soft, huggable yarns marketed for amigurumi or baby blankets for the best texture.
How much fiberfill will I need for this pattern?
The exact amount depends on your tension and desired firmness, but plan for a generous supply since the body-head, tail, legs, and arms all need stuffing. It's best to stuff gradually as you work each piece rather than trying to fill it all at the very end.
Original pattern: https://amigurumiarts.com/little-squirrel-amigurumi-crochet-pattern/
About the Author

Marisol QuinteroWho runs Crochet Obsessed, why a stitch count sits at the end of every round, how a pattern gets written here, and the things this site will never do.
More Patterns
- IntermediateNo. 01

Slouchy everyday beanie worked flat in half double crochet
Crochet beanie pattern for a slouchy everyday look worked flat with hdc rows, then seamed into a soft,…
- IntermediateNo. 02
Crochet amigurumi doll with dress, shoes, and hat
Crochet amigurumi doll pattern with dress, shoes, and hat details for a soft, huggable keepsake you build one…
- IntermediateNo. 03
Chunky moss stitch crochet sweater with raglan-free shoulders
Chunky crochet sweater pattern using moss stitch, worked flat with a 10mm hook for a soft, fast, cool-weather…


