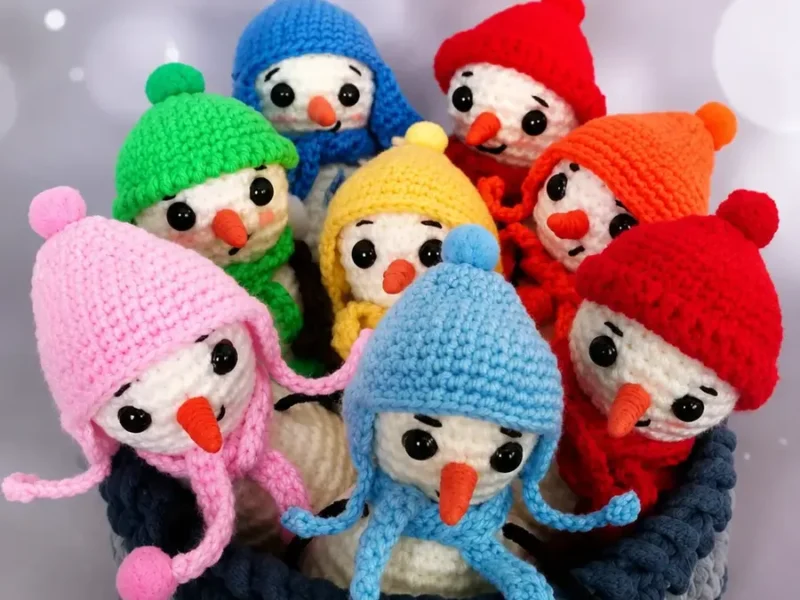
- LevelEasy
- Time3-5 hours
- Hook2.0 mm
- YarnSport
About This Pattern
This little snowman carries the quiet charm of a snowy morning, the kind where everything feels still and soft underfoot. I think of him as the calm moment between songs on the radio dial, small and unhurried, worked in a soft baby yarn that keeps the whole mood gentle. He is not flashy or bold, just sweet, round, and entirely content to sit in your palm while you decide what color scarf he deserves next.
Your hands will spend most of the time working single crochet in a tight, continuous spiral, the kind of rhythm that settles into muscle memory fast. A stitch marker becomes essential since nothing here joins or turns, so losing your place is easy at this small gauge with the fine hook. The arms ask for something different entirely, a slim corded loop built from chains and pulled-up stitches rather than the usual little crocheted tube.
When he's finished, this snowman stands about 8 cm tall, small enough to perch on a windowsill, a bookshelf, or the corner of a desk without taking over the space. His little hat and scarf give him a finished, dressed look that reads as intentional rather than just a plain ball shape. Set him next to a mug of tea or a stack of winter-toned books and he looks right at home.
- You start with the head, building a tight spiral that increases outward before curving back in to close.
- Before the head closes up fully, you embroider the simple face and snap in the safety eyes for good.
- The body follows the same spiral method, worked a little taller so it balances nicely beneath the head.
- Each arm comes together as a slim corded loop, made with chains and a pulled-up-loop technique instead of a tube.
- The little hat builds up in rounds from the top down, finishing with a brim that fits over the head.
- A short scarf and a longer scarf give you two options, both quick pieces you can knot or drape.
- Once every piece is stuffed and shaped, you stitch the arms, hat, and scarf onto the body and head.
On the desk
Crochet Hook
- Size 2.0 mm (No. 2)
Main Yarn
- Alize Baby Best (100g / 240m)
- Additional Yarn (for hat, scarf): Acrylic (50g / 150m) in shades of pink (YarnArt Baby)
Thread
- Iris thread in brown
- Safety Eyes: 8 mm
Toy Stuffing
- Fiberfill (synthetic winterizer)
Stitch shorthand
- MR — magic ring (sliding loop)
- ch — chain stitch
- sl st — slip stitch
- sc — single crochet
- dc — double crochet
- hdc — half double crochet
- inc — increase
- dec — decrease
- FLO — front loop only (work into the front half-loop)
- BLO — back loop only (work into the far half-loop)
A little amigurumi snowman ready for his scarf and hat
Head
- Round 1
MR, 6 sc. (6)
As the hat will be removable, secure the short tail of the non-working yarn by crocheting over it.
As the hat will be removable, secure the short tail of the non-working yarn by crocheting over it.
As the hat will be removable, secure the short tail of the non-working yarn by crocheting over it.
- Round 2
6 inc. (12)
- Round 3
(1 sc, inc)*6 times. (18)
- Round 4
(2 sc, inc)*6 times. (24)
- Round 5
sc. (24)Step by step: sc. (25).
- Round 6
(3 sc, inc)*6 times. (30)
- Rounds 7–8
sc. (30)Step by step: (6 sc, inc)*5 times. (40); sc. (40).
6 sc, [3 ch, 7 tr together worked into one top, starting from 6th stitch of previous row, 10 ch, into the 8th chain stitch work 2 dc together worked into one top, 3 ch, 9 sl st starting from 8th chain stitch, 3 ch, sc into the same stitch of the last treble crochet stitch], 16 sc, [3 ch, 7 tr together worked into one top, 10 ch, into the 8th chain stitch work 2 dc together worked into one top, 3 ch, 9 sl st starting from 8th chain stitch, 3 ch, sc into the same stitch of the last treble crochet stitch].
Step by step: 6 sc, sl st. Cut yarn, fast off, hide yarn end. Sew a pompom to the top of the hat.
Step by step: 8 sc, 8 ch, 19 sc, 8 ch, 15 sc. (63).
7 sc, dec, 6 sc, inc of 3 sc, 6 sc, dec, 17 sc, dec, 6 sc, inc of 3 sc, 6 sc, dec, 7 sc. (63)
6 sc, dec, 7 sc, inc of 3 sc, 7 sc, dec, 14 sc, dec, 7 sc, inc of 3 sc, 7 sc, dec, 6 sc. (63)
6 sc, dec, 7 sc, inc of 3 sc, 7 sc, dec, 14 sc, dec, 7 sc, inc of 3 sc, 7 sc, dec, 6 sc, sl st. (63)
Step by step: Cut yarn, fast off, hide yarn end. Decorate the hat with pompoms.
Step by step: Turn work wrong side facing you, 4 ch, 35 dc worked into the back loop only (BLO), sl st; Cut yarn, fast off, hide yarn end. Sew a pompom to the top of the hat.
- Round 9
11 sc, 2 inc, 4 sc, 2 inc, 11 sc. (34)
- Round 10
sc. (34)
- Round 11
10 sc, (dec, 2 sc)*4 times, 8 sc. (30)
- Round 12
sc. (30)
- Round 13
(dec, sc)*10 times. (20)
- Round 14
(dec, 2 sc)*5 times. (15)
Attach safety eyes between stitches 13 sc and 17 sc of round 9. You can immediately embroider the eyebrows and eyes, making it easier to secure the threads. Insert the carrot nose without fastening, embroider the mouth, and secure the carrot nose after the detail is completely crocheted.
Right arm
- Round 1
4 ch, 3 sl st, 3 ch, 2 sl stRnd 2: 1 ch, pull up 2 loops and crochet as with a long hook: on hook 3 loops, yarn over, pull through 1 loop, yarn over, pull through 2 loops, yarn over, pull through 2 loops.
Rnd 3-5: 1 ch, pull up 2 loops and crochet as with a long hook: on hook 3 loops, yarn over, pull through 1 loop, yarn over, pull through 2 loops, yarn over, pull through 2 loops.
Left arm
- Round 1
3 ch, 2 sl st, 4 ch, 3 sl stRnd 2: 1 ch, pull up 2 loops and crochet as with a long hook: on hook 3 loops, yarn over, pull through 1 loop, yarn over, pull through 2 loops, yarn over, pull through 2 loops.
Rnd 3-5: 1 ch, pull up 2 loops and crochet as with a long hook: on hook 3 loops, yarn over, pull through 1 loop, yarn over, pull through 2 loops, yarn over, pull through 2 loops.
Little Hat
- Round 1
MR, 9 sc. (9)
As the hat will be removable, secure the short tail of the non-working yarn by crocheting over it.
- Round 2
(sc, 2 inc)*3 times. (15)
- Round 3
sc. (15)
- Round 4
(2 sc, inc)*5 times. (20)
- Round 5
(3 sc, inc)*5 times. (25)
- Round 6
(4 sc, inc)*5 times. (30)
- Round 7
(5 sc, inc)*5 times. (35)
- Rounds 8–11
sc. (35)
- Round 12
“Crab stitch” (reverse single crochet), but insert hook into loops of Rnd 10, working around the stitches of Rnd 11.Cut yarn, fast off, hide yarn end. Sew a pompom to the top of the hat.
Scarf
- Round 1
50 ch, 2 sl st, 2 sc, 41 hdc, 2 sc, 2 sl st.
Long Scarf
- Round 1
75 ch, 2 sl st, 2 sc, 66 hdc, 2 sc, 2 sl st. Cut yarn, fast off, hide yarn end. Sew pompoms to the ends of the scarf.
Body
- Round 15
(2 sc, inc)*5 times. (20)
- Round 16
(3 sc, inc)*5 times. (25)
- Round 17
2 sc, (inc, 4 sc)*4 times, inc, 2 sc. (30)
Note for cord-arms: Prepare a brown cord 16-17 cm. 4 sc, inc, 3 sc, 1 ch, skip 1 stitch, insert cord, inc, 4 sc, inc, 2 sc, 1 ch, skip 1 stitch, insert cord, sc, inc, 4 sc, inc. (30)
- Round 18
sc. (30)
- Round 19
(5 sc, inc)*5 times. (35)
- Round 20
34 sc, inc. (36)
- Round 21
sc. (36)
- Round 22
(5 sc, inc)*6 times. (42)
- Rounds 23–24
sc. (42)
- Round 25
(dec, 5 sc)*6 times. (36)
- Round 26
2 sc, (dec, 4 sc)*5 times, dec, 2 sc. (30)
- Round 27
sc. (30)
- Round 28
(dec, 3 sc)*6 times. (24)
- Round 29
sc, (dec, 2 sc)*5 times, dec, sc. (18)
- Round 30
(dec, sc)*6 times. (12)
- Round 31
6 dec. (6)Stuff the detail. Finish crocheting with a slip stitch, cut the yarn, pull the opening tight, secure, and hide the end of the yarn inside the detail.
More shots
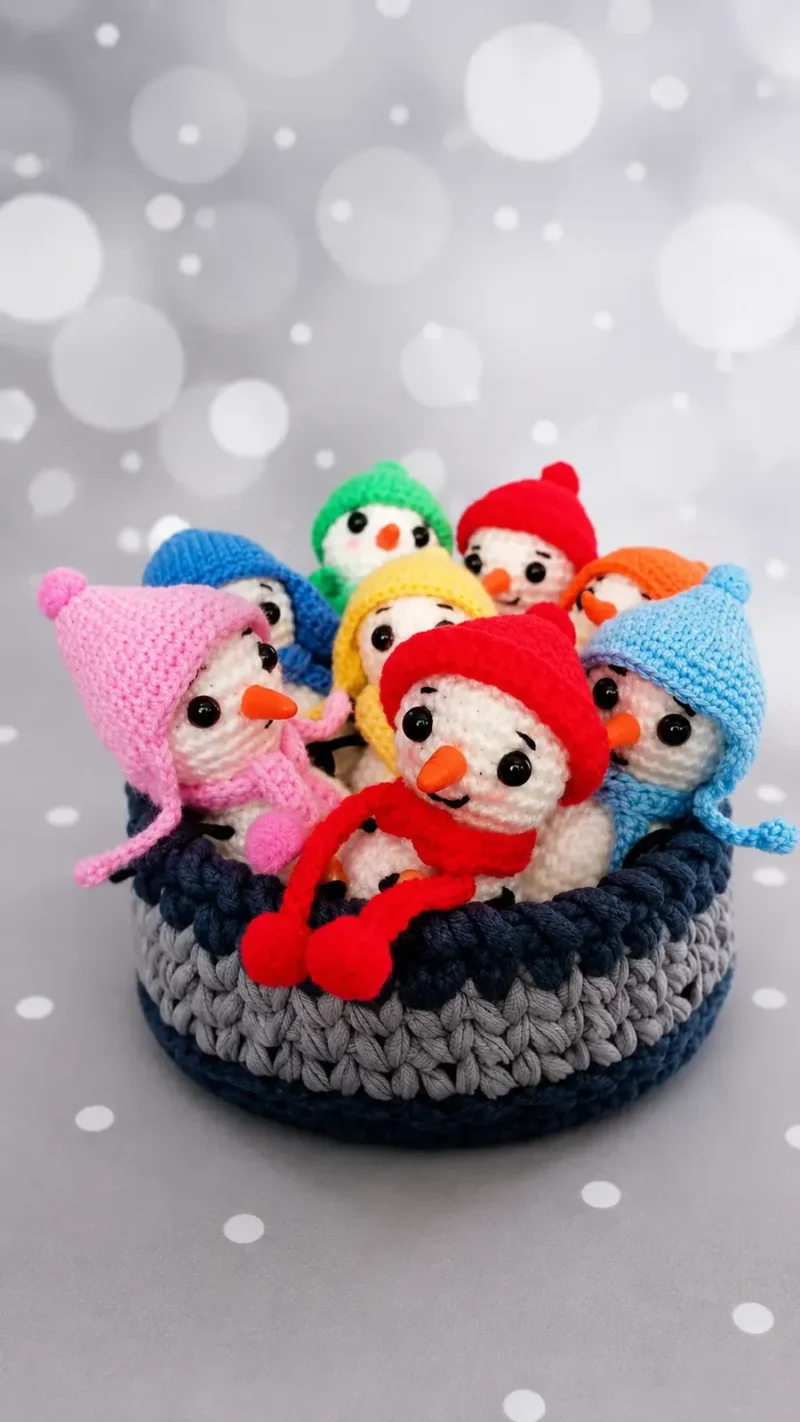
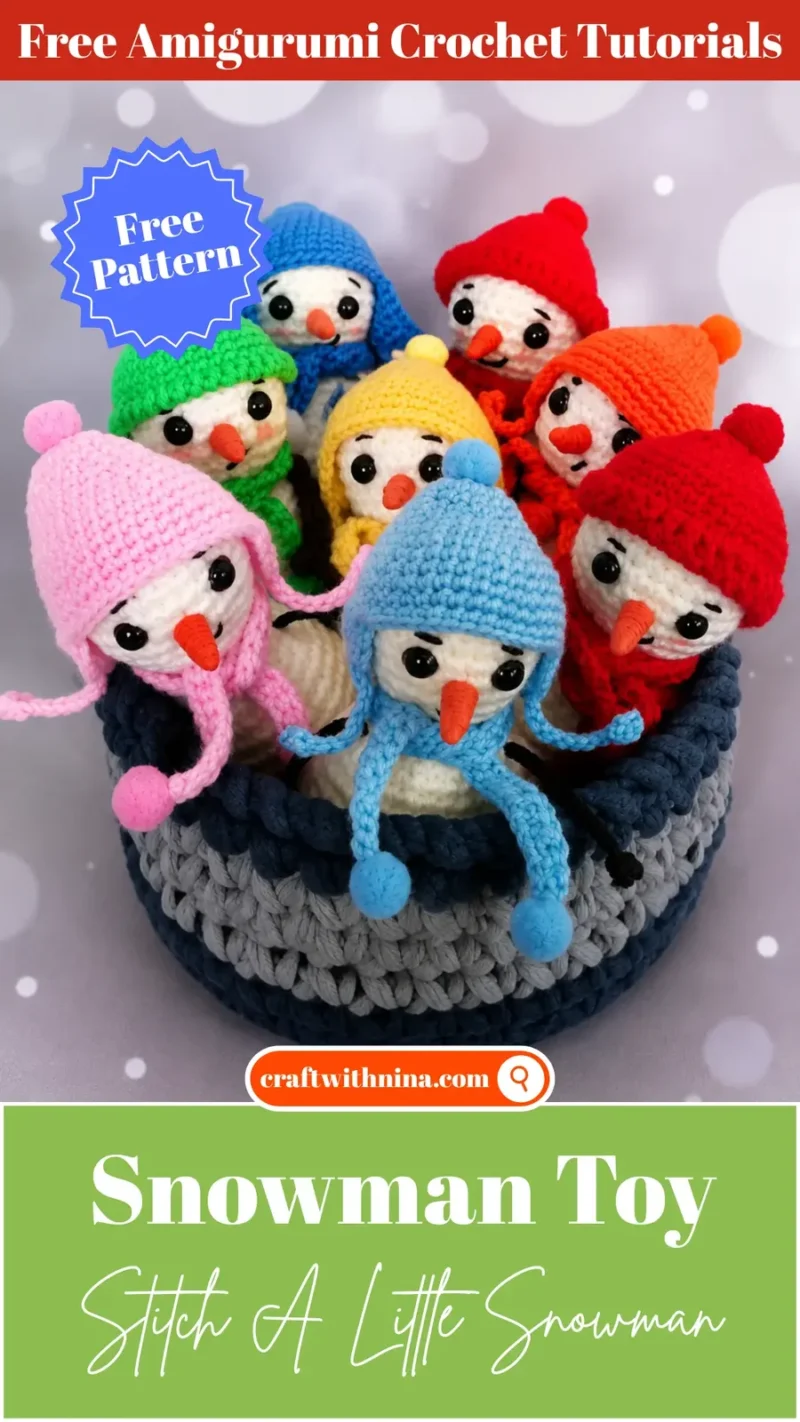
Where it goes
- A tiny shelf companion, set beside a candle or a short stack of favorite books.
- A thoughtful handmade gift, wrapped with a scarf of its own and tucked into a card or small box.
- A sweet addition to a nursery or kid's room shelf, paired with a soft knit blanket nearby.
- A photo prop for a cozy winter flat lay, placed next to a mug of cocoa or tea.
Color ideas
- Classic Snowy White White Alize Baby Best for the head and body, pink acrylic for the Little Hat, Scarf, and Long Scarf, and brown iris thread for the embroidered face.
- Soft Blush Blend A pale blush shade of Alize Baby Best on the head and body, a deeper rose acrylic on the Little Hat and Long Scarf, and a cream acrylic on the short Scarf.
Care
Since both yarns here are acrylic, a gentle hand wash in cool water is all this little snowman needs; skip the washing machine to protect the embroidered face and safety eyes.
Press out excess water in a towel rather than wringing, then reshape the head, body, and hat while still damp so he dries nice and round.
Let him air dry completely away from direct heat before storing him upright on a shelf, which keeps the fiberfill from shifting or going flat.
Easy to get wrong
Losing track mid-spiral
Place a stitch marker in the last stitch of every round since there is no slip stitch join to show you where you are.
Stuffing all at once at the end
Add fiberfill gradually as you crochet the head and body so the shape stays smooth and round instead of lumpy.
Setting safety eyes too late
Push the eyes through and secure the backs before the head decreases down to its final 15 stitches, while you can still reach inside comfortably.
Between the songs
- What I love about this little snowman is how much character comes from so few rounds. The head works up in a tight continuous spiral, gradually increasing and then decreasing, so the shape rounds out on its own without any shaping tricks. Embroidering the face before you close the head means you get to watch his personality appear right before your eyes, brown iris thread against pale yarn. The arms are the real surprise here, not simple crocheted tubes but slim corded loops built from a chain and a pull-up-loop technique that gives them a slightly twisted, yarn-like texture. Add a tiny knit-look hat and a scarf worked in a contrasting pink, and you have a finished amigurumi that feels handmade in the best way.
Listener questions
Can I use a different yarn weight for this snowman?
Yes, the notes mention sizing up to a worsted weight yarn with a larger hook for a bigger plushie. Just remember you may need larger safety eyes to match the new scale.
Why does the pattern tell me to embroider the face before closing the head?
Working the face while the head is still open gives you easy access to secure the thread ends on the inside. Once the head closes up, reaching inside to fix mistakes gets much harder.
Are the arms worked the same way as the head and body?
No, the arms use a completely different technique: a chain and slip stitch base worked with a pulled-up-loop stitch instead of the continuous single crochet spiral. This gives them a slimmer, cord-like shape.
Is this pattern beginner friendly?
Yes, it is rated easy and really only asks for basic amigurumi skills like single crochet and increases. The small scale and fine hook mean you will want decent eyesight or good light, but the stitches themselves stay simple.
Can I make the hat and scarf in different colors?
Definitely, swapping the pink acrylic for another shade is one of the easiest ways to customize each snowman. Making a few in different color combinations is a fun way to build a little collection.
Original pattern: https://craftwithnina.com/free-amigurumi-pattern-little-snowman-toy/
About the Author

Marisol QuinteroWho runs Crochet Obsessed, why a stitch count sits at the end of every round, how a pattern gets written here, and the things this site will never do.
More Patterns
- IntermediateNo. 01

Rose Granny Square Tote Crochet Pattern
Rose granny square tote crochet pattern made from 18 dimensional rose squares for a sturdy, romantic everyday bag.
- IntermediateNo. 02
Tropical octopus baby blanket crochet pattern with appliqués
Tropical octopus baby blanket crochet pattern: a cream filet base with coral and turquoise octopus appliqués, leaves, and…
- IntermediateNo. 03
Sunny lemon couple amigurumi crochet pattern
Sunny lemon couple amigurumi crochet pattern with embroidered slices and safety eyes for a cheerful handmade shelf pair.


