- LevelIntermediate
- Time4-6 hours
- Hook4 mm
- YarnDK / Light Worsted
About This Pattern
There is something calming about a pattern that never asks you to guess. I like how this one builds in plain, honest rounds, the kind you can follow while half listening to a podcast. It has that soft, cheerful energy of a project made purely for the fun of it.
Your hands spend most of the time on repeat: magic ring, single crochet, increase, increase again. The rhythm settles in fast, and by the ears you are moving on muscle memory alone. The real focus arrives later, at the sewing and gluing stage, when you decide exactly how her face will look.
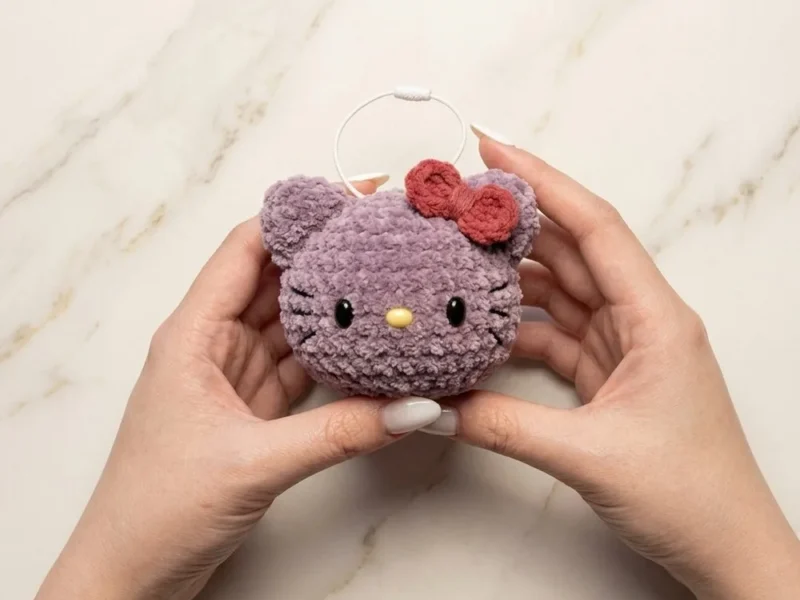
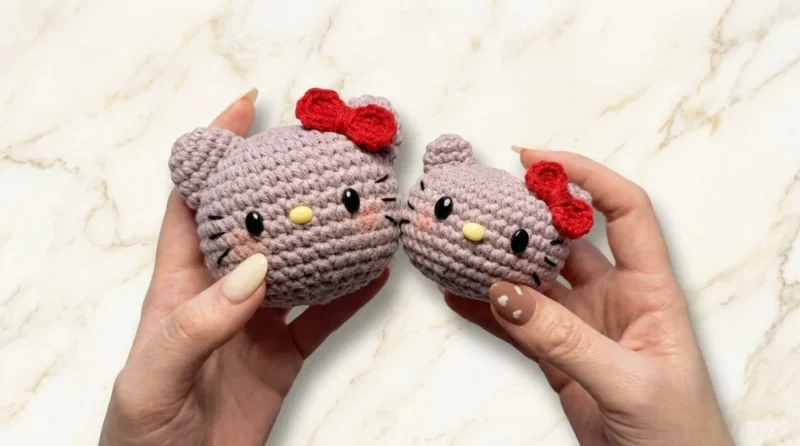
Finished, she sits about the size of your palm, round-headed and a little glossy if you pick a fluffy or velvet yarn. Clip her to a bag, prop her on a shelf next to a plant, or tuck her into a pencil case. She reads as handmade and a little bit fancy, never fussy.
- Start the head with a magic ring and build it outward through steady single crochet increase rounds.
- Keep increasing evenly until the head rounds out into its full domed shape.
- Set the head aside and stuff it firmly with polyester fiberfill before closing.
- Make two small ears from their own magic rings, decreasing them down to a neat point.
- Fold each ear slightly at the base so it holds a soft, rounded curve.
- Sew or glue the ears to the top sides of the head at a gentle angle.
- Attach a small bow to one ear and add the eyes, nose, and whiskers by hand.
- Finish with optional blush on the cheeks and a loop at the top if it is becoming a charm.
On the desk
Main color
- White (cotton, acrylic, or fluffy yarn)
Bow
- Pink, red, or color of choice
Hook
- Appropriate for your yarn (e.g., 2.5–4 mm for DK/light worsted)
Stuffing
- Polyester fiberfill
Notions
- Yarn needle (for sewing and weaving ends)
- Stitch marker (recommended)
- Scissors
- Hot glue (optional, for attaching parts)
- Safety eyes and nose or felt pieces
- Blush (optional)
Stitch shorthand
- ch — chain
- st — stitch
- sts — stitches
- sl st — slip stitch
- sc — single crochet
- dc — double crochet
- inc — increase
- dec — decrease
- mr — magic ring
Sweet kitty plushy crochet pattern for a bag charm
Rounds
- Round 1
8 sc in MR. Sl st to join. (8 sts)
- Round 2
8 inc (2 sc in each st) — 16 sts . (Work 2 sc in each st around.)
- Round 3
(sc, inc) x8 — 24 sts .
- Round 4
(2 sc, inc) x8 — 32 sts .
- Round 5
(3 sc, inc) x8 — 40 sts .
- Rounds 6–12
sc in each st around — 40 sts each round.
- Round 13
(3 sc, dec) x8 — 32 sts .
- Round 14
(2 sc, dec) x8 — 24 sts .
- Round 15
(sc, dec) x8 — 16 sts . Start stuffing firmly with polyfill.
- Round 16
8 dec — 8 sts .Finish: Fasten off, leaving a long tail.
Use a yarn needle to close the opening:
Weave through front loops only of each st, pull tight to close. Weave the yarn tail into the head several times to secure, then cut the excess.
Ears (Make 2)
Make a magic ring, 5 sc in MR.
Sl st to the first st, ch 1 (standing stitch, not counted).
- Round 2
5 inc — 10 sts .
- Round 3
(2 sc, inc) x2 — 8 sts (sc in next 2 sts, inc in next st, repeat once more) Fasten off, leaving a long tail for sewing (or short if using glue). Fold the ear slightly for a rounded effect.
Head
- Round 1(8)
Start with a magic ring, 8 sc in MR.(Do not count the slip knot.)
- Round 2
Sl st to close the round.Standing stitch: ch 1 (do not count as st).
Bow
Magic ring, ch 2.
2 dc into ring , ch 2.
Sl st into ring (half bow formed).
Repeat (ch 2, 2 dc, ch 2, sl st into ring) for the other half.
Fasten off, leaving two long yarn tails.
Use the yarn tails to wrap the center tightly and tie off at the back. Trim ends or use for sewing.
More shots
Where it goes
- Clip it to a backpack or purse zipper as a small handmade bag charm.
- Set it on a desk or bookshelf as a tiny plush that pairs well with other amigurumi.
- Slip it into a child's pencil case or backpack as a soft, sturdy little companion.
- Give it alongside a handwritten card as a small, personal gift that took real time to make.
Color ideas
- Classic white and pink Work the head and ears in white, then crochet the bow in pink and use pink or red for any small face accents.
- Soft pastel mix Keep the head white for contrast, make one ear tip and the bow in a pale color of choice, and save red or a deeper pink for the nose detail only.
Care
Hand wash gently in cool water if you used cotton or acrylic, and avoid the washing machine if the yarn is fluffy or velvet, since agitation can flatten the pile.
Lay the plushy flat to air dry, reshaping the head and ears with your fingers while damp so the fiberfill settles evenly.
Store it away from direct sunlight and away from anything that could crush the ears, keeping the fluffy or velvet texture soft over time.
Assembly
- Step 1 Attach the ears: Sew or glue in place on the top sides of the head, slightly folding the base to create a curve.
- Step 2 Attach the bow: Sew or glue bow to the side of one ear.
- Step 3 Add face details:
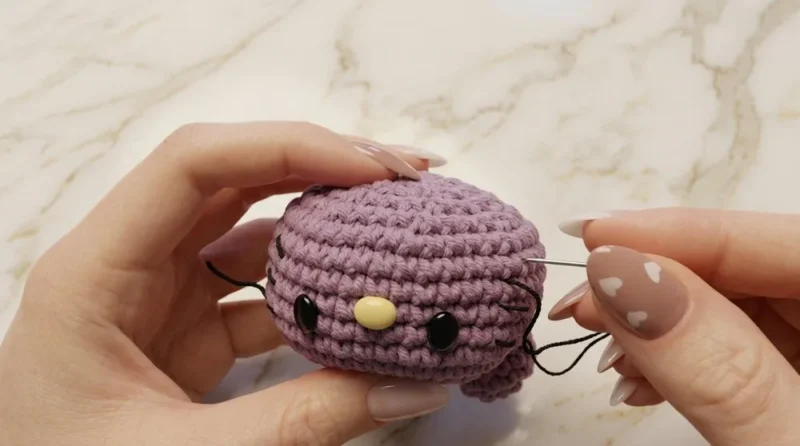
- Step 4 Attach safety eyes and a nose, or cut pieces from felt and glue/sew on.
- Step 5 Embroider whiskers with black embroidery thread, or use a fine black yarn.
- Step 6 Apply blush on the cheeks if desired.
- Step 7 Optionally, attach a loop or keychain to the top as a bag charm.
Easy to get wrong
Losing track of the increase rounds
Place a stitch marker at the start of each round on the head so you always know where a new round begins. Recount stitches at the end of a round before moving on if the pattern feels off.
Ears left flat instead of curved
Remember to fold the base of each ear slightly before sewing, as the pattern instructs, rather than attaching them flat. This small fold is what gives the ears their rounded, lifelike shape.
Underfilling the head before closing
Stuff the head firmly with polyester fiberfill while there is still an open gap to work through, pushing fill into the sides as well as the center. A too-soft head will look lumpy once the ears and face are attached.
Between the songs
- What I enjoy here is how few tricks the pattern actually needs, yet how finished the result looks. The head grows through a clean single crochet increase sequence from a magic ring, so the shaping stays predictable round after round. The ears use their own small magic ring and a neat decrease pairing, then get folded before sewing for that soft, rounded look real ears have. Nothing about the stitch work is complicated, but the payoff, a plush little head with actual dimension, feels bigger than the effort. I also like that the bow and ear sizing are genuinely adjustable by chain count, so you get to make the same character look a little different every time without touching the core shaping.
Listener questions
Can I make this without safety eyes?
Yes, the materials list gives felt pieces as an alternative, glued or sewn on in place of safety eyes and a nose. This is a good option if the charm is meant for a very young child.
How do I make the ears bigger or smaller?
The source notes say you can adjust ear and bow size by changing the initial chain or stitch count, so start with a few more or fewer stitches in the first round. Keep the same increase and decrease pattern afterward to preserve the shape.
What yarn gives the softest finished plushy?
A fluffy or velvet yarn in white will give the head the plushiest, most huggable texture, as the source intro suggests. Cotton or acrylic works too and holds stitch definition a little better if you prefer a crisper look.
Can I turn this into a different character?
Yes, the pattern notes mention the basic head shape works for other characters just by changing the yarn color and swapping the facial details. The ears, bow, and face are the pieces to customize, while the head shaping stays the same.
Do I need to sew the parts or can I glue everything?
Either works, and the pattern allows sewing or hot glue for the ears, bow, and face pieces depending on your preference. Sewing tends to hold up better if the charm will get handled often, while glue is faster for a display piece.
Original pattern: https://redagapeblog.com/free-hello-kitty-crochet-pattern/
About the Author

Marisol QuinteroWho runs Crochet Obsessed, why a stitch count sits at the end of every round, how a pattern gets written here, and the things this site will never do.
More Patterns
- IntermediateNo. 01

Rose Granny Square Tote Crochet Pattern
Rose granny square tote crochet pattern made from 18 dimensional rose squares for a sturdy, romantic everyday bag.
- IntermediateNo. 02
Tropical octopus baby blanket crochet pattern with appliqués
Tropical octopus baby blanket crochet pattern: a cream filet base with coral and turquoise octopus appliqués, leaves, and…
- IntermediateNo. 03
Sunny lemon couple amigurumi crochet pattern
Sunny lemon couple amigurumi crochet pattern with embroidered slices and safety eyes for a cheerful handmade shelf pair.


