- LevelIntermediate
- Time4-6 Hours
- Hook4.0 mm
- YarnBulky
About This Pattern
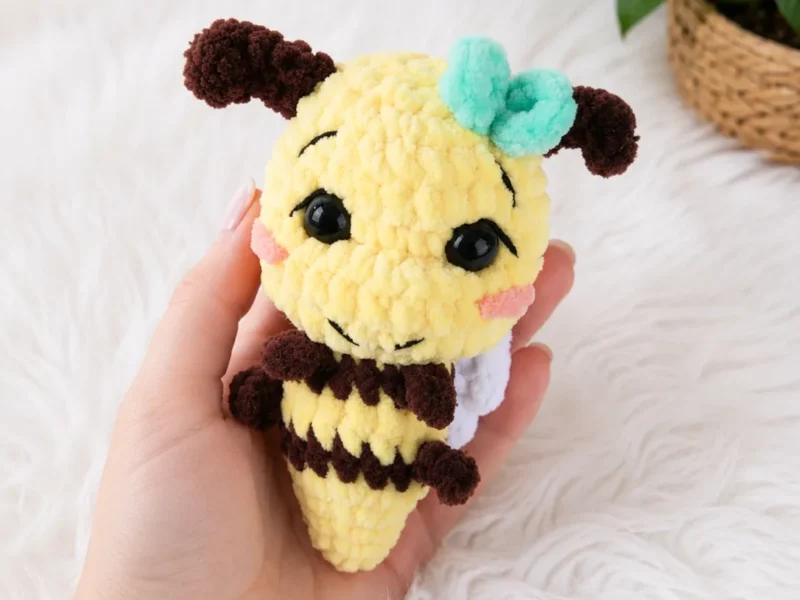
This Honeybee Keychain is a tiny, huggable amigurumi that turns a few skeins of super bulky yarn into the cutest little pollinator you've ever seen. With its round striped body, big cinched face, and delicate two-sided wings, it captures everything charming about bees without any of the sting. It's perfect for crocheters who love quick, personality-packed makes to clip onto backpacks, keys, or diaper bags, or to hand off as a cheerful little gift.
You'll work the body and head in a continuous spiral using basic single crochets and increases, then bring the face to life with a satisfying cinching technique that shapes those signature bee cheeks. Add in a bit of color-change work for the yellow-and-brown stripes, plus simple wing and antennae pieces, and you've got a project that's approachable for confident beginners but rewarding for intermediate makers too. Expect about 4 to 6 hours from first stitch to finished bee.
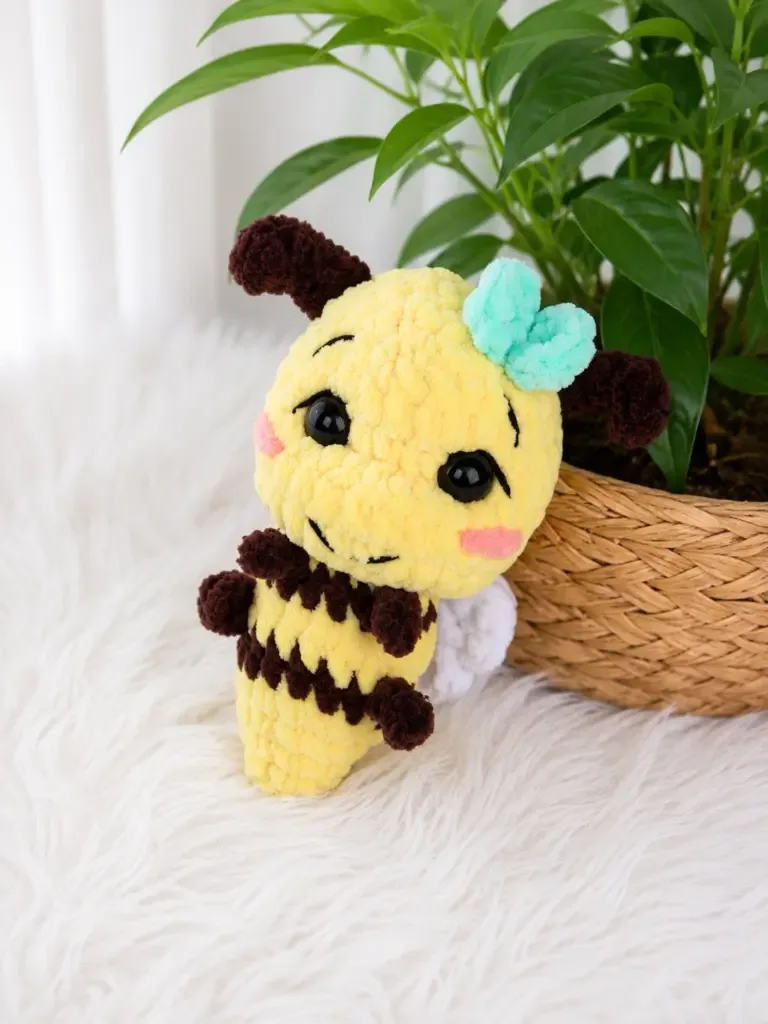
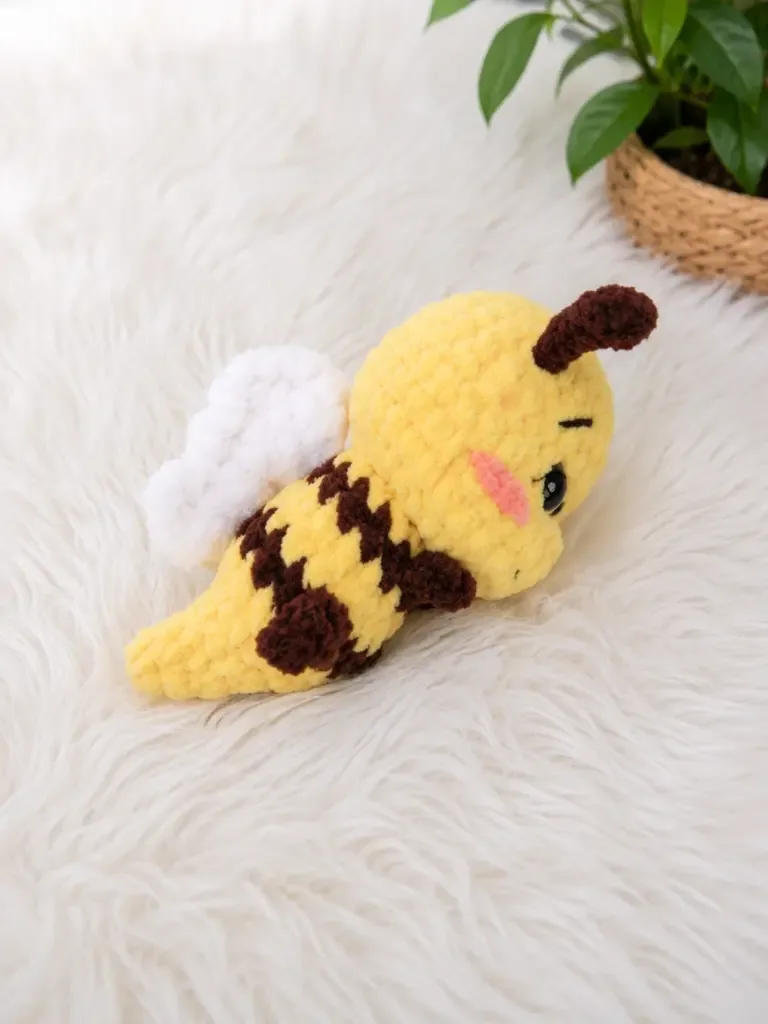
The finished honeybee sits compact in your palm, with a plump round body, a big expressive face, and wings that flutter out to the sides just like the real thing. It has that squishy, huggable quality amigurumi fans adore, and its small size makes it an ideal keychain, bag charm, or shelf-sitter. Whether you're making one for yourself or a whole hive as gifts, this little bee is guaranteed to make people smile.
- Start with the body, working single crochets in a continuous spiral while striping yellow and brown for the classic bee look.
- Increase and stuff the body evenly as you go so it holds a firm, rounded shape without gaps in the stitches.
- Move on to the head, again working in a continuous spiral and stuffing firmly before closing it up.
- Use a strong thread to cinch the face, pulling gently to shape the cheeks and set the expression.
- Embroider the eyelids, eyebrows, and mouth with black thread, then add pink or peach cheek blush for extra sweetness.
- Crochet two tiny antennae separately and attach them to the top of the head for that unmistakable bee silhouette.
- Work the wings as one two-sided piece using the larger hook, then position and stitch them onto the back of the body.
- Finish by crocheting a small bow and sewing it onto the head or body for the final charming touch.
Materials
Yarn
- Himalaya Dolphin Baby (or equivalent super bulky/chunky weight), yellow (main color, approximately 0.25 skein), brown (for legs and antennae), white (for wings)
- Thin black embroidery thread — for eyelids, eyebrows, and mouth
- Pink or peach embroidery thread — for cheek blush
Hook size
- F-5 / 4.0 mm (for body and head)
- J-10 / 6.0–7.0 mm (for wings, worked with 2 strands held together)
Safety eyes
- 10–12 mm, 1 pair
- Stuffing / fiberfill
- Strong thread or yarn — for face shaping/cinching
- Stitch markers
- Yarn needle / tapestry needle
- Scissors
Crochet Abbreviations
- ch
- Chain
- dc
- Double Crochet
- dec
- Invisible Decrease (2 stitches decreased to 1)
- inc
- Increase (2 sc in same stitch)
- MR
- Magic Ring
- sc
- Single Crochet
- sl st
- Slip Stitch
- tr
- Treble Crochet
Honeybee Keychain Crochet Pattern (Free Amigurumi)
Body
Begin at the tail end with yellow yarn.
- Round 1
4 sc in MR. (4)
- Round 2
sc, inc repeat 2 times around. (6)
- Round 3
2 sc, inc repeat 2 times around. (8)
- Round 4
3 sc, inc repeat 2 times around. (10)
- Round 5
4 sc, inc repeat 2 times around. (12)
- Round 6
2 sc, inc repeat 2 times around. (16)
- Round 7
Lower legs (brown yarn): 5 sc along body, ch 4, starting in the 2nd ch from hook work 3 sc back along the chain, 0 sc along body, ch 4, starting in the 2nd ch from hook work 3 sc back along the chain, 5 sc along body. (16) This creates the two lower legs.
- Round 8-9
(yellow yarn): sc in each st around. Work 2 rounds even. (16)
- Round 10
Upper legs (brown yarn): 4 sc along body, ch 3, starting in the 2nd ch from hook work 2 sc back along the chain, 4 sc along body, ch 3, starting in the 2nd ch from hook work 2 sc back along the chain, 8 sc along body. (16) This creates the two upper legs. Fasten off and weave in brown yarn — it is no longer needed.
- Round 11-12
(yellow yarn): sc in each st around. Work 2 rounds even. (16)Stuff the body with fiberfill now, before closing.
- Round 13
dec 8 times around. (8)Close the opening with a yarn needle and weave in ends.
Head
Begin with yellow yarn.
- Round 1
3 sc in same st repeat 8 times. (24) Work into a foundation chain or use a magic ring with 8 stitches as your base, then work 3 sc into each — see note below.
- Round 2
3 sc, inc repeat 6 times around. (30)
- Round 3-5
sc in each st around. Work 3 rounds even. (30)
- Round 6
8 sc, dec repeat 3 times around. (27)
- Round 7
sc in each st around. (27)
- Round 8
7 sc, dec repeat 3 times around. (24)Insert safety eyes between Rounds 6 and 7, with 6 stitches between the inner corners of each eye. Secure the backings firmly.
- Round 9
2 sc, dec repeat 6 times around. (18)
- Round 10
sc, dec repeat 6 times around. (12)
- Round 11
dec 6 times around. (6)Close the opening with a yarn needle.
Note on Rnd 1 of Head: The original pattern indicates working 3 sc into each of 8 stitches for a 24-stitch start. The most reliable way to achieve this is to make a magic ring, work 8 sc into it, pull it closed, then go back and work 3 sc into each of those 8 stitches to reach 24 — or simply start a 24-stitch round directly using your preferred method.
Face Shaping (Cinching)
Using a length of strong thread or yarn:
Insert the needle under the chin area and bring it out at the inner corner of the left eye (from your perspective looking at the face).
Insert the needle back in at the inner corner of the right eye and bring it out under the chin.
Pull firmly and evenly, watching the symmetry as the eyes settle into position. Use your fingers to guide them where you want them.
Tie a few secure knots, then bury the thread ends inside the head.
Antennae (make 2)
Using brown yarn, attach to the row above the eyes on each side of the head.
Join brown yarn to the head.
Ch 4. Starting in the 2nd ch from hook, work 4 sc back along the chain — this creates the bobble tip of the antenna.
Work 2 sc back along the remaining chain.
Sl st into the next stitch on the head to anchor the antenna.
Fasten off, weave in ends inside the head.
Repeat on the opposite side of the head.
Wings (make 1 — worked as a single two-sided piece)
Use white yarn held double (2 strands together) and your larger hook (J-10 / 6.0–7.0 mm). Keep tension loose and relaxed throughout.
First side (right): Ch 6, join with sl st to form a ring. All stitches of the wing are worked into this ring.
Ch 3, 2 dc into ring, ch 3, sl st into ring.
Ch 3, 1 dc into ring, 3 tr into ring, ch 4, sl st into ring.
First side of wing is complete.
Second side: Ch 4, 3 tr into ring, 1 dc into ring, ch 3, sl st into ring.
Ch 3, 2 dc into ring, ch 3, sl st into ring.
Fasten off, leaving long tails for sewing.
Bow
Ch 4. Into the first chain: work 1 dc, ch 3, sl st.
Ch 3, 1 dc, sl st.
Fasten off, leaving a tail for sewing on.
More photos
Assembly Instructions
- Step 1 Stuff the Body firmly and close it as instructed in Rnd 13.
- Step 2 Attach the Head to the open top of the Body, aligning the face forward. Sew in place using the yarn tail and a whipstitch around the join. Pull snugly so there is no gap.
- Step 3 Complete the face shaping cinch as described in the Face Shaping section above.
- Step 4 Sew the Wings onto the back of the body, centered between the upper and lower leg rows. Bury the long yarn tails inside the body.
- Step 5 Using thin black embroidery thread , embroider the eyelids, eyebrows, and a small smile onto the face.
- Step 6 Using pink or peach embroidery thread , add a few small stitches on each cheek for a rosy blush.
- Step 7 Sew the Bow onto the head or body at your preferred position.
- Step 8 Weave in all remaining ends.
Important Notes
- 💡 Keep a stitch marker moving at the start of every round in the body and head — since these are worked in a continuous spiral, it's easy to lose your place without one.
- 💡 Gauge is not critical for this project, but work your stitches on the tighter side throughout the body and head so the fiberfill stays hidden and the striped color changes look crisp — Himalaya Dolphin Baby is a chenille-style yarn that can open up at loose tension, so go down a hook size if you see gaps forming.
- 💡 Plan your black embroidery thread placement for the eyelids, eyebrows, and mouth before stuffing is complete, since it's much easier to embroider the face while you can still access the inside of the head.
- 💡 Save a length of strong thread or yarn specifically for the face shaping/cinching step — regular working yarn can stretch or slip, so a sturdier thread holds the cheek shaping securely.
- 💡 Stuff the body and head firmly but in small amounts at a time, checking the shape frequently, since a too-firm rush job can distort the smooth roundness this bee depends on.
- 💡 This pattern is written in US crochet terminology.
- 💡 For the leg chains: when you chain 4 (or 3) and work back, the very first chain closest to the hook is a turning chain and gets skipped — you start in the 2nd chain from the hook. This creates a neater, slightly rounded tip that looks like a real little leg. Keep these chains loose so they don't pull the body out of shape.
- 💡 Cinch the face before embroidering — let the eyes settle completely before you pick up your embroidery thread, since embroidering over a still-shifting face leads to asymmetry that's hard to fix afterward.
- 💡 When attaching the head, pin or hold it in place before sewing and take a moment to get the face angle exactly right — once you start sewing it's committed. Sewing in small catches around the full circumference (rather than a few large stitches) creates the most invisible seam.
Common Mistakes and Fixes
- Losing track of the beginning
Place a stitch marker in the first stitch of every round and move it up as you go — this is essential since there are no join or turning chains to guide you.
- Stitches becoming too loose, letting
Go down a hook size if your stitches look gappy, and aim for firm, snug stitches especially on the body where stuffing shows through most easily.
- Overstuffing or understuffing the body
Stuff firmly but evenly in small pinches as you go, checking that the piece holds its round shape without lumps before closing and before cinching the face.
- Pulling the face shaping thread
Cinch gradually, checking the look of the face after each pull, and secure with several small backstitches before trimming so the shaping doesn't loosen over time.
- Attaching the two-sided wings
Use pins or stitch markers to test-place both wings and antennae before sewing, comparing spacing from the center seam on each side for symmetry.
Variations
- I adore this pattern because it packs so much charm into such a small package. The striped body worked in continuous spiral rounds is endlessly satisfying — no seams, no joins, just smooth rows of yellow and brown stitches building up right before your eyes. My favorite part is definitely the face shaping step, where a few strategic cinches transform a plain round head into that unmistakable wide-eyed bee expression. It feels like sculpting with yarn! The two-sided wings worked with a larger hook and doubled strand give just the right amount of structure without extra wire or stiffening, and stitching on the tiny bow at the end adds such a sweet finishing touch. It's also incredibly satisfying to watch such a small amount of yarn — really just a quarter skein of the main color — turn into a complete, dimensional little creature. This is the kind of pattern you can start after dinner and have finished before bed, and that quick gratification is exactly why I keep coming back to make more of these buzzy little friends.
Frequently Asked Questions
What yarn weight works best for this Honeybee Keychain pattern?
This pattern calls for a super bulky/chunky weight yarn like Himalaya Dolphin Baby, which gives the bee its plump, quick-to-work texture. If you substitute yarn, aim for a similar bulky weight so your stitch counts and finished size stay accurate.
Do I need to know how to do an invisible decrease for this pattern?
Yes, this pattern uses standard single crochet increases and decreases throughout the body and head shaping. Comfort with basic amigurumi shaping techniques will make the process much smoother, especially through the face cinching step.
Why are the wings worked with a different, larger hook?
The wings use a J-10 / 6.0–7.0mm hook held with two strands together to create a slightly looser, more structured fabric that holds its shape without wire or stiffener. This contrasts with the tighter, smaller-hook stitches used on the body and head.
How do I keep the fiberfill from showing through my stitches?
Work your single crochets snugly and consider sizing down your hook slightly if your tension runs loose. Gauge isn't critical for this pattern, but tight, even stitches are key to keeping the stuffing hidden.
Can I turn this pattern into a keychain versus a plain amigurumi toy?
Absolutely — simply attach a metal keychain clip or split ring through a sturdy loop of yarn or thread at the top of the head before or after stuffing. Many makers also add a small jump ring reinforced with a few stitches for extra durability on a keyring.
Original pattern: https://amistitch.com/sweet-honeybee-keychain-free-amigurumi-crochet-pattern/
About the Author

Marisol QuinteroWho runs Crochet Obsessed, why a stitch count sits at the end of every round, how a pattern gets written here, and the things this site will never do.
More Patterns
- IntermediateNo. 01

Slouchy everyday beanie worked flat in half double crochet
Crochet beanie pattern for a slouchy everyday look worked flat with hdc rows, then seamed into a soft,…
- IntermediateNo. 02
Crochet amigurumi doll with dress, shoes, and hat
Crochet amigurumi doll pattern with dress, shoes, and hat details for a soft, huggable keepsake you build one…
- IntermediateNo. 03
Chunky moss stitch crochet sweater with raglan-free shoulders
Chunky crochet sweater pattern using moss stitch, worked flat with a 10mm hook for a soft, fast, cool-weather…


