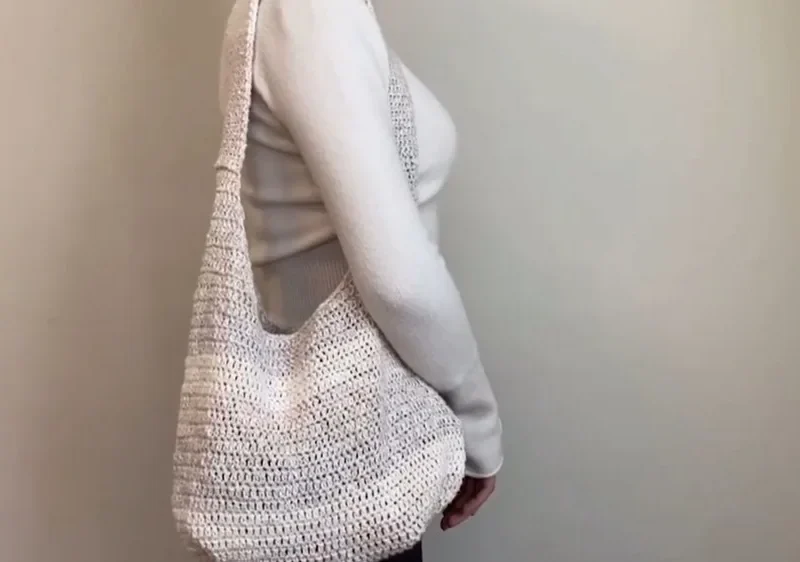
- LevelIntermediate
- Time4-6 hours
- Hook5.5 mm
- YarnLight (3)
About This Pattern
This one has that satisfying, watch-it-grow energy. You start with a flat little oval and just keep circling outward until suddenly you're holding the bones of a real bag. There's a calm, steady rhythm to it, the kind of project you can pick up between errands and put down without losing your place.
Your hands will spend most of their time on double crochet, round after round, with the increases doing the shaping work at the corners. Later you shift gears into half double crochet for the straps, which feels like a nice change of pace after all that base building. Nothing fussy here, just consistent, repeatable motion.
Picture this bag hanging on a hook by the door, cotton yarn giving it enough body to hold its shape without stiffening up. It looks equally at home slung over a kitchen chair or sitting on a shelf next to a stack of books. Simple, useful, a little proud of itself.
There's something grounding about a project that doesn't ask you to follow a chart or count sixteen different stitch types. You get to watch a flat oval become a dimensional bag through nothing but steady increases, and that visible progress keeps you moving round after round.
- Chain a foundation length and work double crochet around it, increasing at both ends to form an oval base.
- Keep working rounds outward, doubling the increases at each corner so the base grows evenly.
- Mark stitch points on opposite sides of the bag to show where each strap will begin.
- Work each strap as a flat panel in half double crochet, then double crochet rows, between the marked points.
- Finish each strap edge with a modified single crochet for a firmer, cleaner edge.
- Secure the ends of the first strap, then repeat the entire strap process for the second one.
- Join both strap ends together with a slip stitch seam, then cut and secure the yarn.
On the desk
- 5.5 mm crochet hook (size I)
- Scissors
- Light (3) weight cotton yarn (which is sturdy and durable for a bag)
Stitch shorthand
- ch — chain
- st — stitch
- sl st — slip stitch
- sc — single crochet
- hdc — half double crochet
- dc — double crochet
- inc — increase
Grow-your-own crochet tote bag with matching straps
Bag Body
- Round 1
Begin with a slip knot and chain 20 (or the length you desire for the base of your bag); chain two more (for turning) and make two double crochets in the third chain from the hook; skip the first two chains, double crochet all the way until the last stitch, do not double crochet into the last stitch; make four double crochets into the last chain to turn the corner, creating two increases; work double crochets along the opposite side of the foundation chain, and make two double crochets into the first stitch from the beginning of the row; slip stitch into the top of the first double crochet to join the round.
- Round 2
Chain two and double crochet into every stitch until you reach the corners with increases; at each corner, place two double crochets into each of the four increase stitches from the previous round (eight increases in each corner).
- Round 3
Continue working double crochets around, doubling the number of increases at each corner (Row 3 will have sixteen increases in each corner); follow this pattern until the base is as large as you prefer.
- Round 4
Chain two and double crochet in each stitch around without increasing; slip stitch to join each round; repeat this round until the bag reaches the desired height.For the slouchy portion leading to the straps, count the total number of stitches around the bag, subtract four from this total, and divide by 6.8 (rounding as necessary) to determine the number of stitches between each strap's starting points; mark stitches on each side of the bag where the straps will begin, ensuring the same number of stitches are between each set of markers.
Strap
Make 2- Round 1
Insert hook at the marked stitch; chain one and work half double crochet stitches to the other marked stitch, creating a panel.
- Round 2
Chain one, turn, skip the first half double crochet, and continue with double crochets; place a half double crochet in the second to last stitch; repeat these rows until the panel reaches the desired strap width.
- Round 3
Work a modified single crochet (thermal stitch): chain one, go into the back loop of the stitch and the loop from the previous row, yarn over, and pull through both loops, then single crochet to finish the stitch; continue this pattern, counting stitches to maintain the same width across the strap; repeat the strap pattern until it reaches your desired length.
When finished, create a slip stitch and try fitting objects into the bag to ensure it is the right size.
More shots
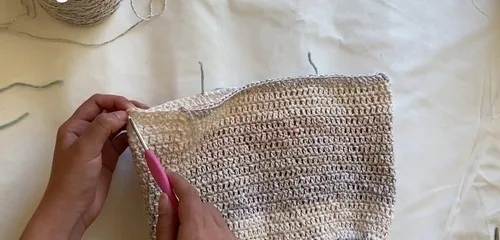
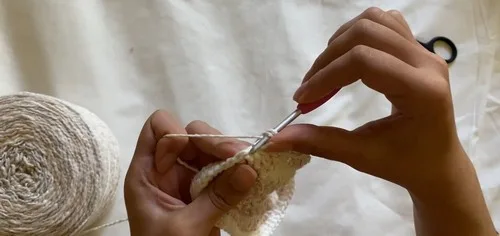
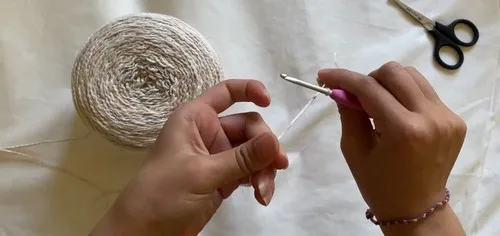
Where it goes
- A grocery run tote that holds its shape thanks to the sturdy double crochet base and cotton fiber.
- A beach or pool bag, paired with a rolled towel and a paperback that fits easily inside the wide body.
- A project bag for your next crochet or knitting work in progress, with the straps long enough to go over one shoulder.
- A market or farmers market carrier, roomy enough for produce and light enough that the cotton yarn does not weigh you down.
Care
Hand wash the finished bag in cool water since cotton can lose shape if agitated too much in a machine.
Lay it flat to dry rather than hanging it wet, so the straps and base don't stretch under their own weight.
Once dry, gently reshape the base by hand and store the bag stuffed with tissue or a folded towel to hold its form.
Assembly
- Step 1 To complete the strap, chain one at the end and pull tightly to secure.
- Step 2 Repeat all steps to create the second strap, ensuring it's the same length as the first strap.
- Step 3 To connect both straps, start with a slip knot, place the ends of the straps together, and slip stitch across to join them securely.
- Step 4 Chain two, cut the yarn, and pull tightly to finish.
Easy to get wrong
Losing count at the corner increases
Place a stitch marker in the first stitch of each corner increase group so you can find it again on the next round. Recount the increase stitches before moving on rather than after.
Uneven strap marker placement
Measure the stitch count between markers on each side before starting the straps, not just by eye. Uneven spacing here throws off how the straps hang once the bag is worn.
Tension shift between double crochet and half double crochet
The strap panels use half double crochet while the body uses double crochet, and a tighter or looser hand on one can make the transition visible. Work a few practice rows if your gauge tends to drift between stitch types.
Listener questions
Why does my bag base look wavy instead of flat?
A wavy base usually means the corner increases have fallen behind what the round actually needs, so the edge starts ruffling. Recount your corner stitches against the previous round and add increases evenly on both sides.
How do I know where to place the strap markers?
The pattern has you count your total stitches around the bag, subtract four, then divide to find even spacing on each side. Place matching markers on both sides so the straps start at mirrored points.
Do both straps need to be worked separately?
Yes, each strap is its own panel worked between its own set of markers, then the two are joined together at the end with a slip stitch seam. Keeping careful track of your rows helps both straps come out the same length.
Is the cotton yarn necessary or can I substitute another fiber?
Cotton gives this bag the structure and stitch definition that make the corner increases easy to see and the base hold its shape. A different fiber in the same light weight category should still work with the same hook, but expect a softer, less structured result.
Original pattern: https://crocheteverything.com/say-goodbye-to-saggy-bag-and-try-out-this-crochet-simple-bag-tutorial-easy-to-make-doesnt-sag/
About the Author

Marisol QuinteroWho runs Crochet Obsessed, why a stitch count sits at the end of every round, how a pattern gets written here, and the things this site will never do.
More Patterns
- IntermediateNo. 01

Slouchy everyday beanie worked flat in half double crochet
Crochet beanie pattern for a slouchy everyday look worked flat with hdc rows, then seamed into a soft,…
- IntermediateNo. 02
Crochet amigurumi doll with dress, shoes, and hat
Crochet amigurumi doll pattern with dress, shoes, and hat details for a soft, huggable keepsake you build one…
- IntermediateNo. 03
Chunky moss stitch crochet sweater with raglan-free shoulders
Chunky crochet sweater pattern using moss stitch, worked flat with a 10mm hook for a soft, fast, cool-weather…


