- LevelIntermediate
- Time10-14 Hours
- Hook5.0 mm
- YarnWorsted
About This Pattern
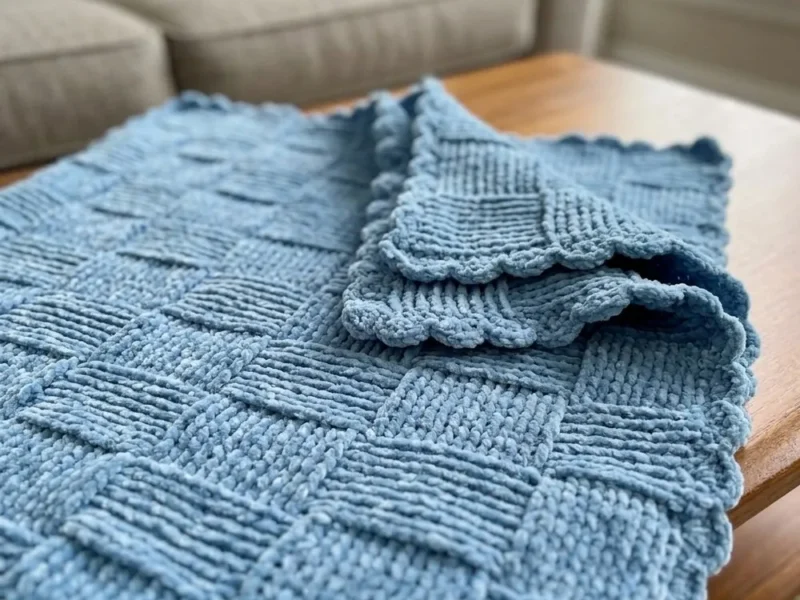
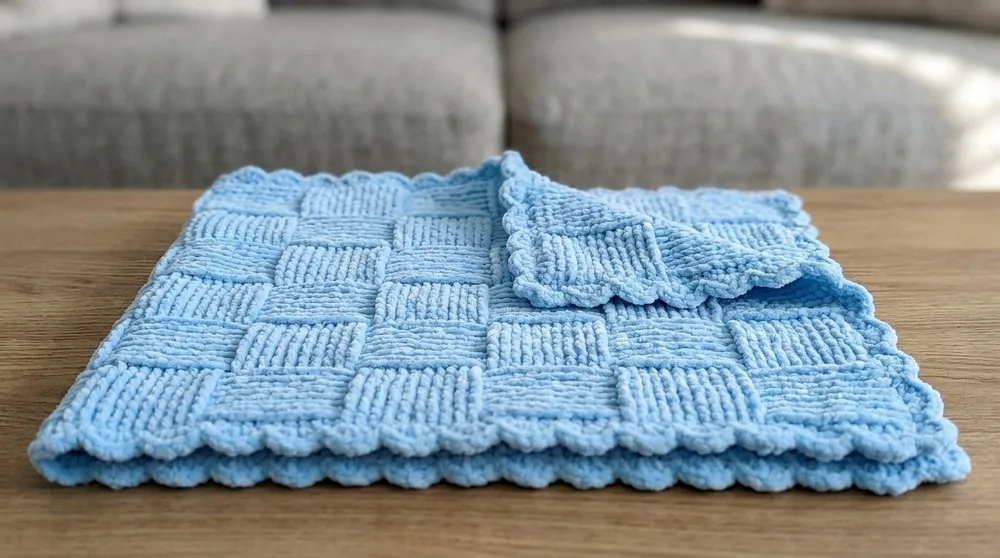
This pattern turns three skeins of Bernat Baby Velvet into a plush, toddler-sized blanket covered in the classic basket weave stitch. Raised columns of post stitches cross over one another to form woven-looking squares, and a soft scalloped border wraps the whole thing in a gentle frill. It's the kind of make that looks far more complicated than it is, which makes it perfect for anyone who wants an impressive handmade blanket without wrestling with a chart or a complicated colorwork plan.
The blanket shown measures approximately 32″ x 34″, which means it's big enough to tuck around a small person in a crib, stroller or car seat, but small enough to actually finish. Gauge isn't critical here, though it will affect both your finished size and how much yarn you use. Velvet gives it a heavy, silky drape and a pile that catches the light across every raised block. Folded over the arm of a sofa it reads as decor; handed to a new parent it reads as an heirloom. The stitch counts adapt easily if you want a bigger throw.
- Chain a multiple of 11 × (odd number) + 4 — 125 chains for the sample — then work Row 1 in dc for a straight foundation.
- Work Row 2, alternating 11 fpdc and 11 bpdc across, ending with a fpdc section and 1 dc in the top of the turning ch.
- Repeat Row 2 through Row 8, keeping the post stitches lined up so each block is 8 rows tall.
- Ch 1 without turning and work the single crochet foundation round: 1 sc per row-end, 3 sc in each corner, 1 sc in each st across the top and bottom, sl st to join.
- Add the scalloped edge — 7 dc scallops along the sides, 5 dc scallops across the ends, sl st at the corners.
- Join with a sl st into the first sc, fasten off, and weave in every tail with your tapestry needle.
- Launder the finished blanket per your yarn label and let the velvet pile settle before wrapping it up.
Materials
Yarn
- Bernat Baby Velvet (Color shown: Blue), approximately 3 skeins
- Alternative Yarn Suggestions: Bernat Future Hope, or any acrylic/soft medium-weight yarn
Hook
- 5.0 mm (US H-8) crochet hook
Tools
- Scissors
- Tapestry needle (for weaving in ends)
- Stitch markers (helpful for marking the first and last stitch of each row)
Crochet Abbreviations
- ch
- chain
- st(s)
- stitch(es)
- dc
- double crochet
- fpdc
- front post double crochet
- bpdc
- back post double crochet
- sc
- single crochet
- sl st
- slip stitch
- sk
- skip
- rep
- repeat
Free Crochet Basket Weave Blanket Pattern in Soft Velvet
Foundation Row
Foundation chain Ch a multiple of 11 × (odd number) + 4 (e.g., ch 125 for blanket size).
Why the multiple Foundation chain must be a multiple of 11 (times an odd number) plus 4 (e.g. 11×11+4=125; in the sample, 125 chains). Getting this starting multiple right is what keeps the blocks even and the border smooth.
- Row 1
In the 4th ch from hook, dc. Dc in each ch across. (Turning ch does not count as dc.)End of row Ch 2, turn.
Basket Weave Pattern — Block Section (Main Body)
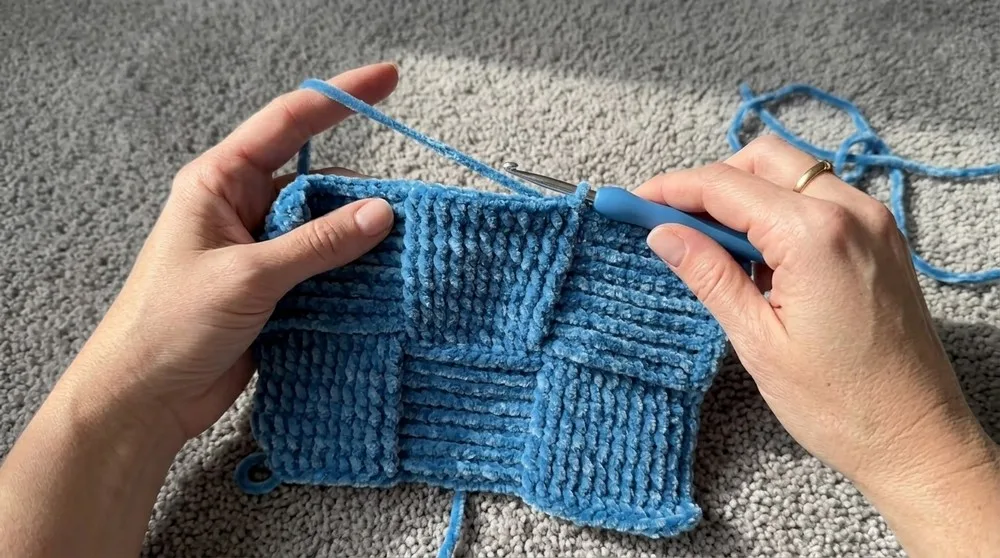
How it works The basket weave is made by alternating sections of 11 front post double crochets (fpdc) and 11 back post double crochets (bpdc) for 8 rows, then swapping the sections for a woven effect.
- Row 2
First 11 sts: Fpdc in next 11 sts. Next 11 sts: Bpdc in next 11 sts. Alternate: Continue fpdc 11, bpdc 11 across. End with fpdc section of 11 sts.End of row Dc in top of turning ch.
Turn * Ch 2, turn. - Rows 3-8
Repeat row 2, keeping fpdc and bpdc lined up (work post sts as they appear beneath).Counting rows For each section of 8 rows, count the “ridges” to identify when it’s time to change block direction. Each “ridge” counts as 1 row, so count carefully.
To switch direction
Next 8-row set Begin each section with the opposite post stitch: If the last 8-row block began with fpdc, start this section with bpdc for 11 sts, then fpdc for next 11, alternating as before across the row.
Keep alternating Continue alternating every 8 rows to create the basket weave.
Sample blanket For the sample blanket, make 13 blocks vertically (8 rows each) for approximately 32–34″ length.
Border — Single Crochet Foundation Round
Finish the body When the blanket is the desired length, complete the last dc row.
Set up Ch 1, do NOT turn.
Down the sides Working around blanket edges: 1 sc per row-end down the side.
At corners 3 sc in each corner.
Top and bottom 1 sc in each stitch across the top and bottom.
All the way around Continue all the way around, adjusting so edge is flat.
Join Sl st to first sc to join.
Scalloped Edge
On sides (Sc, sk 1 st, 7 dc in next st, sk 1 st) – rep across.
On ends (Sc, sk 1 st, 5 dc in next st, sk 1 st) – rep across for a less ruffled look (since the ends are shorter).
At corners Slip stitch into the corner instead of single crochet for a smoother finish.
All the way around Continue repeating the above pattern around, adjusting as necessary so scallops fit evenly (add extra sc or sk fewer stitches at the end if needed).
At finish Join with a sl st into first sc, fasten off, and weave in all ends.
More photos
Important Notes
- 💡 Blanket size shown: approx. 32″ x 34″. For the sample blanket, make 13 blocks vertically (8 rows each) for approximately 32–34″ length.
- 💡 Multiples: Foundation chain must be a multiple of 11 (times an odd number) plus 4 (e.g. 11×11+4=125; in the sample, 125 chains). Ensure you have the correct starting multiple to keep blocks even and the border smooth.
- 💡 Gauge is not critical but will affect finished size and yarn usage.
- 💡 Tension: Crochet velvet tightly to prevent worming. If stitches are too loose, consider going down a hook size.
- 💡 Always end each row with 1 dc in the top of the turning chain for tidy edges.
- 💡 Adjust the border as needed so the scallops fit — don't be afraid to fudge a little at the corners for a neat look.
- 💡 Use a 5.0 mm (US H-8) hook with a shallow, smooth head. Velvet chenille splits easily on sharply pointed hooks, and a smooth throat helps you slide around the posts without snagging the pile.
- 💡 Place a stitch marker in the first and last stitch of every row for the first few repeats. Velvet swallows stitch definition, and losing an edge stitch each row is the single easiest way to end up with a crooked blanket.
- 💡 Wind your three skeins into cakes before you start, or at least pull from the center. Velvet tangles into a stubborn nest if it rolls loose on the floor, and joining a new skein mid-block is much easier when the yarn feeds smoothly.
- 💡 Join new skeins at the end of a row, never in the middle of a raised column. A join hidden under the border or at the side edge disappears completely, while a mid-row join in velvet almost always shows as a bump.
- 💡 Lay the blanket flat and check your width after the foundation row and again after your first full 8-row block. Post stitches pull the fabric narrower than the foundation row suggests, so this is the moment to add or remove whole blocks — not twenty rows later.
- 💡 Weave in ends with a large-eye tapestry needle and split the yarn as you go, running tails through several stitches in two different directions. Velvet is slippery, and ends that are simply threaded straight through will work themselves loose in the wash.
Common Mistakes and Fixes
- Working a post stitch around the wrong
A front post stitch goes around the post from the front, back, then front again; a back post stitch goes around from the back, front, then back. Velvet hides your work, so pinch the post between your fingers and feel it before inserting your hook. If a whole row looks flat, check the very first one — the rest usually followed it.
- Skipping or doubling stitches under
Each post stitch replaces exactly one stitch of the row below — never work an extra stitch into the top of the stitch you just wrapped. Count your stitches at the end of every row for the first few repeats, and remember to finish each row with 1 dc in the top of the turning chain so your edges stay tidy and your count stays true.
- Working velvet too loosely, which blurs
Velvet wants a firmer hand than most yarns — this pattern is worked tightly on purpose so loops can't migrate out of finished stitches. Keep your tension even from row to row rather than loose in some places and tight in others, and if your stitches still look gappy and slack, go down a hook size instead of trying to yank them tighter as you go.
- Velvet worming — loops popping out
Worming comes from loose, uneven tension and from yanking the yarn while working. Keep your velvet stitches tight and consistent, avoid frogging velvet more than necessary since the pile abrades, and launder the finished blanket following your yarn label so the fibers settle back into place.
- Uneven scallops that bunch on the sides
The single crochet foundation round is what fixes this, not the scallops themselves. Space that round evenly along the row ends before you begin the scalloped edge, adjusting so the edge lies flat, and give each corner 3 sc so it turns without pulling in. The pattern also uses 7 dc scallops on the sides and only 5 dc on the ends for exactly this reason.
Frequently Asked Questions
Do I really need velvet yarn, or can I substitute something else?
You can absolutely substitute. Bernat Future Hope, or any acrylic or soft medium-weight yarn, will work with the same 5.0 mm hook. Gauge isn't critical for this pattern, but it does change your finished size and yarn usage, so make a small swatch first — firmer yarns make the post stitches denser and you may want a different hook size for better drape.
Is basket weave stitch hard for a beginner?
It's a step up from a plain blanket but very manageable if you're comfortable with double crochet. The only new skill is working around the post of the stitch below instead of into the top, and after two or three rows your hands learn the rhythm. The hardest part is remembering to swap the sections after every 8 rows.
Why does my velvet blanket look fuzzy and squiggly in places?
That's worming, and it's common with chenille-style velvet yarn — loops migrate out of stitches when the fabric is worked too loosely. The pattern's advice is to crochet velvet tightly to prevent it, and if your stitches are still too loose, go down a hook size before you get much further.
Can I skip the scalloped edge?
Yes, though I'd still work the single crochet foundation round around all four sides, because that's what squares up the edges and hides the row ends. From there you can stop for a clean modern look, or add the scallops for a softer, more traditional finish. A contrast color border is a lovely third option.
Original pattern: https://redagapeblog.com/free-crochet-pattern-for-classic-basket-weave-blanket/
About the Author

Marisol QuinteroWho runs Crochet Obsessed, why a stitch count sits at the end of every round, how a pattern gets written here, and the things this site will never do.
More Patterns
- IntermediateNo. 01

Slouchy everyday beanie worked flat in half double crochet
Crochet beanie pattern for a slouchy everyday look worked flat with hdc rows, then seamed into a soft,…
- IntermediateNo. 02
Crochet amigurumi doll with dress, shoes, and hat
Crochet amigurumi doll pattern with dress, shoes, and hat details for a soft, huggable keepsake you build one…
- IntermediateNo. 03
Chunky moss stitch crochet sweater with raglan-free shoulders
Chunky crochet sweater pattern using moss stitch, worked flat with a 10mm hook for a soft, fast, cool-weather…


