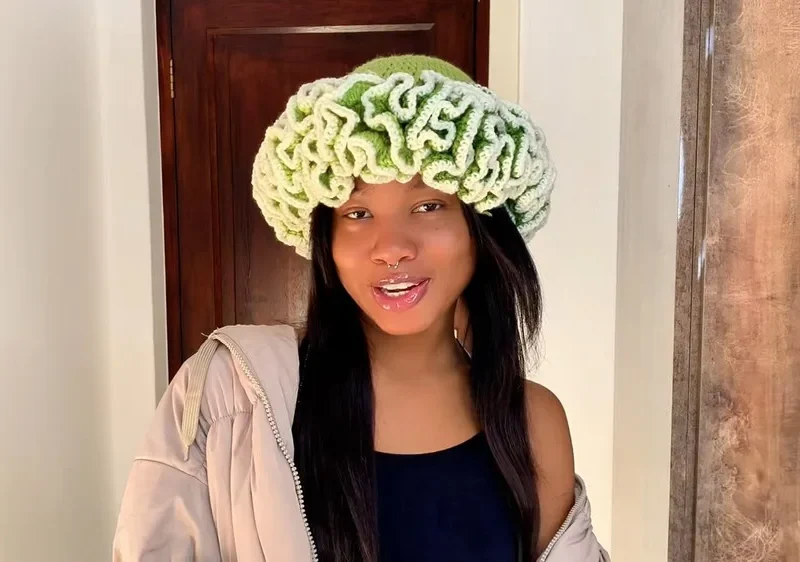
- LevelBeginner
- Time3-5 Hours
- Hook3.5 mm
- YarnDK
About This Pattern
This Ruffled Rocket Hat is proof that a few rows of extra-full double crochet can transform a plain beanie into something truly eye-catching. Worked from the crown down in a rich lime or olive shade with cream accents, the thick cascading ruffles stack up around the brim for playful, sculptural texture. It's perfect for crocheters who want a project that photographs beautifully but doesn't demand advanced skills—just confidence with basic stitches and a little patience for the ruffle rows.
The finished hat sits with a fitted crown and a dramatically ruffled edge that can be tuned from subtle to over-the-top depending on how many ruffle rows you work. It's soft, bouncy, and full of movement thanks to the DK weight yarn, making it a cozy everyday accessory or a fun handmade gift for anyone who loves a little extra flair in their wardrobe.
- Start at the crown with a small magic ring worked in joined rounds using the smaller hook.
- Increase evenly round by round, checking your stitch count against the reference after each increase round.
- Once increases are complete, work the straight Body section to your desired hat length.
- Prepare the brim with a setup round that positions your stitches for the ruffles ahead.
- Stack Ruffle Row 2 and Ruffle Row 3 on top, building thicker, cascading layers of ruffled texture.
- Optionally add a cream trim round for a soft contrasting edge along the outer ruffle.
- Weave in all ends neatly along the base of the ruffles to keep the brim clean and bulk-free.
Materials
- ~200g DK weight yarn (e.g., lime, olive, or chosen shade)
- ~50–60g DK weight yarn (e.g., cream)
- Crown & first ruffle row: 3.5 mm crochet hook
- Second, third, and trim rows: 4 mm crochet hook
- (Optional) 3 mm crochet hook for weaving in ends
- Tapestry needle (for weaving ends)
- Scissors
Crochet Abbreviations
- ch
- chain
- sl st
- slip stitch
- sc
- single crochet
- dc
- double crochet
- st(s)
- stitch(es)
- inc
- increase (2 dc in 1 st)
Easy Ruffle Hat Crochet Pattern for Beginners
Crown
With main color and 3.5 mm hook:
Set-up
Ch 3.
- Round 1
11 dc into first ch (the one closest to slip knot), join with sl st to top of ch-3. (12 dc including initial ch-3)
Increases
- Round 2
Ch 3 (counts as dc), 1 dc in same st, 2 dc in each st around. Join with sl st to top of ch-3. (24 dc)
- Round 3
Ch 3, 1 dc in same st, (1 dc in next st, 2 dc in next st) repeat around. Join with sl st. (36 dc)
- Round 4
Ch 3, 1 dc in same st, (1 dc in each of next 2 sts, 2 dc in next st) repeat around. Join with sl st. (48 dc)
- Round 5
Ch 3, 1 dc in same st, (1 dc in each of next 3 sts, 2 dc in next st) repeat around. Join with sl st. (60 dc)
- Round 6
Ch 3, 1 dc in same st, (1 dc in each of next 4 sts, 2 dc in next st) repeat around. Join with sl st. (72 dc)
Body
- Rounds 7-15
Ch 3, dc in each st around. Join with sl st. (72 dc per round, 9 rounds for adult size)(Hat body can be adjusted by adding/subtracting rounds as desired for length)
Brim Preparation
Switch to 4 mm hook .
- Round 16
Ch 1, sc in each dc around. Join with sl st. (72 sc) (Optional: Repeat this round for wider base)
Ruffles
Switch back to main color, 3.5 mm or 4 mm hook as preferred.
Ruffle Row 1
- Ruffle Row 1
Ch 3, 2 dc in same st, 3 dc in each st around. Join with sl st to top of ch-3.
Ruffle Row 2
- Ruffle Row 2
Ch 3, 2 dc in same st, 3 dc in each dc around. Join with sl st.(Switch to 4 mm hook for fuller ruffles if desired.)
Ruffle Row 3
- Ruffle Row 3
Ch 3 , (3 dc in same st, 4 dc in each st around). Join with sl st.On this row, place 4 dc in each st for extra fullness.
Fasten off and weave in main color ends if not performing cream border.
Optional Ruffle Edge with Cream
- Trim Round
With accent color and 4 mm hook, attach cream color to any st with a sc. Sc in each st around. Join with sl st and fasten off.Weave in all ends with the tapestry needle.
Stitch Counts Reference
- Round 1
12 dc
- Round 2
24 dc
- Round 3
36 dc
- Round 4
48 dc
- Round 5
60 dc
- Rounds 6+
72 dc in body & brim (rounds 6 and onward)
More photos
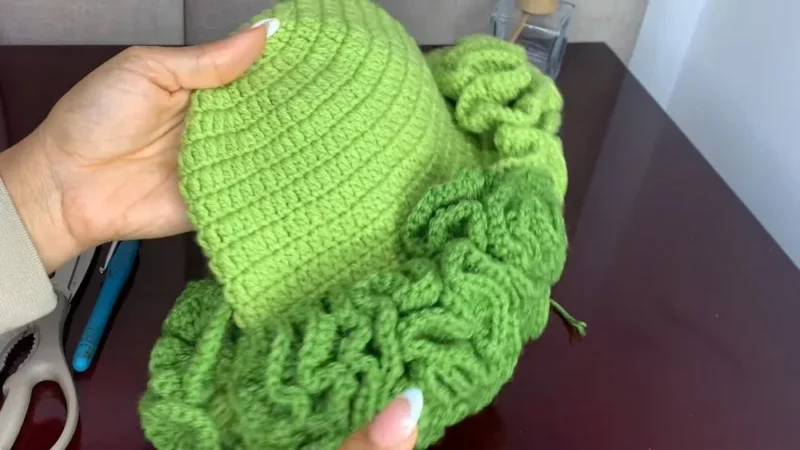
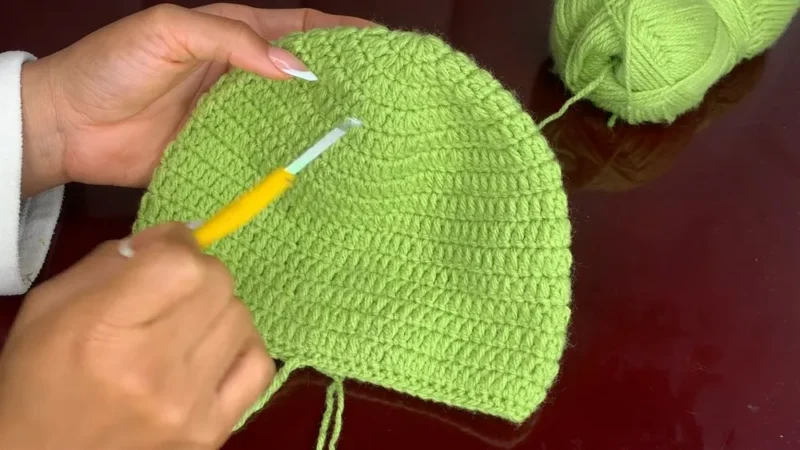
Important Notes
- 💡 Place a stitch marker at the beginning of each round from the very first Crown round onward; with joined rounds, it's easy to lose track of where you started.
- 💡 Check your stitch count against the Stitch Counts Reference after every increase round in the Crown—catching an error early saves you from unraveling ruffle rows later.
- 💡 Choose a soft, bouncy DK yarn with good drape rather than a stiff cotton—the ruffles rely on movement and softness to cascade properly.
- 💡 For a firmer, more structured brim, work an extra round of single crochet before starting your ruffles, or thread a thin elastic through the Brim Preparation round.
- 💡 If you want a subtler ruffle, reduce the number of dc worked into each stitch during the Ruffle Rows or simply omit the Optional Ruffle Edge with cream.
Common Mistakes and Fixes
- Uneven increases during the Crown
Place a stitch marker at the start of each round and count carefully after every increase round—compare your total to the Stitch Counts Reference before moving on.
- Forgetting that the turning chain
Always treat the ch-3 as your first dc when counting stitches and when joining at the end of each round—slip stitch into the top of that chain, not the first actual stitch.
- Working the ruffle stitches
Keep your tension relaxed through the Ruffle Rows and choose a soft, bouncy DK yarn with good drape rather than a stiff or scratchy fiber.
- Leaving yarn tails unwoven
Weave ends in flat along the base of the ruffles rather than through them, and trim tails close using a tapestry needle for a clean finish.
- Not adjusting the Body length before
Try the hat on (or measure against head circumference) before the Brim Preparation round and add or remove repeats in the Body section as needed.
Variations
- This hat is basically an invitation to play with color and texture, so don't be afraid to experiment! For a bold ombré look, start your crown in a deep olive and gradually shift to a bright lime by the time you hit the ruffle rows— Mandala or Scheepjes Colour Crafter both transition beautifully in DK weight. Want a softer, more subtle brim? Simply work two ruffle rows instead of three, or reduce the number of dc stitches worked into each ruffle stitch—this instantly calms down the drama without losing the effect. For a bolder, more voluminous look, add a fourth ruffle row or work extra dc into each stitch for an almost tutu-like brim. Color blocking is another fun direction: keep the crown and body in one solid shade, then work each ruffle row in a completely different color for a striped, cascading rainbow effect—think sunset oranges into pinks, or ocean blues into teals. If you're making this for a child, simply work fewer repeats in the Body section before starting your ruffles to shorten the overall length, and consider a smaller starting hook if you want a tighter, more structured crown. For a wintery version, swap the cream trim for a metallic or self-striping yarn like Reflective for a subtle sparkle in the optional Ruffle Edge. You can also skip the cream trim altogether and let the final ruffle row be your natural finishing edge for a more streamlined look. Themed color palettes—like deep reds and golds for a festive statement piece, or pastel lilac and mint for spring—work wonderfully here since the ruffles themselves do most of the visual heavy lifting.
Frequently Asked Questions
What yarn weight works best for this ruffle hat?
DK weight yarn is ideal since it gives the ruffles enough body to hold their shape while still draping softly. Look for a yarn with a bit of bounce rather than a stiff, tightly plied cotton for the best cascading effect.
Can I make this hat bigger or smaller?
Yes—the pattern is designed to be adjustable by working more or fewer repeats in the Body section before you begin Brim Preparation and the Ruffle Rows. This lets you customize the length for a child, teen, or adult without changing the crown construction.
How do I make the ruffles less dramatic?
Simply work fewer ruffle rows overall, or reduce the number of double crochet stitches worked into each stitch during the Ruffle Rows. Both adjustments calm down the volume while keeping the same overall construction.
Is this pattern really beginner-friendly?
Yes—it only uses double crochet, basic increases, and joined rounds, all worked from the crown down. The main things to watch are keeping your increases even and remembering the ch-3 counts as your first stitch each round.
Original pattern: https://redagapeblog.com/crochet-easy-ruffle-hat/
About the Author

Marisol QuinteroWho runs Crochet Obsessed, why a stitch count sits at the end of every round, how a pattern gets written here, and the things this site will never do.
More Patterns
- IntermediateNo. 01

Slouchy everyday beanie worked flat in half double crochet
Crochet beanie pattern for a slouchy everyday look worked flat with hdc rows, then seamed into a soft,…
- IntermediateNo. 02
Crochet amigurumi doll with dress, shoes, and hat
Crochet amigurumi doll pattern with dress, shoes, and hat details for a soft, huggable keepsake you build one…
- IntermediateNo. 03
Chunky moss stitch crochet sweater with raglan-free shoulders
Chunky crochet sweater pattern using moss stitch, worked flat with a 10mm hook for a soft, fast, cool-weather…


