- LevelBeginner
- Time1-2 Hours
- Hook3 mm
- Yarn4 Ply / Fingering
About This Pattern
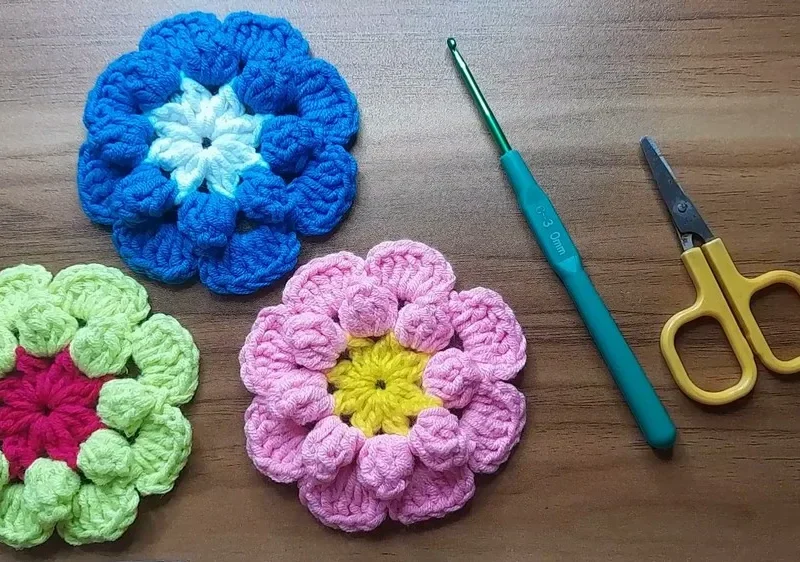
This little crochet flower is one of those patterns you'll find yourself making again and again once you've got the hang of it. Built up in three simple rounds, it starts as a tiny ring and blossoms into a full, dimensional flower with a bobbly popcorn-stitch center and soft, rounded petals. It's perfect for beginners who've mastered the basics of chains and double crochet and are ready to try something with a little more texture and shape.
The techniques here are wonderfully approachable: you'll work a foundation ring, cluster stitches into a starting flower base, then build a raised popcorn stitch for the middle round before finishing with simple shell-style petals. Nothing here requires advanced shaping or counting gymnastics — just following the ch-2 spaces around each round. Expect to spend about 30 to 45 minutes once you're comfortable with the rhythm, making it an ideal quick project for an evening on the couch.
The finished flower is small and sweet, roughly the size of a large coin to a small cookie, with a nicely domed, textured center and soft petals that curl slightly outward. It has a lovely handmade charm that looks equally at home pinned to a hat, stitched onto a bag, or gifted as a little something extra tucked into a card. Made in soft milk cotton, it feels gentle and substantial in the hand — a tiny project with a big payoff.
- Chain a small ring and work eight clustered stitch groups around it to form the flower's foundation base.
- Join the round and admire the eight little ch-2 spaces that will anchor the next layer.
- Attach a new color if you'd like contrast, then work a raised, bobbled stitch into each of those spaces.
- Chain between each raised stitch to build a ring of evenly spaced bumps around the center.
- Close the round and settle into the rhythm of the third and final layer.
- Slip stitch into each chain space and build a cluster of stitches to form a rounded petal.
- Repeat the petal cluster all the way around until every space holds its own soft petal.
- Fasten off, weave in your ends neatly, and trim away any excess yarn to finish.
Materials
- Milk cotton 4 ply yarn in any color of your choice
- 3 mm crochet hook
- Scissors
Crochet Abbreviations
- sl st
- slip stitch
- ch
- chain
- dc
- double crochet
- tog
- together
Easy crochet flower pattern for beginners with popcorn petals
Main Pattern
- Round 1
Start with a slip knot. Chain 5, join with a slip stitch to the first chain to form a ring. Chain 3 (counts as first dc), make 1 dc into the center of the ring. Chain 2, then make 2dc tog in the center of the ring, pulling the yarn through all loops on the hook. Chain 2 and repeat the 2dc tog in the center, followed by ch 2, four more times. Finish the round with a slip stitch to the top of the first chain. (8 groups of 2dc tog and ch-2 spaces)Attach a new color of yarn with a slip knot before starting Round 2.
- Round 2
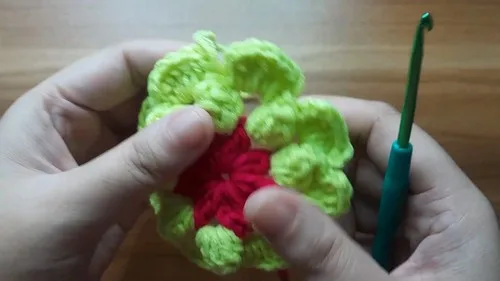
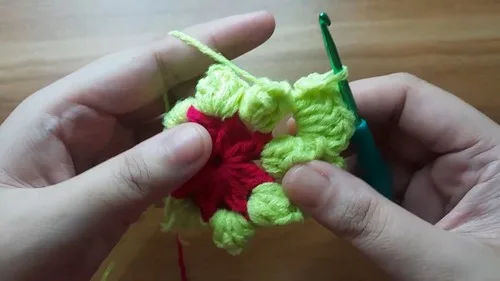
Insert yarn into any ch-2 space from the previous round. Chain 3 (counts as first dc), make 4 more dc into the same ch-2 space (5 dc total including starting ch-3). Pull the loop on the hook a bit longer, insert the hook into the first dc of the group (or the top of the starting ch-3), and pull the dropped loop through to complete the popcorn stitch. Chain 3. Continue making popcorn stitches followed by ch-3 in each ch-2 space around. Finish the round with a slip stitch to the back side of the first popcorn stitch.
- Round 3
Slip stitch into the next ch-3 space. Chain 2, make 5 dc into the same ch-3 space, chain 2, then slip stitch into the same ch-3 space to form the first petal. Continue this pattern (sl st into next ch-3 space, ch 2, 5dc, ch 2, sl st) for each ch-3 space around to create the petals. After completing all the petals, finish with a chain 2 and a slip stitch into the same chain space.
More photos
Assembly Instructions
- Step 1 Secure and cut the yarn, weave in ends, and trim any excess yarn.
Important Notes
- Use a stitch marker to mark your first stitch in each round, since there's no formal turning chain to guide you and it's easy to lose your place after the join.
- Milk cotton yarn has a bit of natural give, so keep your tension slightly firmer than usual to help the popcorn stitch hold its raised, domed shape.
- Block your finished flower lightly by pinning the petals into place and misting with water — this helps the petals lie flat and open rather than curling inward.
- A 3mm hook is specified for a nice tight fabric that shows off the popcorn texture; sizing up will make the flower larger but slightly looser and less defined.
- Keep your stitch tension consistent through the 2dc-tog cluster in Round 1, since this foundation shapes how evenly your petals will sit in Round 3.
Common Mistakes and Fixes
- Losing count of the eight ch-2 groups in Round 1
Pause after each 2dc-tog and ch-2 repeat to count your groups on the ring — you should have exactly eight before joining with a slip stitch.
- Pulling the popcorn loop too tight in Round 2
Deliberately pull the loop on your hook a bit longer than usual before dropping it back through the first dc — a too-tight loop will make it hard to complete the popcorn stitch cleanly.
- Working the popcorn stitch into the wrong space
Make sure each group of 5 dc and the popcorn closure goes into the same ch-2 space from Round 1, not into the stitches themselves.
- Forgetting to change colors before Round 2
If you want a two-tone flower, attach your new color with a slip knot right before starting Round 2, as noted in the pattern info.
- Petals coming out uneven in Round 3
Always slip stitch into the ch-3 space itself (not the top of the popcorn stitch) before working your 5 dc, ch 2, and closing slip stitch for each petal.
- Leaving yarn tails too short to weave in
Leave at least a 6-inch tail when finishing so you have enough length to weave securely through the popcorn and petal stitches without it slipping loose.
Variations
- I adore this flower because it proves you don't need fancy stitches to make something that looks impressively textured. The magic happens in Round 2, when you work that popcorn stitch into each ch-2 space — pulling the loop long, dropping it through, and watching a little bobble pop right out of the flat ring. It's such a satisfying moment! Then Round 3 rewards you again with easy shell petals worked right into the ch-3 spaces, and suddenly you're holding a real, dimensional flower. I also love that this pattern uses just one hook size and one ball of milk cotton, so there's zero guesswork with materials. It's forgiving too — since the popcorn stitches naturally hide small tension inconsistencies, your flower will look polished even if your stitches aren't perfectly even yet. This is the kind of pattern I hand to brand-new crocheters because it builds real confidence: you go from a slip knot to a finished, gift-worthy flower in one sitting, and that feeling never gets old.
Frequently Asked Questions
What size will the finished flower be?
Using the recommended milk cotton 4 ply and a 3mm hook, the flower comes out to roughly 2 to 2.5 inches across. Sizing up your yarn and hook will produce a larger bloom.
Can I make this flower in just one color?
Absolutely — the pattern is written to optionally change colors before Round 2, but you can skip that step entirely and crochet the whole flower in a single continuous color for a simpler, cohesive look.
What does the popcorn stitch actually do in this pattern?
The popcorn stitch in Round 2 creates the raised, bobbled texture in the center of the flower by working 5 dc into a space, then pulling a loop through to cinch the group together into a puffed bump.
Do I need any special tools besides a hook?
No — this pattern only needs a 3mm crochet hook, milk cotton 4 ply yarn, and a pair of scissors, making it a great low-fuss project to start today.
Why is my flower curling instead of laying flat?
This usually happens if the popcorn stitches in Round 2 were pulled too tight, drawing the fabric inward; try loosening your tension slightly and lightly blocking the finished piece to help it relax flat.
Original pattern: https://crocheteverything.com/crochet-flowers-tutorial-step-by-step-for-beginners/
About the Author

Marisol QuinteroWho runs Crochet Obsessed, why a stitch count sits at the end of every round, how a pattern gets written here, and the things this site will never do.
More Patterns
- IntermediateNo. 01

Slouchy everyday beanie worked flat in half double crochet
Crochet beanie pattern for a slouchy everyday look worked flat with hdc rows, then seamed into a soft,…
- IntermediateNo. 02
Crochet amigurumi doll with dress, shoes, and hat
Crochet amigurumi doll pattern with dress, shoes, and hat details for a soft, huggable keepsake you build one…
- IntermediateNo. 03
Chunky moss stitch crochet sweater with raglan-free shoulders
Chunky crochet sweater pattern using moss stitch, worked flat with a 10mm hook for a soft, fast, cool-weather…


