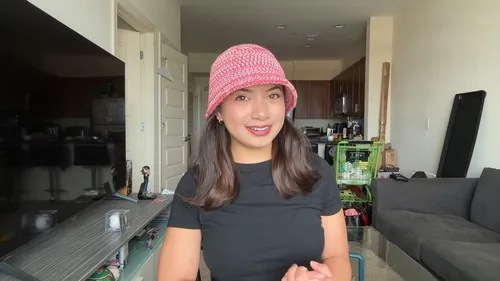
- LevelIntermediate
- Time4-6 hours
- Hook5.5 mm
- YarnWorsted (held double)
About This Pattern
This one has a breezy, put-it-on-and-go kind of energy. It's the hat you make on a Saturday morning and wear out the door by afternoon. There's nothing fussy about it, just clean rounds building into something you'd actually reach for.
Your hands stay busy with a steady rhythm of half double crochets, holding two strands of cotton together the whole time. You'll work through increases at the crown, then settle into plain rounds for the sides. The back loop only rounds ask for a little more attention, since that's where the ridges that shape this hat come from.
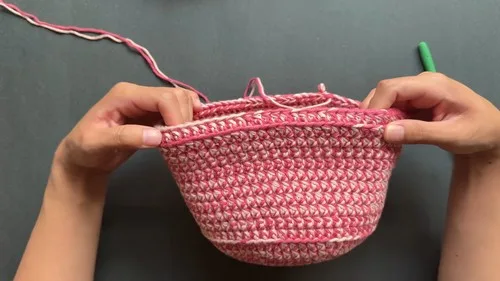
Sitting on a shelf by the door, this hat looks ready for errands, not precious or delicate. The doubled cotton gives it enough body to hold its shape even when it's not on your head. It reads as something structured and a little polished, not like a floppy summer throwaway.
- Start at the center with a magic circle and build the crown through a series of evenly spaced increase rounds.
- Hold two strands of cotton together throughout so the fabric feels sturdy from the very first stitch.
- Work one round in the back loop only to press a ridge into the fabric where the sides begin.
- Continue straight rounds for several more rows until the sides reach the height you want for the crown of the hat.
- Shift to the brim by working increase rounds again, flaring the fabric outward from the sides.
- Add a second back loop only round partway through the brim to create another defined ridge line.
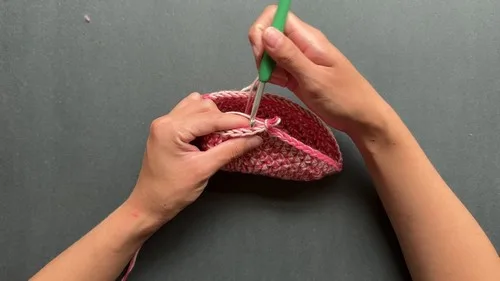
- Finish with a round of slip stitches for a clean edge, then fasten off and weave in your ends.
On the desk
- 100% Cotton yarn (180 yards/100g, two strands held together)
- 5.5 mm crochet hook
- Scissors
- Darning needle
- Stitch markers (recommended)
Stitch shorthand
- hdc — half double crochet
- blo — back loops only
- ss — slip stitch
Double-strand crochet bucket hat for beginners
Hat Crown (Increases)
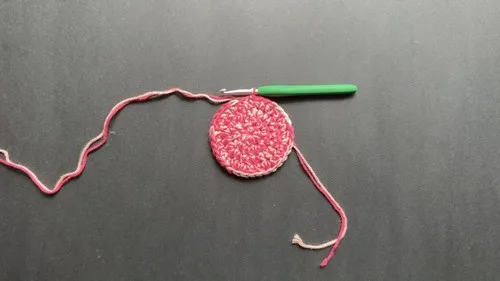
Start with a magic circle.
- Round 1
Make 8 Half Double Crochets (HDC) into the circle, pull to close, and slip stitch to join.
- Round 2
Make 2 HDC in each stitch around for a total of 16.
- Round 3
Work 1 HDC, then an increase (2 HDC in next stitch); repeat around for 24 stitches.
- Round 4
Work 2 HDC, then an increase; repeat around for 32 stitches.
- Round 5
Work 3 HDC, then an increase; repeat around for 40 stitches.
- Round 6
Work 4 HDC, then an increase; repeat around for 48 stitches.
- Round 7
Work 5 HDC, then an increase; repeat around for 56 stitches.
- Round 8
Work 6 HDC, then an increase; repeat around for 64 stitches.
- Round 9 (Optional)
Work 7 HDC, then an increase; repeat around for 72 stitches if making a larger size.Finish each round with a slip stitch and chain one to start the next round.
Hat Side
- Round 9
(or 10): Work 1 HDC in each stitch around.
- Round 10
(or 11): Work 1 HDC in the Back Loop Only (BLO) of each stitch to create a ridge.
- Rounds 11–18
(or 12–19): Work 1 HDC in each stitch around for eight rounds to form the hat’s height.
For Hat Brim
- Round 19
(or 20): Work 3 HDC, then an increase; repeat around.
- Round 20
(or 21): Work 1 HDC in the Back Loop Only (BLO) of each stitch.
- Round 21
(or 22): Work 4 HDC, then an increase; repeat around.
- Round 22
(or 23): Work 1 HDC in each stitch around.
- Round 23
(or 24): Chain one and turn your work. Make one Slip Stitch (SS) in every stitch around and join to the first SS.
More shots
Where it goes
- A everyday sun hat for walks, gardening, or running errands when you want your face shaded without sunglasses doing all the work.
- A handmade gift for a friend who lives somewhere warm and wears hats as part of her regular outfit, not just on vacation.
- A beach bag staple that pairs well with a linen cover-up or a simple cotton tank and denim shorts.
- A market or farmers-market accessory that looks good with a canvas tote and works just as well over damp hair.
Care
Hand wash the finished hat in cool water with a mild detergent, since cotton can shrink slightly in hot water.
Lay it flat on a towel to dry and reshape the brim and crown gently by hand while it's still damp.
Store it stuffed with tissue paper or a small towel to help it hold its structured shape between wears.
Assembly
- Step 1 Chain one, cut a long tail, and pull it through to secure.
- Step 2 Weave in all loose ends using the darning needle to complete your crochet bucket hat.
Easy to get wrong
Losing track of increase placement
Drop a stitch marker at the start of each round and after every increase group so you can count back if the round comes up short.
Working into both loops on ridge rounds
Slow down on the back loop only rounds and check the first few stitches before continuing, since this is what creates the visible ridge lines.
Strands twisting while held together
Check every few rounds that both strands of cotton are laying flat and untwisted, or your tension will look uneven.
Between the songs
- The satisfaction here comes from watching a flat magic circle turn into a real, structured shape without much drama. Working two strands of cotton held together does the heavy lifting on structure, so you get a hat that stands up on its own instead of slouching. I like the two back loop only rounds especially, one at the top of the sides and one on the brim, because each one leaves a visible ridge that reads as an intentional design line, not a mistake. The increase rounds on the crown and brim are simple math you repeat around, so you're never guessing. By the time you fold that flat brim out, it feels like the piece did more work than your hands did.
Listener questions
Why does this pattern use two strands of cotton held together?
Holding two strands together adds thickness and structure that a single strand of cotton can't give on its own. It's what allows the brim and crown to hold their shape instead of flopping.
What do the back loop only rounds actually do?
Working in the back loop only leaves the front loop sitting proud, which creates a visible ridge in the fabric. This pattern uses that ridge once where the sides begin and again partway through the brim.
Can I use stitch markers even though they're just recommended?
Yes, and I'd suggest it, especially through the crown increases where the stitch count changes every round. It's an easy way to catch a missed increase before it throws off the next round.
How do I know when the sides are the right height before starting the brim?
The pattern's straight rounds on the sides build the crown height, so just work through all of them as written. If you want a shorter or taller crown, that's the section where you can add or remove rounds.
What hook size does this pattern call for?
This pattern uses a 5.5 mm hook throughout, held with both strands of cotton the entire time. There's no size change between the crown, sides, or brim.
Original pattern: https://crocheteverything.com/how-to-crochet-bucket-hat-tutorial-for-beginners/
About the Author

Marisol QuinteroWho runs Crochet Obsessed, why a stitch count sits at the end of every round, how a pattern gets written here, and the things this site will never do.
More Patterns
- IntermediateNo. 01

Slouchy everyday beanie worked flat in half double crochet
Crochet beanie pattern for a slouchy everyday look worked flat with hdc rows, then seamed into a soft,…
- IntermediateNo. 02
Crochet amigurumi doll with dress, shoes, and hat
Crochet amigurumi doll pattern with dress, shoes, and hat details for a soft, huggable keepsake you build one…
- IntermediateNo. 03
Chunky moss stitch crochet sweater with raglan-free shoulders
Chunky crochet sweater pattern using moss stitch, worked flat with a 10mm hook for a soft, fast, cool-weather…


