- LevelIntermediate
- Time2-3 Hours
- YarnWorsted
About This Pattern
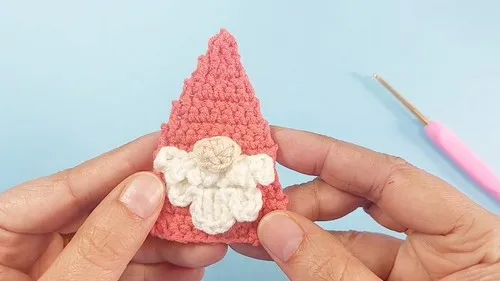
This little gnome applique is one of those patterns that proves big charm can come in a small package. Built from just three simple pieces — a textured chained beard, a tiny hdc-and-sc nose, and a rounded 17-round body — it comes together into a sweet, whiskery gnome face that's perfect for topping hats, decorating blankets, or standing alone as a mini decoration. It's ideal for crocheters who love quick, satisfying projects with a big payoff, and it's a wonderful way to use up scraps of worsted weight yarn in cozy, earthy colors.
The magic of this pattern lies in its clever beard technique: chaining a long foundation, then working a rhythmic pattern of skipped chains, slip stitches, and chain-3 loops to create a bumpy, textured 'stitched' beard look without any fussy stitch counting. The smaller piece introduces half double crochet and double crochet worked into the same chain, giving you practice with stitch height changes in a tiny, low-pressure format. Expect this to take an intermediate crocheter about 2-3 hours, including the 17-round shaped body.
When finished, you'll have a compact, dimensional gnome face measuring just a few inches across — small enough to tuck onto a hat brim, stitch to a pillow, or frame as ornament-sized wall art. The layered beard texture gives it a rustic, handmade look that photographs beautifully and feels wonderfully tactile in the hand. It makes a delightful last-minute gift topper, a fun addition to a handmade card, or a whimsical accent for anyone who collects gnome décor.
- Start the beard piece by chaining a long foundation and skipping the first few chains to set your starting point.
- Work a repeating rhythm of chain-3 loops and slip stitches along the foundation to build the beard's bumpy texture.
- Fasten off the beard piece, leaving a long tail for attaching it later.
- Begin the beard's smaller part with a shorter foundation chain and skip a couple of chains before your first stitch.
- Work a half double crochet into the chain, then add a chain-2 loop and a slip stitch in the same spot.
- Continue along the beard's smaller part, adding a double crochet and another small chain loop for extra dimension.
- Make the nose separately by working a magic ring with a mix of single and half double crochet stitches, then closing the ring and fastening off.
- Separately, build the rounded body by working 17 shaped rounds to form the main gnome face shape.
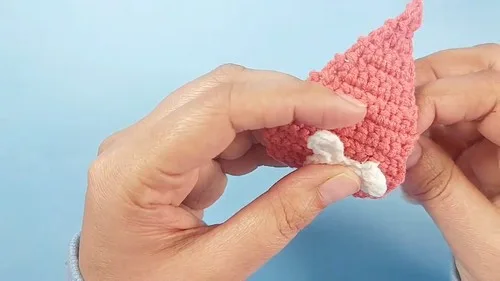
- Sew the beard and nose pieces onto the finished body to complete the whimsical gnome applique.
Materials
- Worsted weight yarn
- Crochet hook (size to suit your yarn)
Crochet Abbreviations
- st
- stitch
- sl st
- slip stitch
- sc
- single crochet
- hdc
- half double crochet
- dec
- decrease
- dc
- double crochet
Cute Crochet Gnome Applique Pattern (Easy Step-by-Step Guide)
Body
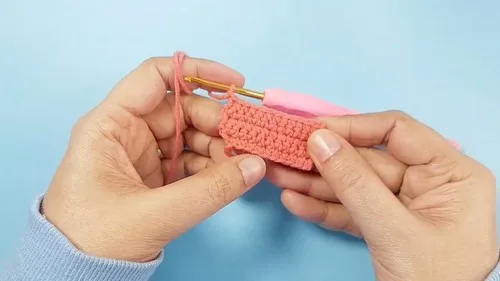
Start with a slip knot and chain 11.
- Round 1
Skip the first chain and single crochet (sc) in each of the next 10 back bumps.
- Round 2
Chain 1 and turn. Make 2 sc in the first stitch, 1 sc in each of the next stitches, and 2 sc in the last stitch for a total of 12 sc.
- Round 3-5
Chain 1 and turn. Sc in each of the 12 stitches.
- Round 6
Chain 1 and turn. Decrease (dec) at the beginning, sc in the next stitches, and dec again at the end for a total of 10 sc.
- Round 7-9
Sc in each of the 10 stitches.
- Round 10
Dec at the beginning and end for a total of 8 sc.
- Round 11
Sc in each of the 8 stitches.
- Round 12
Dec at the beginning and end for a total of 6 sc.
- Round 13
Sc in each of the 6 stitches.
- Round 14
Dec, sc in the next 2 stitches, and dec again for a total of 4 sc.
- Round 15
Sc in each of the 4 stitches.
- Round 16
Make 2 decreases for a total of 2 sc.
- Last Round
Chain 1 and make 1 final dec.
Beard
- Larger Part
Create a slip knot and chain 11. Skip the first 3 chains and slip stitch (sl st) in the next chain. Then, chain 3 and sl st into the next chain. Repeat this pattern of chaining 3 and sl st to the end. Fasten off.
- Smaller Part
Create a slip knot and chain 6. Skip the first 2 chains and make a half double crochet (hdc) in the 3rd chain. Chain 2 and sl st into the same chain. Sl st into the next chain. Chain 2, make a double crochet (dc) into the same chain, and then chain 1. Make a dc into the next chain. Chain 2 and sl st into the same chain. Sl st into the last chain. Chain 2, hdc into the same chain, and then chain 2. Sl st and fasten off.
Nose
Create a magic ring and chain 1.
Make 1 sc, 1 hdc, 2 sc, 1 hdc, and 1 sc into the ring.
Close the ring and sl st on top of the first sc. Fasten off.
More photos
Important Notes
- 💡 Use a hook one size smaller than the yarn label suggests for the body rounds — this keeps your amigurumi stitches tight enough to prevent stuffing from peeking through.
- 💡 Keep a locking stitch marker in the first stitch of every round of the 17-round body so you never lose track of where each round begins and ends.
- 💡 When working the beard's chain-3 loops, keep your tension consistent throughout so all the loops end up the same size for a symmetrical, tidy finish.
- 💡 Leave a long yarn tail (at least 8 inches) when fastening off both the beard and nose pieces — you'll need this length for sewing them onto the finished body.
- 💡 Pin the beard piece in place before sewing so you can adjust its position and check the overall gnome face proportions before committing any stitches.
Common Mistakes and Fixes
- Miscounting the 'skip first 3 chains'
Place a stitch marker in the 3rd chain from the hook before you begin skipping, so you have a clear visual anchor for where your first slip stitch belongs.
- Losing track of which chain to slip
Work slowly and count chains out loud or in your head each time — 'chain 3, one chain, slip stitch' — and check that each loop lands on a fresh, unused chain along the foundation.
- Working the hdc and dc into two
Before working the second stitch, physically look at your hook placement and confirm it's still in the identical chain you just used for the hdc — don't advance forward.
- Skipping stitch markers on the 17-round
Place a locking stitch marker at the start of every round and move it up as you go — this is essential for any piece with more than a few rounds of shaping.
- Not blocking or steaming the finished
Lightly pin the beard piece to a blocking mat and steam it gently before attaching it to the body, so the loops relax into a neat, even beard shape.
Variations
- I adore this pattern because it packs so much personality into so few stitches. The beard is the real star — that chain-11 foundation worked into a repeating skip-3, slip stitch, chain-3 pattern creates this wonderfully bumpy, textured fringe that looks so much more complicated than it actually is. There's something deeply satisfying about watching that jagged little beard take shape loop by loop. Then the smaller piece, where you work an hdc and a dc into the very same chain, teaches your hands to feel the difference between stitch heights in real time — it's a sneaky little skill-builder disguised as a tiny nose. And the 17-round body gives you just enough shaping practice to feel like a real amigurumi maker without committing to hours of rounds. Every piece is quick enough to finish in one sitting, which means you get that rewarding 'I made something today' feeling fast. This is the kind of pattern I keep coming back to whenever I want a palate-cleanser project between bigger makes.
Frequently Asked Questions
What yarn weight works best for this gnome applique?
A worsted weight (medium, #4) yarn gives the best stitch definition for both the textured beard and the 17-round body. Cotton or acrylic blends work especially well since they hold their shape nicely when the finished piece is sewn onto a project.
Can I attach this gnome applique to a hat or blanket?
Yes, this pattern is designed as an applique, so it's perfect for sewing onto hats, blankets, pillows, or bags. Just leave a long enough yarn tail when fastening off each piece so you have plenty to work with for sewing.
Why does the beard piece use slip stitches and chain-3 loops instead of regular rows?
This combination creates a bumpy, textured edge that mimics the look of a shaggy beard without any complicated stitch counting. It's a clever technique that gives a realistic, dimensional look using only basic stitches.
Do I need to stuff the gnome body piece?
Since the body is worked in 17 rounds, light stuffing will give it a rounded, three-dimensional look if you want a slightly puffy applique, though you can also leave it flat and unstuffed if you prefer a smoother, flatter appliqué for sewing onto fabric.
Is this pattern good for a beginner crocheter?
It's best suited for someone comfortable with basic stitches like chain, slip stitch, half double crochet, and double crochet, plus some experience working in the round. A confident beginner who has practiced these stitches individually should be able to follow along successfully.
Original pattern: https://crocheteverything.com/cute-crochet-gnome-applique-pattern-step-by-step/
About the Author

Marisol QuinteroWho runs Crochet Obsessed, why a stitch count sits at the end of every round, how a pattern gets written here, and the things this site will never do.
More Patterns
- IntermediateNo. 01

Slouchy everyday beanie worked flat in half double crochet
Crochet beanie pattern for a slouchy everyday look worked flat with hdc rows, then seamed into a soft,…
- IntermediateNo. 02
Crochet amigurumi doll with dress, shoes, and hat
Crochet amigurumi doll pattern with dress, shoes, and hat details for a soft, huggable keepsake you build one…
- IntermediateNo. 03
Chunky moss stitch crochet sweater with raglan-free shoulders
Chunky crochet sweater pattern using moss stitch, worked flat with a 10mm hook for a soft, fast, cool-weather…


