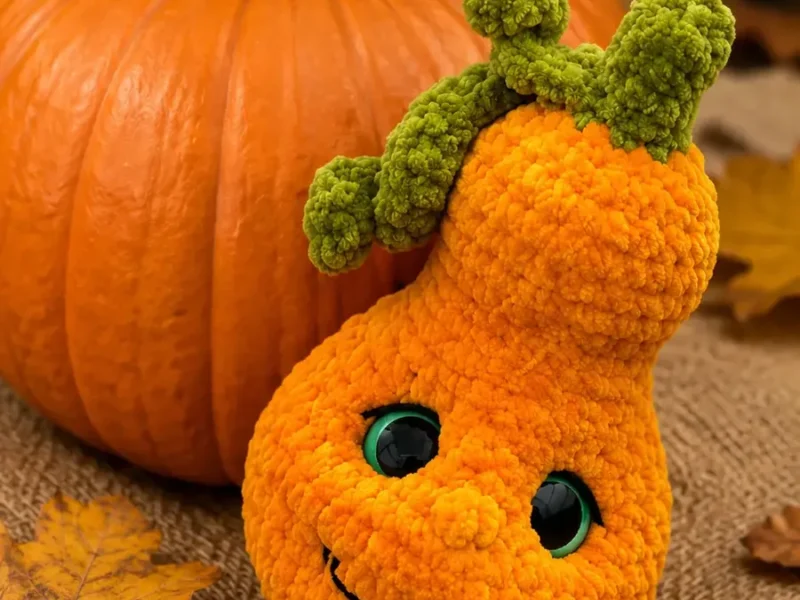
- LevelIntermediate
- Time4-6 Hours
- Hook4.0 mm
- YarnWorsted
About This Pattern
This little pumpkin plush is the kind of amigurumi that makes people say 'aww' the moment they spot it on a shelf. Worked up in soft velvet yarn, it has a rounded, huggable body topped with two whimsical curling leaves that give it real personality. It's perfect for crocheters who love making seasonal decor pieces, gifts for little ones, or a sweet addition to a growing amigurumi collection that doesn't require a huge yarn stash to complete.
The body is worked in one continuous spiral from a magic ring, building up through a steady increase pattern before leveling off into straight rounds and then tapering down again — classic amigurumi shaping from start to finish. You'll practice safety eye placement, firm stuffing technique, a clean color change from orange to yellow-green, and simple embroidery for the face. It's a great intermediate project — not overly complex, but enough technique variety to keep things interesting over an evening or two of stitching.
The finished pumpkin sits at a friendly amigurumi-plush scale, about 15-17 cm tall when made with the recommended materials, with a plump, rounded shape thanks to firm stuffing and the soft drape of velvet yarn against your fingers. Its trapezoid safety eyes and embroidered eyelashes and mouth give it an expressive little face, while the two spiral leaves add a playful, almost sculptural detail on top. It's an adorable gift for kids, a cozy shelf-sitter for autumn décor, or a thoughtful handmade present for anyone who loves a good pumpkin.
- Start the pumpkin body with a magic ring and build outward through a steady series of increase rounds to shape the base.
- Continue working straight rounds in a spiral once the widest point is reached, keeping the stitch marker aligned down the center back.
- Pause around the halfway point to insert the safety eyes with even spacing, then stuff the head area firmly before continuing.
- Keep working the body rounds while adding fiberfill gradually, sculpting the classic rounded pumpkin silhouette as you go.
- Finish shaping and closing the top of the pumpkin, hiding the yarn tail neatly inside the stuffed body.
- Attach the additional color at the top and chain out two separate leaf strands, working single crochets into one loop only so they curl.
- Sculpt the face as desired, then embroider eyelashes and a chain-stitch mouth in black thread to complete your little pumpkin's expression.
Materials
- Size 4.0 mm crochet hook
LaVita Yarn Velur plush yarn (120m/100g)
- Main color 3012 (orange) – 30 g
- Additional color 8161 (yellow-green) – 10 g
- A small amount of black semi-cotton yarn (YarnArt Jeans 160m/50g) for face embroidery
- Strong thread for sculpting
- Fiberfill stuffing (hollofiber or synthetic fluff)
- 16 mm safety eyes (trapezoid with slanting pupil)
- Scissors, long needle with a wide eye, stitch marker
Crochet Abbreviations
- ch
- chain stitch
- MR
- magic ring
- sc
- single crochet
- Puff stitch
- 3 unfinished double crochets worked together into one base stitch
- inc
- increase (two single crochet worked into one base stitch)
- dec
- decrease (two single crochet worked together)
- sl st
- slip stitch
- (…) x X
- repeat instructions in parentheses X times
- (NUMBER)
- total number of stitches in the round
Crochet Pumpkin Plush Amigurumi Pattern With Curly Leaves
Little Pumpkin
Worked in one piece in a spiral, without lifting loops. The stitch marker runs in a straight line down the center back; if the round shifts, make shift stitches at the end of the round (sc) — no need to count them — then move the marker (placed on the last stitch of the round) and continue. Depending on gauge, this may be needed every 3-5 rounds.
Insert safety eyes between rounds 12 and 13 at a distance of 7 stitches between the eye posts (count along round 12). Add fiberfill and stuff firmly.
Stuff the upper part of the pumpkin, then change yarn color to the additional color. Fasten off and cut the main color thread before starting round 26.
Stuff the stem lightly. Cinch the ring closed, fasten off and cut the thread. Hide the tail inside the piece.
- Round 1
8 sc in MR or in the second chain from hook. (8)
- Round 2
8 inc. (16)
- Round 3
(1 sc, inc) x 8 times. (24)
- Round 4
(2 sc, inc) x 8 times. (32)
- Round 5
(3 sc, inc) x 8 times. (40)
- Round 6-10
(5 rounds): 40 sc. (40)
In the next round we will work the nose — 1 puff stitch (3 unfinished double crochets worked together into one base stitch).
- Round 11
19 sc, 1 puff stitch, 20 sc. (40)
- Round 12
(3 sc, dec) x 8 times. (32)
- Round 13
32 sc. (32)
- Round 14
(2 sc, dec) x 8 times. (24)
- Round 15
(2 sc, dec) x 6 times. (18)
- Round 16-18
(3 rounds): 18 sc. (18)
- Round 19
(2 sc, inc) x 6 times. (24)
- Round 20-23
(4 rounds): 24 sc. (24)
- Round 24
(1 sc, dec) x 8 times. (16)
- Round 25
8 dec. (8)
- Round 26-30
(5 rounds): 8 sc. (8)
Leaves
So that the leaves curl slightly in a spiral, it is important to work only into the loops on one side of the chain.
If you want more tightly curled leaves, work 2-3 sc into each chain stitch along the chain.
Work a sl st, fasten off and cut the thread. Hide the tails inside the pumpkin body.
- Round 1
Attach the additional color thread in round 26 on the right side and chain 11. Starting from the 2nd chain from the hook, work 10 sc along the chain. (10 sc)
- Round 2
Work a sl st into the stitch of round 26 and chain 21. Starting from the 2nd chain from the hook, work 20 sc along the chain. (20 sc)
More photos
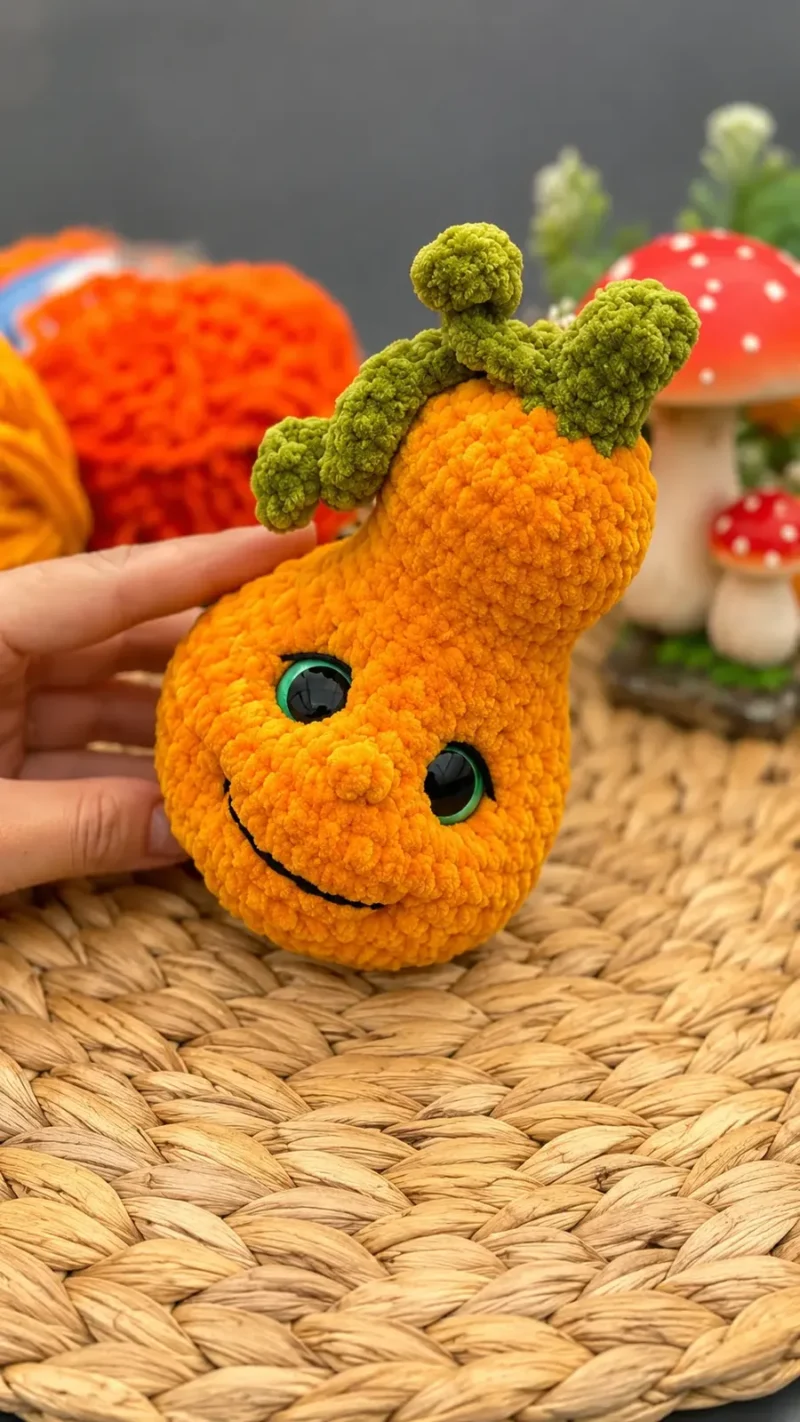
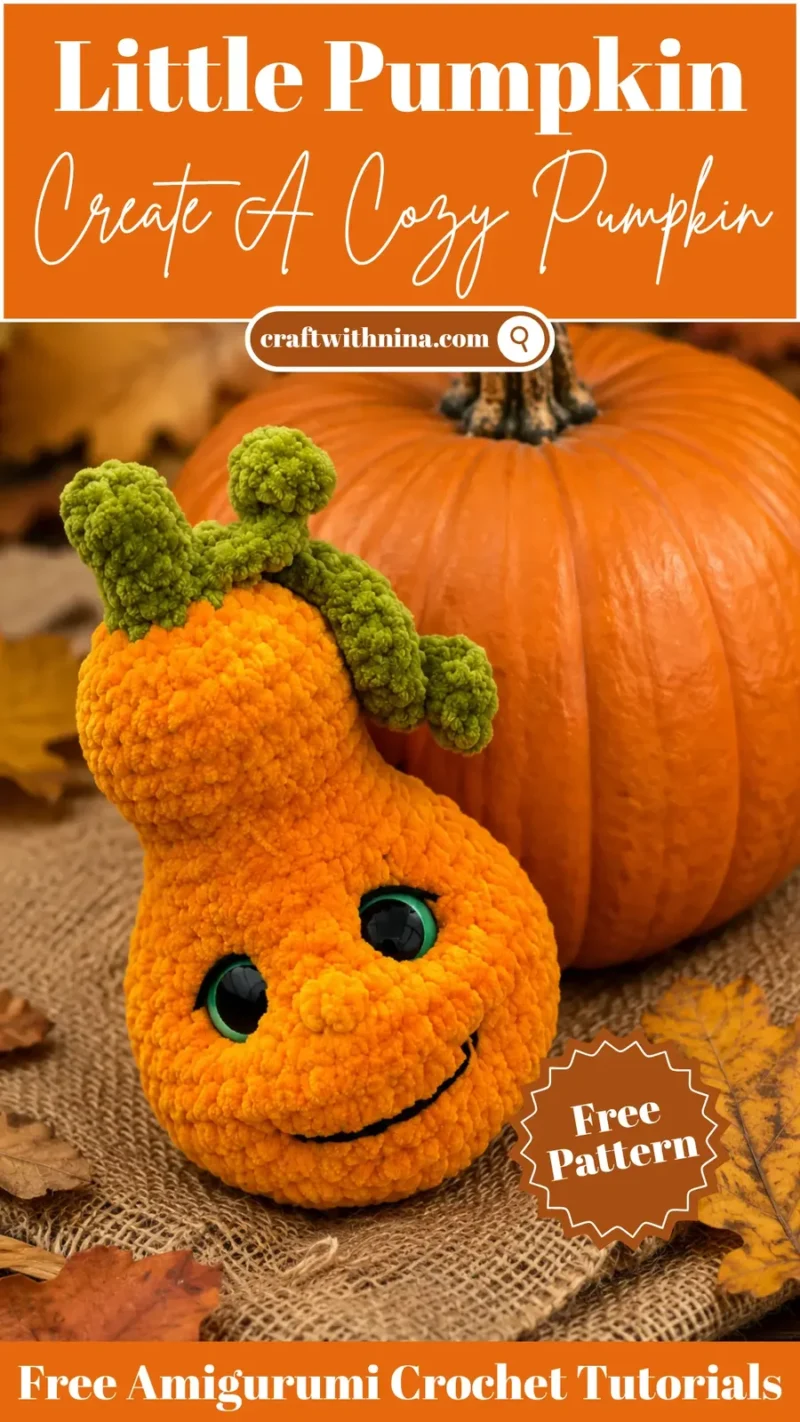
Assembly Instructions
- Step 1 Perform eye and mouth sculpting as desired. Sculpt the mouth 3 rounds below the nose.
- Step 2 Using black YarnArt Jeans thread, embroider eyelashes and a mouth (mouth embroidered with a chain stitch).
Important Notes
- This pumpkin is worked entirely in a continuous spiral without joining or lifting loops between rounds, so consistent tension matters more than usual — try to keep your stitches even throughout.
- The stitch marker should run in a straight vertical line down the center back of the pumpkin; if your rounds start to drift, add a couple of unlisted shift stitches at the round's end to realign it.
- Insert the 16mm safety eyes between rounds 12 and 13 while the opening is still large enough to easily reach inside and secure the backs.
- the leaves, working extra single crochets into each chain stitch will create a tighter, more pronounced curl if you prefer a more dramatic spiral shape.
- Weave in all leaf tails on the inside of the pumpkin body after fastening off, keeping the finished top neat and free of loose threads.
- Finished size: the height of the toy, when using the recommended materials, is about 15-17 cm.
Common Mistakes and Fixes
- Losing track of the spiral rounds
Keep a stitch marker on the last stitch of each round at all times and move it up every round; this pattern specifically notes shift stitches may be needed every 3-5 rounds to keep the spiral straight down the back.
- Placing the safety eyes too close together or too far apart.
Measure 7 stitches between the eye posts along round 12 before inserting the eyes, and check the spacing looks even from the front before snapping on the backs.
- Stuffing too loosely, leaving the pumpkin soft and floppy.
Stuff firmly and in small pieces as you go rather than one big handful at the end, especially before closing the top, so the plush holds its rounded shape.
- Forgetting to change yarn color before
Fasten off and cut the main color thread before starting round 26 as directed, then attach the additional color cleanly so the transition stays crisp.
- Working into both loops of the leaf foundation chain.
Work only into the loops on one side of the chain for the leaves so they naturally curl into that pretty spiral shape; working both loops will leave them flat.
- Embroidering the mouth in the wrong
Sculpt and embroider the mouth 3 rounds below the nose area as instructed, marking the spot with a pin first to check placement before stitching.
Variations
- This pumpkin is endlessly customizable once you understand the basic construction. For color, try a cream or white main color with a deep green additional color for a more neutral, farmhouse-style pumpkin, or go bold with a burgundy body and mustard-yellow leaves for a moodier autumn palette. A pale pink main color with sage green leaves makes an adorable non-traditional 'sweetheart pumpkin' for baby gifts. If you want a fuzzier or shinier finish, swap the plush velvet yarn for a chenille or a smooth worsted-weight yarn, just be sure to adjust your hook size slightly to keep the stitches tight enough to hide stuffing. For size changes, work the increase rounds one or two rounds longer before leveling off to create a larger, more rounded pumpkin, or stop the increases earlier for a smaller, more compact version — just remember the eye placement and any body ratios should scale with your adjusted round count. You can also experiment with the leaves: work only the shorter 10-sc leaf for a minimalist look, or add a third leaf in a different length for extra texture on top. Embroider a smiling mouth instead of the chain-stitch line, or skip the eyelashes for a more gender-neutral, wide-eyed look. For a no-safety-eyes version (great for very young children), embroider the eyes instead using the same black semi-cotton thread used for the face details. However you tweak it, the spiral leaf trick and firm stuffing technique are the two elements I'd always keep — they're what make this little pumpkin so charming.
- I adore this pattern because it takes something as simple as a stuffed sphere and turns it into a character with real charm. Working the body in a continuous spiral with that steady increase sequence is so satisfying — you watch it grow round by round without ever breaking your rhythm. Placing the safety eyes between rounds 12 and 13 and stuffing firmly right at that stage feels like the moment the pumpkin truly comes to life. The color change from the plush orange to the yellow-green stem area is clean and easy, no fuss, just a fresh burst of color at the top. And then those curling leaves! Working into just one loop of the foundation chain so they naturally spiral is such a clever little trick — it makes the leaves feel dimensional and alive instead of flat. Finishing with hand-embroidered eyelashes and a chain-stitch mouth lets you give your pumpkin its own unique expression every single time. It's a small project with big personality, and that combination is exactly what I love in an amigurumi pattern.
Frequently Asked Questions
What type of yarn can I use if I cannot find LaVita Yarn Velur?
You can substitute any velvet or plush yarn of similar weight, such as Himalaya Dolphin Baby, YarnArt Dolce, or Premier Parfait Chunky, using a matching 4.0 mm hook.
Can I use regular safety eyes without the slanting pupil?
Yes, standard 16 mm round safety eyes work wonderfully and will still give your pumpkin a very sweet, friendly expression.
Why does the pattern call for shift stitches?
Spiral crochet naturally drifts to one side over several rounds, so making an extra stitch when needed keeps your center back marker aligned and your front details centered.
How do I make the leaf tendrils curl even more?
To create tighter spirals for your pumpkin leaves, work 2 or 3 single crochet stitches into every chain stitch instead of just 1.
What stitch works best for embroidering the mouth line?
A simple chain stitch or stem stitch using black semi-cotton yarn gives the mouth a clean, defined line over the plush texture.
Original pattern: https://craftwithnina.com/amigurumi-pattern-little-pumpkin-plush/
About the Author

Marisol QuinteroWho runs Crochet Obsessed, why a stitch count sits at the end of every round, how a pattern gets written here, and the things this site will never do.
More Patterns
- IntermediateNo. 01

Slouchy everyday beanie worked flat in half double crochet
Crochet beanie pattern for a slouchy everyday look worked flat with hdc rows, then seamed into a soft,…
- IntermediateNo. 02
Crochet amigurumi doll with dress, shoes, and hat
Crochet amigurumi doll pattern with dress, shoes, and hat details for a soft, huggable keepsake you build one…
- IntermediateNo. 03
Chunky moss stitch crochet sweater with raglan-free shoulders
Chunky crochet sweater pattern using moss stitch, worked flat with a 10mm hook for a soft, fast, cool-weather…


