- LevelIntermediate
- Time4-6 hours
- Hook6 mm
- YarnBulky
About This Pattern
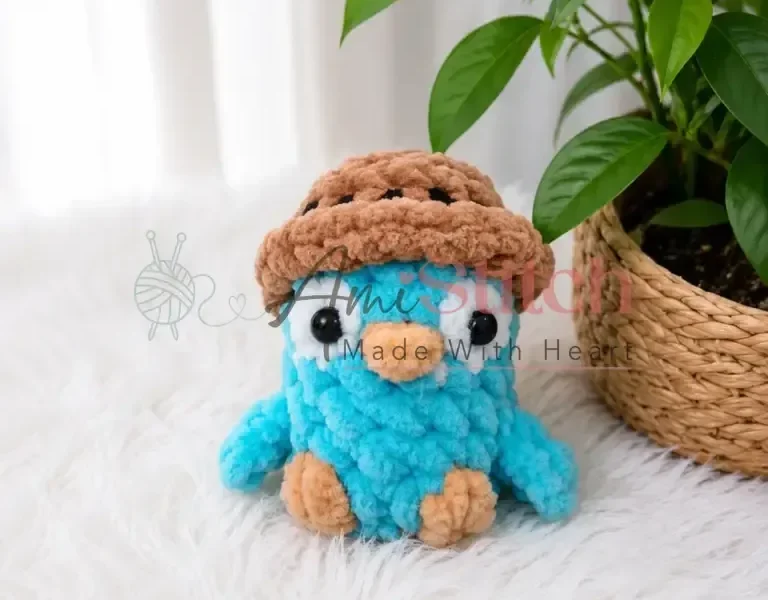
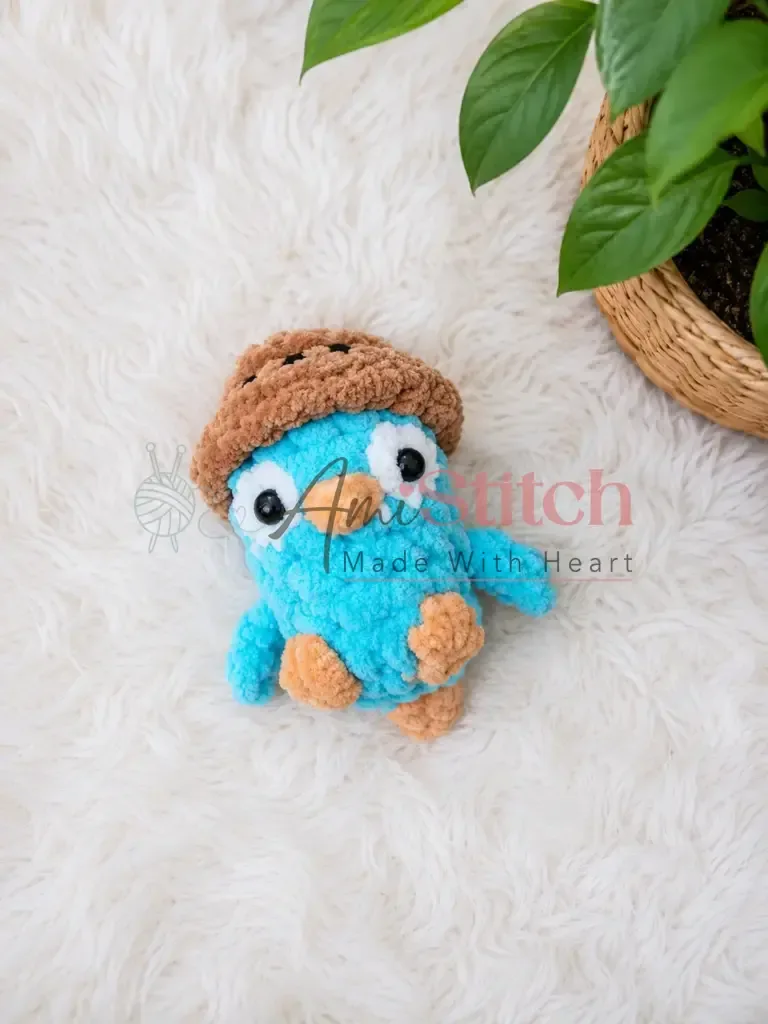
This little platypus has a split personality and I mean that in the best way. Up top it wears a tidy brown-and-black hat shape, and below that it turns into a round teal body with wings and a duck-like bill. The mood is playful but tidy, the kind of small project that makes you grin when you flip it over.
Your hands get a real workout in contrast here. You will work the same round twice — once into front loops for the hat brim, once into back loops for the body — so you feel the fabric branch in two directions from one foundation. Then you shape a bill with either a tiny chain or a gathering stitch, which asks for patience more than strength.
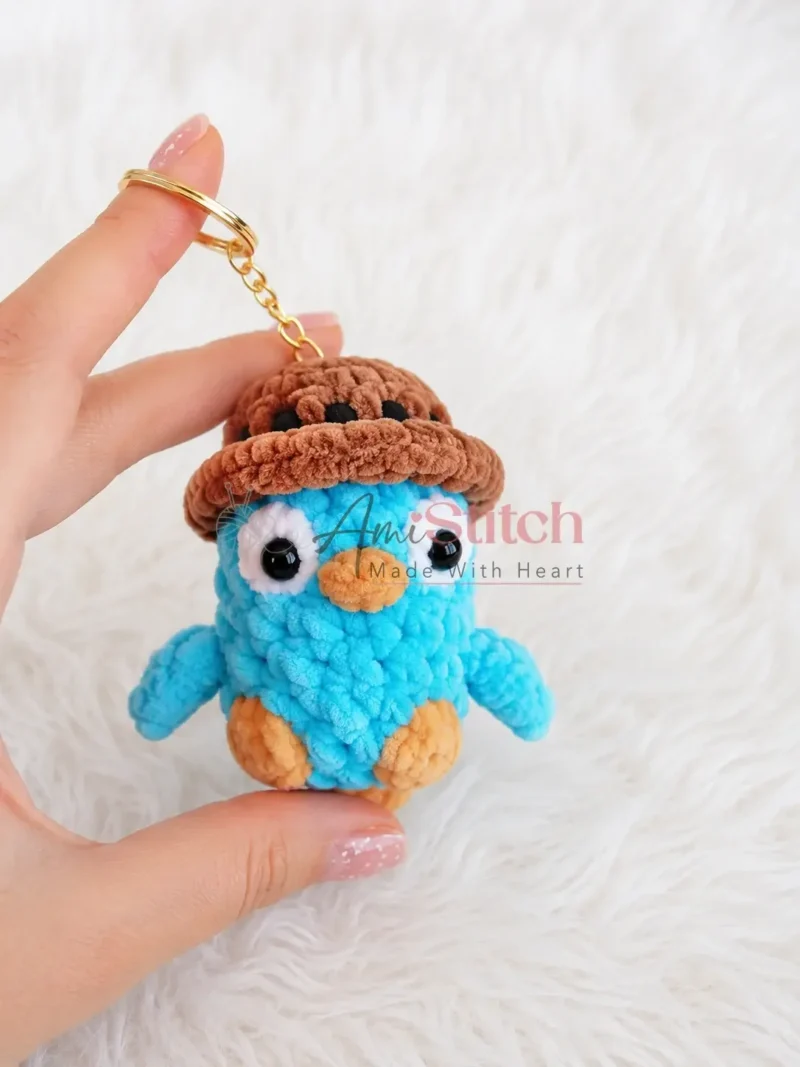
When it is done, this platypus lives happily clipped to a backpack zipper or dangling from a tote handle. It is small enough to tuck in a pocket but detailed enough that people stop and ask who made it. On a shelf next to other amigurumi, its two-tone hat makes it stand out immediately.
Worked almost entirely in single crochet as one continuous piece from the hat down, this beginner-friendly keychain amigurumi is a great entry point into small-scale figure crochet, with just a few embellished rounds adding the eyes, wings, legs, and tail.
- Split the final hat round into front loops only to flare out the brim shape.
- Place two white puff stitches a few rounds up to mark where the eyes will sit.
- Stitch the orange bill between the eyes using either the chained method or the gathered-stitch method.
- Add two small chain-stitch wings anchored with a slip stitch as you keep working the body.
- Stuff the piece firmly as you close the rounds so the plush yarn holds its shape.
- Glue or secure the eyes into the puff stitches and attach a keychain ring through the hat top.
On the desk
Yarn
- Bulky-weight plush yarn in teal (main color), brown (hat brim), orange (bill, legs, tail), white (eyes), and black (hat band)
Eyes
- Adhesive craft eyes: 6 mm, 2 pieces (or safety eyes used with white puff stitch placement)
Hook
- US G-6 / 4.0 mm
Stuffing
- Polyfill / fiberfill
- Stitch marker
- Yarn needle / tapestry needle
- Scissors
- Craft glue (for adhesive eyes)
Stitch shorthand
- ch — Chain
- dec — Invisible Decrease
- hdc — Half Double Crochet
- inc — Increase (2 sc in same stitch)
- MR — Magic Ring
- puff st — Puff Stitch
- sc — Single Crochet
- sl st — Slip Stitch
- BLO — Back Loop Only
- FLO — Front Loop Only
Crochet platypus keychain amigurumi pattern
Hat (Begin with Brown Yarn)
Foundation: Chain 5. Work back along the chain beginning from the 2nd chain from the hook.
- Round 1
inc in first st, sc in next 2 sts, 4 sc in next st (corner), sc in next 2 sts, inc in last st. (12)
- Round 2
sc in each st around. (12)
- Round 3
Switch to black yarn. Sc in each st around. (12)
- Round 4
(Brim — FLO): Working in front loops only, inc in each st around. (24)Cut the brown yarn and fasten off. Switch to teal yarn.
Body (Continue from Rnd 4 — Teal Yarn)
Note: The body continues from the same Rnd 4 round, but worked into the back loops only.
- Round 4
(Body — BLO): Working in back loops only of Rnd 3, sc in each st around. (12)
- Round 5(12)
Sc in first st, puff st in white (2 hdc closed together) for eye , sc in next 2 sts, puff st in white (2 hdc closed together) for eye , sc in next 7 sts. (12) These two white puff stitches mark the eye positions.
- Round 6
Sc in each st around. (12)
- Round 7
Sc in first st, Wing: ch 3, sc in 2nd ch from hook, sc in next ch, sl st into base stitch (wing complete) , sc in next 6 sts, Wing: ch 3, sc in 2nd ch from hook, sc in next ch, sl st into base stitch (wing complete) , sc in next 5 sts. (12)
- Round 8
Sc in each st around. (12)
- Round 9
Sc in next 2 sts, puff st in orange (2 hdc closed together) for leg , sc in next 2 sts, puff st in orange (2 hdc closed together) for leg , sc in next 4 sts, Tail: with orange, ch 4, hdc in 2nd ch from hook, hdc in next 2 chs (tail complete) , sc in next 2 sts. (12)Stuff the figure firmly with fiberfill now, before closing.
- Round 10
dec 6 times around. (6)Fasten off, leaving a yarn tail. Thread the tail through the remaining 6 stitches and pull tight to close the opening. Weave in ends.
Bill
Work the bill in orange between Rounds 5 and 6, centered between the two eye puff stitches. Choose one method:
Option A — Chained bill: Join orange yarn at the base, ch 2, fasten off, and secure the tail so the chain sits horizontally between the eyes as a small curved bill.
Option B — Gathered bill: Using orange yarn and a yarn needle, work two horizontal gathering stitches across the surface between the eyes at Rounds 5–6. Pull gently to create a slight pucker that mimics the bill shape.
More shots
Where it goes
- Clip it to a backpack or diaper bag zipper as a cheerful, easy-to-spot marker.
- Loop it onto a set of house keys so you can find them by feel alone.
- Pair it with a plain canvas tote as a small pop of teal and orange.
- Give it a spot on a desk or shelf alongside other small amigurumi keychains.
Color ideas
- Classic platypus Brown for the hat body, black for the hat band, teal for the main body, orange for the bill, legs, and tail, white for the eye puff stitches.
- Tonal swap Keep brown and black on the hat as written, but swap the body to a different main color of your choice while leaving the orange bill and white eyes the same for contrast.
Care
Hand wash the finished platypus gently in cool water, since bulky-weight plush yarn can mat or felt if agitated or washed hot.
Lay it flat to air dry and reshape the hat brim and bill by hand while damp so the fiber sets in position.
Store it away from direct sunlight to keep the teal and orange from fading, and keep the glued eyes away from excess moisture.
Assembly
- Step 1 Once the piece is complete and stuffed, attach the 6 mm adhesive eyes into the center of each white puff stitch. Press firmly and allow the glue to cure fully before handling.
- Step 2 If you used safety eyes instead, they should already be secured through the white puff stitches before the opening was closed.
- Step 3 Attach a keychain ring through the top of the hat — either by looping yarn through the tip before closing the foundation chain or by threading a small jump ring through the top stitches with the yarn needle.
- Step 4 Weave in all remaining yarn ends securely, burying them inside the body so they don’t work loose with daily use.
Easy to get wrong
Losing track of front loops vs back loops
Mark Round 3 with a locking stitch marker before you split directions, and check each loop before you insert your hook so the hat and body do not blend into one flat round.
Puff stitch eyes placed unevenly
Count stitches between the two eye puff stitches as you go rather than eyeballing placement, since the pattern spaces them with a specific stitch count on each side.
Losing the spiral without a marker
Drop a stitch marker at the start of every round the moment you begin it, since this body is worked in a continuous spiral with no joining rounds to signal where you are.
Overstuffing with one big chunk
Use small pinches of fiberfill rather than one large piece so you can control the shape as you stuff a keychain-sized figure — fill firmly enough to hold its shape without distorting the stitches.
Puff stitches lying flat
Pull each loop of the puff stitch (2 hdc closed together) a little higher than usual before closing it, so the eye and leg puffs sit proud of the surface instead of lying flat.
Between the songs
- What makes this one satisfying is the front-loop-only and back-loop-only split worked from the exact same round. You crochet Round 3 once, then send it two directions — front loops build the flared hat brim, back loops start the rounded teal body. That single technique does double duty and gives the piece its silhouette without any extra shaping math. Add in the white puff-stitch eyes, the little chain-stitch wings anchored with a slip stitch, and a bill you build from either a two-chain curve or a gathered pucker, and you get a face and posture that reads as platypus from across the room. It is compact, it is quick, and every round earns its place.
Listener questions
Can I use safety eyes instead of adhesive eyes?
Yes, and the pattern notes that safety eyes should be secured through the white puff stitches before you close up the opening. Adhesive eyes go on after stuffing and need time to cure before handling.
Why does the body start from the same round as the hat?
Round 3 is worked once, then picked up in two different loop directions. Front loops only flare into the hat brim, while back loops only continue downward into the teal body.
Which bill method should I choose?
The chained bill gives a crisp little curved shape with a quick two-chain, while the gathered bill uses surface stitches pulled snug for a softer pucker. Either works, so pick based on whether you want a more defined or more subtle bill.
How do I attach the keychain ring?
You can loop yarn through the very tip of the hat before closing the foundation chain, or thread a small jump ring through the top stitches afterward. Either method keeps the ring secure at the highest point of the piece.
Does the stitch count matter if my gauge is different?
Gauge is not critical here, but working tightly enough that the stuffing does not peek through the stitches matters more. Just make sure your tension stays firm and consistent across the hat and body.
What yarn works best for this platypus keychain?
A bulky-weight plush or chenille yarn gives Perry his signature soft, velvety texture. Look for yarns labeled 'velvet' or 'chenille' in the bulky weight category. Keep in mind that plush yarns can make stitch counting harder, so work slowly and use a stitch marker on every round.
Can I make Perry larger or smaller?
Yes — simply change your hook and yarn weight. A lighter-weight yarn with a smaller hook will give you a tinier keychain, while a thicker yarn and larger hook will produce a desk-toy-sized platypus. The stitch counts stay the same; only the finished size changes.
My hat brim is curling — what went wrong?
This usually happens if the FLO increase round is worked too tightly. The brim needs a little ease to flare out naturally. Try going up half a hook size for that single round, or consciously loosen your tension as you work the front-loop increases. Blocking with a light steam can also help a plush brim relax into shape.
Original pattern: https://amistitch.com/crochet-platypus-keychain-mini-amigurumi-pattern/
About the Author

Marisol QuinteroWho runs Crochet Obsessed, why a stitch count sits at the end of every round, how a pattern gets written here, and the things this site will never do.
More Patterns
- IntermediateNo. 01

Rose Granny Square Tote Crochet Pattern
Rose granny square tote crochet pattern made from 18 dimensional rose squares for a sturdy, romantic everyday bag.
- IntermediateNo. 02
Tropical octopus baby blanket crochet pattern with appliqués
Tropical octopus baby blanket crochet pattern: a cream filet base with coral and turquoise octopus appliqués, leaves, and…
- IntermediateNo. 03
Sunny lemon couple amigurumi crochet pattern
Sunny lemon couple amigurumi crochet pattern with embroidered slices and safety eyes for a cheerful handmade shelf pair.


