- LevelIntermediate
- Time4-6 hours
- Hook4.0 mm
- YarnWorsted
About This Pattern
There is something so satisfying about a project you can start and finish in one sitting, and this mug cozy is exactly that kind of piece. It has a cheerful, practical energy, the sort of make that feels like a little gift to your own morning routine. I think of it as a small win you can hold in your hands before the coffee even finishes brewing.
Your hands stay busy with straightforward single crochet rows, back and forth, building up rectangle after rectangle until the fabric feels just right. The loop asks for a touch more focus, since you are working a slip stitch and single crochet combination in one tidy row. Sewing the button on at the end brings a nice bit of finishing-work satisfaction, the kind that comes from closing a loop that actually catches and holds.
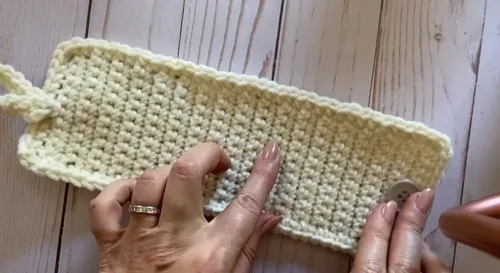
Picture the finished cozy wrapped snug around a favorite mug, sitting on a desk or a kitchen counter, catching morning light. It looks handmade in the best way, a little imperfect and full of personality. It turns an ordinary cup of coffee into something that feels considered, even on a rushed weekday.
- Chain a foundation row sized for either the large or small cozy, then work single crochet across to start the body.
- Turn at the end of every row, chaining one before crocheting into both loops of each stitch.
- Keep working single crochet rows back and forth until the cozy body reaches the height you want.
- Add a single crochet border around all four edges if you want a cleaner, more finished look.
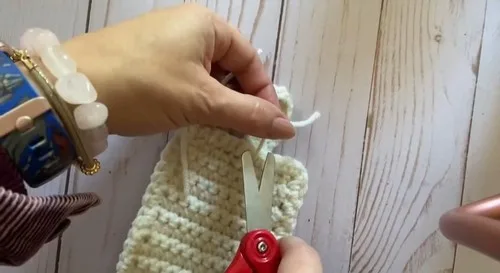
- Fasten off the body and weave in the tail with a tapestry needle for a tidy inside.
- Chain a foundation for the loop, then work a slip stitch and single crochet combination across the row.
- Bind off the loop leaving a long tail, then tie its two ends together to secure the closure.
- Sew the loop to one short side of the cozy and stitch the button opposite it so they align.
On the desk
- Worsted weight yarn
- 4.0 mm crochet hook
- Button (approx. 1 inch)
- Tapestry needle
- Scissors
Stitch shorthand
- ch — chain
- sl st — slip stitch
- sc — single crochet
Cozy Mug Wrap With Loop And Button Closure
Main Pattern (Mug Cozy Body)
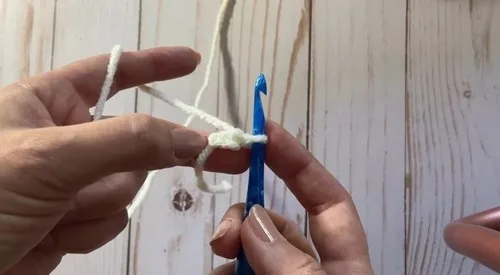
Create a Slip Knot: Make a loop with your yarn. Cross the loop over the working yarn. Pull up a new loop through the first. Insert your hook into the new loop. Tighten to secure.
Maintain even tension throughout.
- Row 1
For large cozy: Chain 17. For small cozy: Chain 13.Step by step: To chain, yarn over and pull through the loop on your hook.
- Row 2
Skip the first chain, insert hook into second chain, yarn over and pull up a loop, yarn over again and pull through both loops. Repeat single crochet to end of row.Step by step: Identify the V-shaped stitches before inserting your hook into the second chain.
Continue Rows: At the end of each row, chain 1 and turn. Insert hook under both loops of each stitch and single crochet across. Repeat until desired height/length is reached.Bind Off: Yarn over and pull through final loop. Cut yarn, leaving a tail. Pull tail through the last loop and tighten.Weave in ends using a tapestry needle and trim excess yarn for a clean finish.
Optional Border: Single crochet evenly around all four edges, inserting hook into edge stitches. This step adds polish and a finished look.
Loop
- Row 1
Chain 20.
- Row 2
Insert hook into second chain from hook, slip stitch in first stitch, then single crochet across the rest.Tie both ends together to secure the loop.
Bind Off: Bind off, leaving a long tail.
More shots
Where it goes
- Wrap it around a favorite mug for your morning coffee or tea at home.
- Give it a spot on a work-from-home desk where it pairs nicely with a coaster.
- Keep one in the office kitchen so your mug stands out among the plain ones.
- Use it on a travel mug for a quick errand run, paired with a matching scarf or hat from the same yarn.
Care
Hand wash the cozy in cool water with a mild detergent, since worsted weight yarn can felt or shrink with heat and agitation.
Lay it flat to dry on a towel rather than hanging it, so the single crochet rows keep their shape instead of stretching.
Store it flat or loosely folded in a drawer, and reshape gently by hand if the loop or edges look pulled out of place.
Assembly
- Step 1 Attach the Loop: Position the loop on one short side of the cozy. Use the long tail to sew it on with a tapestry needle. Tie the ends inside and weave in.
- Step 2 Attach the Button: On the opposite short side, sew the button securely, making sure it aligns with the loop for proper closure.
Easy to get wrong
Uneven single crochet tension
Keep your hook and yarn tension consistent row to row, especially since the whole body relies on matching single crochet stitches. If your rows start flaring or pulling in, pause and check that you are inserting under both loops evenly.
Loop chain worked too loosely
The loop needs to stay snug enough to hold the button without stretching out of shape. Work the slip stitch and single crochet combination with slightly firmer tension than the body.
Button and loop misaligned
Sew the button on only after checking exactly where the loop sits on the opposite short side. Hold the cozy closed around your mug before stitching to confirm the placement lines up.
Between the songs
- What I love about this cozy is how much technique lives in such a small piece. The main body is a simple single crochet rectangle, worked flat in turned rows, so you get to watch your fabric grow fast and see real progress every few minutes. The loop is where the piece gets interesting, since it combines a slip stitch and single crochet in the same row, giving you a firm little closure that is sturdier than it looks. Sewing the loop on with its own long tail and stitching the button opposite it feels like proper garment-finishing work, even on something this small. It is a pattern that teaches patience with tension and reward with a functional, wearable-for-your-mug result.
Listener questions
Can I make this cozy fit a bigger or smaller mug?
Yes, that is exactly why the pattern offers two starting chain lengths. Choose the larger chain for a bigger mug and the smaller one for a slimmer cup, then work rows until the height suits your mug.
What if I do not have a button on hand?
Any button around one inch will work fine for this closure. Just make sure it is sturdy enough to hold up to the loop tugging against it each time you slip the cozy on and off.
Why does the loop use a different stitch combination than the body?
The slip stitch and single crochet combination in the loop keeps it dense and slightly firmer than the open single crochet body. That firmness is what lets the loop hold its shape around the button instead of stretching loose.
How do I keep the loop from twisting when I sew it on?
Before stitching, lay the loop flat against the short side of the cozy and check both ends sit evenly. Tying the ends together as instructed before sewing helps it stay put while you work.
Is the optional border necessary?
It is not required, but it does give the edges a cleaner, more polished look. I like adding it especially along the top and bottom edges where the fabric tends to curl a little.
Original pattern: https://crocheteverything.com/diy-crochet-mug-cozy-pattern-with-loop-and-button-closure/
About the Author

Marisol QuinteroWho runs Crochet Obsessed, why a stitch count sits at the end of every round, how a pattern gets written here, and the things this site will never do.
More Patterns
- IntermediateNo. 01

Slouchy everyday beanie worked flat in half double crochet
Crochet beanie pattern for a slouchy everyday look worked flat with hdc rows, then seamed into a soft,…
- IntermediateNo. 02
Crochet amigurumi doll with dress, shoes, and hat
Crochet amigurumi doll pattern with dress, shoes, and hat details for a soft, huggable keepsake you build one…
- IntermediateNo. 03
Chunky moss stitch crochet sweater with raglan-free shoulders
Chunky crochet sweater pattern using moss stitch, worked flat with a 10mm hook for a soft, fast, cool-weather…


