- LevelIntermediate
- Time4-6 hours
- Hook1 mm
- YarnFingering
About This Pattern
I love a project that looks like one thing and turns out to be another. This starts as a flat round, the kind you'd expect to become a coaster, and then it blooms. By the time the petals curl up off the surface, you're holding a rose, not a disk, and that little surprise is the whole charm of this piece.
Your hands stay busy with two different rhythms here. First there's the steady, meditative build of the round base, increase after increase, dc after dc. Then the petals ask for something sharper: taller tr stitches, skipped loops, slip stitches that anchor each petal before you sc around its edge to finish it clean.
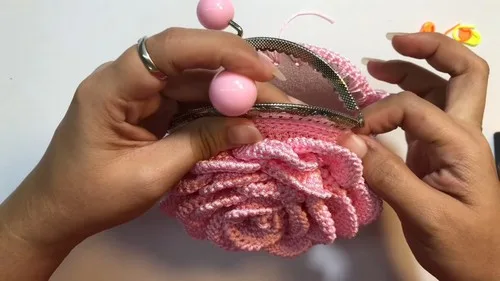
Set this on a shelf or clipped onto a strap and it reads as jewelry for your everyday carry, not just storage. The kiss lock frame gives it a little snap of hardware shine against all that soft nylon cord texture. It's the kind of object a friend picks up off your desk and asks who made it.
I like that the finished bag is unapologetically small. It's not trying to hold your whole life, just the few things you actually reach for, lip balm, a folded bill, a house key on a ring.
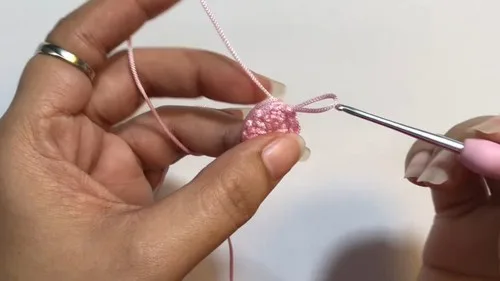
- Start with a magic ring and build a flat circle, increasing steadily each round so it lies smooth and even.
- Keep the increases evenly spaced as the base widens, since this sets up the loops the petals will later use.
- Finish that petal's edge with a row of sc worked around it before slip stitching into place.
- Repeat the same petal shaping into the next inner loop to build a second, matching petal beside the first.
- Work one more petal with an extra stitch at its base so it sits slightly fuller than the first two.
- Attach the finished rose to the metal arc frame once all petals are shaped and secured.
- Add the leather strap to the frame so the piece hangs ready to wear.
On the desk
- 1 mm or 1.5 mm nylon cord
- Hook size 2.20 mm
- 10.5 cm metal frame (arc frame, kiss lock)
- Leather base for the sling (120 cm)
- 100g yarn (for the rose mini bag)
Stitch shorthand
- ch — chain
- st — stitch
- sl st — slip stitch
- sc — single crochet
- dc — double crochet
- tr — treble crochet
Crochet mini rose bag with kiss lock frame tutorial
For Round Base
- Round 1
Make a magic ring. Ch 2, 11 dc into the ring. Sl st to the first ch 2.
- Round 2
Ch 2, 2 dc in each st around. Sl st to the first ch 2. (24 dc) For Round 3: Ch 2, 1 dc, 1 dc in the next st (increase) around. Sl st to the first ch 2. (36 dc)After Round 4: Ch 2, 2 dc in the next st, 1 dc in the next st (increase) around. Sl st to the first ch 2. (48 dc)
- Round 5
Ch 2, 3 dc in the next st, 1 dc in the next st (increase) around. Sl st to the first ch 2. (60 dc)
- Round 6
Ch 2, 4 dc in the next st, 1 dc in the next st (increase) around. Sl st to the first ch 2. (72 dc)
Petals
- Round 1
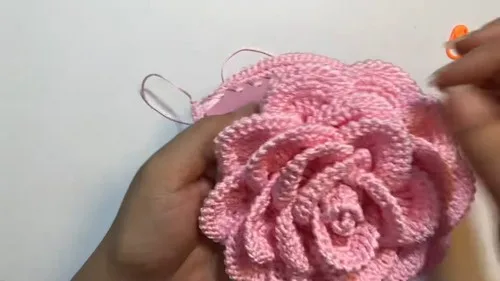
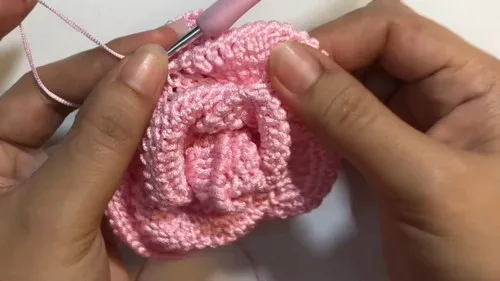
First Petal Ch 3, 2 tr in the first inner loop. Skip 3 loops, sl st to the 4th loop. Ch 1, sc in each st around the petal. Skip 3 loops, sl st to the 4th loop.
Second Petal
Ch 3, 2 tr in the next inner loop. Skip 3 loops, sl st to the 4th loop. Ch 1, sc in each st around the petal. Skip 3 loops, sl st to the 4th loop.
- Round 2
First Petal Ch 3, 3 tr in the first inner loop. Skip 5 loops, sl st to the 6th loop. Ch 1, sc in each st around the petal. Skip 5 loops, sl st to the 6th loop.
Second Petal
Ch 3, 3 tr in the next inner loop. Skip 5 loops, sl st to the 6th loop. Ch 1, sc in each st around the petal. Skip 5 loops, sl st to the 6th loop.
- Round 3
First Petal Ch 3, 3 tr in the first inner loop. Skip 4 loops, sl st to the 5th loop. Ch 1, sc in each st around the petal. Skip 4 loops, sl st to the 5th loop.
Second Petal
Ch 3, 3 tr in the next inner loop. Skip 4 loops, sl st to the 5th loop. Ch 1, sc in each st around the petal. Skip 4 loops, sl st to the 5th loop.
For Round 4: Repeat the pattern for Round 3 for all six petals.
Round 5: Repeat the pattern for Round 3 for all ten petals.
Attaching Leather Base
Attach yarn to the leather base. Ch 1, 2 sc in the first hole.
Continue with 5 sc in each hole, then increase (2 sc in the next hole). Repeat the pattern around.
Attach the leather base to the rose panel by joining the inner loops of the leather base to the inner loops of the rose panel.
Attach the second leather base to the other side of the rose panel.
More shots
Where it goes
- Carry it as a coin purse for a night out, holding just cash, a card, and lip balm.
- Clip it to a tote bag's interior as a tiny zip-free pouch for earbuds or hair ties.
- Hang it by the leather strap as a decorative accent on a dresser or vanity mirror.
- Gift it as a keepsake pouch for a small keepsake like a ring or a lock of hair.
Color ideas
- Classic rose Work the round base and all three petals in a single deep rose or burgundy nylon cord, letting the kiss lock frame's metal tone provide the only contrast.
Care
Spot clean with a damp cloth and mild soap, since nylon cord doesn't need full washing and holds its shape best when kept dry.
Air dry flat away from direct heat if it does get wet, reshaping the petals gently with your fingers while damp.
Store it stuffed lightly with tissue inside the frame opening so the petals don't flatten during time on a shelf or in a drawer.
Easy to get wrong
Uneven increases in the base
Count your stitches at the end of each increase round against the target total before moving on, since a missed increase early on throws off every later round.
Skipping the wrong loop count for petals
Count carefully when you skip loops before slip stitching to the next one, since skipping too few or too many changes how far each petal reaches forward.
Tension too loose with nylon cord
Keep your dc and tr stitches snug since nylon cord has little give, and loose stitches will leave visible gaps once the petals are shaped and under light tension.
Listener questions
What size cord works best for this bag?
The pattern calls for 1 mm or 1.5 mm nylon cord with a 2.20 mm hook. Sticking to that range keeps your stitches tight enough to hold the petal shapes firmly.
How many petals does the finished rose have?
You work three petals total: two matching ones from the first petal round, plus a third, slightly fuller petal from the second round. They overlap to build the rose's layered look.
Can I use regular yarn instead of nylon cord?
The materials list specifies nylon cord because it holds its shape without stuffing or wire. A soft yarn would likely need extra reinforcement to keep the petals standing up.
How does the bag attach to the frame and strap?
The rose attaches directly to the 10.5 cm metal arc frame, and the leather base provides the sling once the rose is secured. No separate lining or gusset is worked in this pattern.
Is this a good first flower-crochet project?
It suits someone who already has solid dc and tr stitches under their belt, since the petal rounds involve precise loop skipping. A straightforward round base makes the opening rounds approachable even if the petals are new to you.
Original pattern: https://crocheteverything.com/easy-to-make-crochet-mini-rose-bag-tutorial-for-keeping-tiny-things/
About the Author

Marisol QuinteroWho runs Crochet Obsessed, why a stitch count sits at the end of every round, how a pattern gets written here, and the things this site will never do.
More Patterns
- IntermediateNo. 01

Rose Granny Square Tote Crochet Pattern
Rose granny square tote crochet pattern made from 18 dimensional rose squares for a sturdy, romantic everyday bag.
- IntermediateNo. 02
Tropical octopus baby blanket crochet pattern with appliqués
Tropical octopus baby blanket crochet pattern: a cream filet base with coral and turquoise octopus appliqués, leaves, and…
- IntermediateNo. 03
Sunny lemon couple amigurumi crochet pattern
Sunny lemon couple amigurumi crochet pattern with embroidered slices and safety eyes for a cheerful handmade shelf pair.


