- LevelConfident Beginner
- Time3-4 Hours
- Hook3.5 mm
- YarnWorsted
About This Pattern
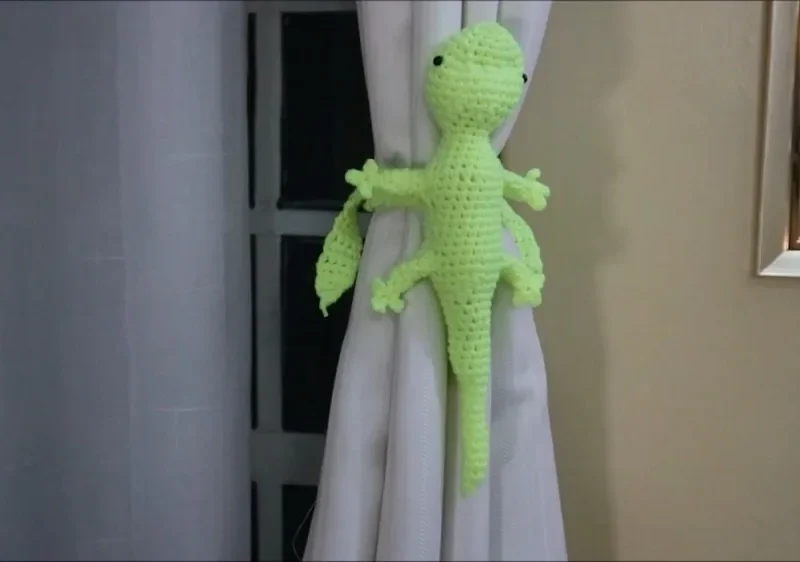
This pattern turns a few yards of worsted weight yarn into a soft, smiling lizard that wraps around your curtain and holds it back all day long. Instead of the usual fabric loop or plastic hook, you get a stuffed little creature with a long tapering tail, tiny legs, and a pair of ties that quietly do the working. It is perfect for a kid's room, a craft corner, or anyone who likes their home decor with a sense of humor.
The whole lizard is worked as one continuous spiral from head to tail across 28 rounds, so there are no seams to line up and no joining rounds to keep track of. You will use single crochet, simple increases and decreases, and a stitch marker to hold your place. Confident beginners can absolutely handle it, and the trickiest part is simply remembering to stuff as you go. Plan on roughly three to four hours, or one cozy evening if you are a fast stitcher.
Finished, the lizard is a slim, palm-friendly shape that curves naturally around a gathered curtain, with a slightly flattened face, two little eye details, and legs placed wherever you decide they look best. Worked in worsted acrylic on a 3.5 mm or 4 mm hook, the fabric comes out dense and springy, so it holds its shape year after year. Made in pairs, they are a genuinely charming housewarming gift, and kids adore having one guard each side of the window.
- Begin at the head and work in continuous rounds, marking the first stitch of every round as you go.
- Shape the snout and head with the written increases, checking your stitch count after each shaping round.
- Stuff the head firmly while the opening is still wide and easy to reach.
- Continue down the body and taper it into a slim pointed tail over the 28 rounds.
- Add stuffing gradually as the body narrows, keeping the tail tip light and flexible.
- Make the legs and pin them on each side, counting stitches so both sides match.
- Flatten the face with a side-to-side yarn pass if you like, then add the eye details.
- Work the two ties, attach them at matching heights, and wrap your lizard around the curtain.
Materials
Yarn
- Worsted weight acrylic yarn in desired colors (main body, leg, and eye details)
Hook
- 3.5 mm (E-4) or 4 mm (G-6) crochet hook, suitable for your yarn
Stitch Marker
- To mark rounds and stitches
Stuffing
- Polyester fiberfill or scrap yarn
Safety Eyes or Beads
- For eye details (optional)
Yarn Needle
- For sewing and weaving in ends
- Scissors
Crochet Abbreviations
- MR
- Magic ring
- ch
- chain
- sc
- single crochet
- sl st
- slip stitch
- inc
- increase (2 sc in same st)
- dec
- decrease (sc 2 together)
- st(s)
- stitch(es)
Crochet Lizard Curtain Tieback – Free Beginner Amigurumi Pattern
Head to Tail
Step by step: Attach yarn at round 4 of the body near neck or desired position; Ch 1. Work 7 sc around base, join in a round. (7 sts); Use stitch marker to keep track.
- Round 1
Make a magic ring (MR) . Work 6 sc into MR. (6 sts)
- Round 2
[ 1 sc, inc ] x3 (repeat three times). Place marker. (9 sts)
- Round 3
[ 2 sc, inc ] x3. (12 sts)
- Round 4
[ 1 sc, inc ] x6. (18 sts)
- Round 5
[ 2 sc, inc ] x6. (24 sts)
- Round 6
10 sc, inc x2, repeat once. (28 sts) Work 10 sc, inc x2; work 10 sc, inc x2 again.
- Round 7-9
Sc in each st around . (28 sts/round)
- Round 10
[ 5 sc, dec ] x4. (24 sts)
- Round 11
[ 2 sc, dec ] x6. (18 sts)
- Round 12
[ 1 sc, dec ] x6. (12 sts)
- Round 13-15
Sc in each st around . (12 sts/round) Stuff head firmly before continuing as opening narrows.
- Round 16
[ 3 sc, inc ] x3. (15 sts)
- Round 17
[ 4 sc, inc ] x3. (18 sts)
- Round 18
[ 5 sc, inc ] x3. (21 sts)
- Round 19-29
Sc in each st around . (21 sts/round) Save Stuff as you crochet.
- Round 30
[ 5 sc, dec ] x3. (18 sts)
- Round 31
[ 4 sc, dec ] x3. (15 sts)
- Round 32
[ 3 sc, dec ] x3. (12 sts)
- Round 33-34
Sc in each st around . (12 sts/round) Continue stuffing as required.
- Round 35
[ 2 sc, dec ] x3. (9 sts)
- Round 36-40
Sc in each st around . (9 sts/round)
- Round 41
Dec, 2 sc, dec, 2 sc, 1 sc . (7 sts)
- Round 42-44
Sc in each st around . (7 sts/round)
- Round 45
Dec, 5 sc . (6 sts)
- Round 46-48
Sc in each st around . (6 sts/round)Step by step: Dec x3 . (3 sts) Fingers (x3):; For each finger: Ch 3; Sl st in second ch from hook and in next ch; Repeat for all three fingers; Sl st to base, ch 1 , fasten off and sew in ends.
- Round 49
Dec, 4 sc . (5 sts)
- Round 50-51
Sc in each st around . (5 sts/round)
- Round 52
Dec, sc, dec . (3 sts) Ch 1, cut yarn , and weave in the end.
Eyes
Attach safety eyes or embroider between rounds 7 and 8 near the head. Flatten the face by weaving yarn horizontally if desired.
Ties (Make 2)
Attach yarn at base of body near first leg.
Ch 1. Work 4 sc across, ch 1 , turn.
Continue working 4 sc across each row, ch 1 and turn, repeating until tie is as long as desired.
End shaping: At end of final row, dec x2 , ch 1 , then dec x1, ch 1 , fasten off and weave in ends.
More photos
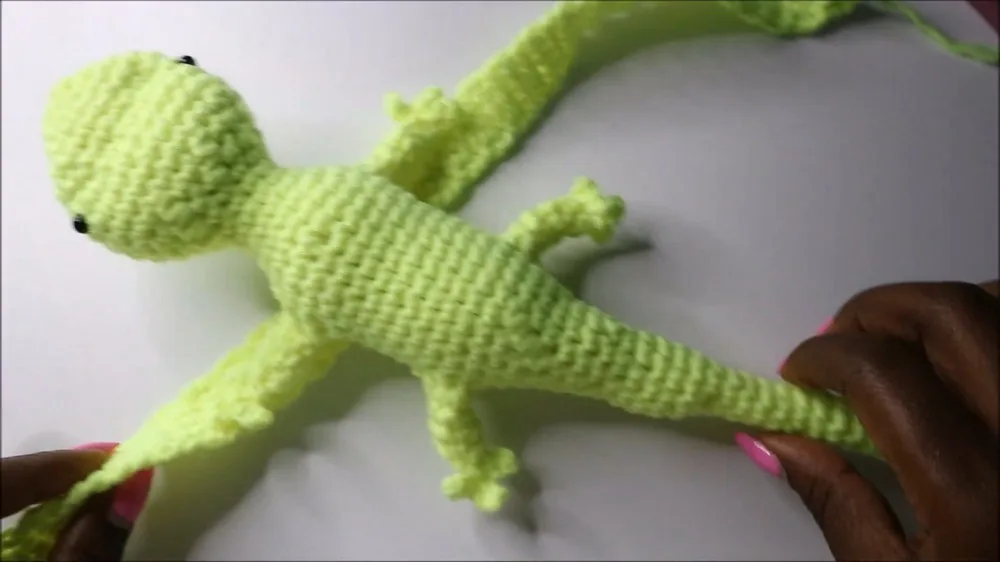
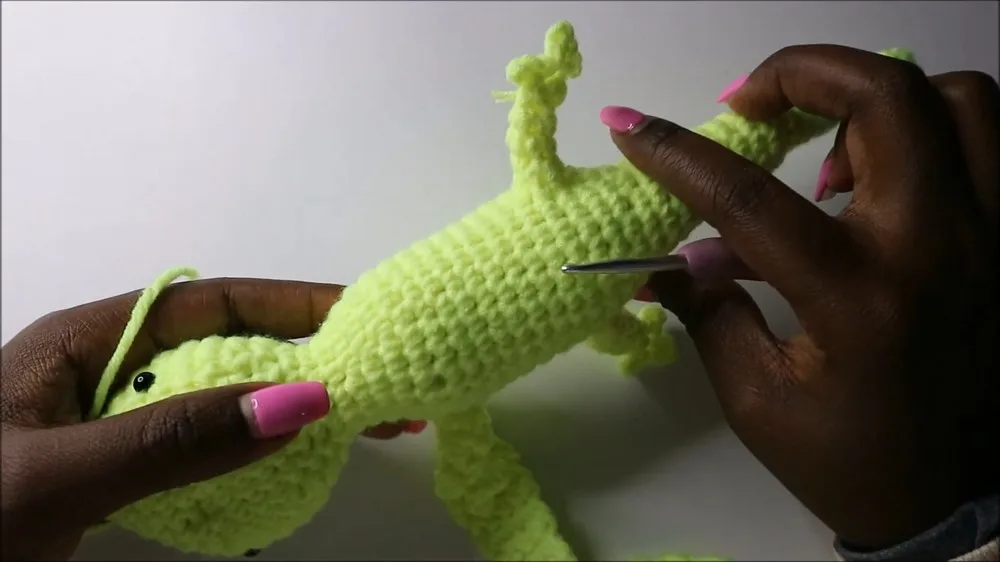
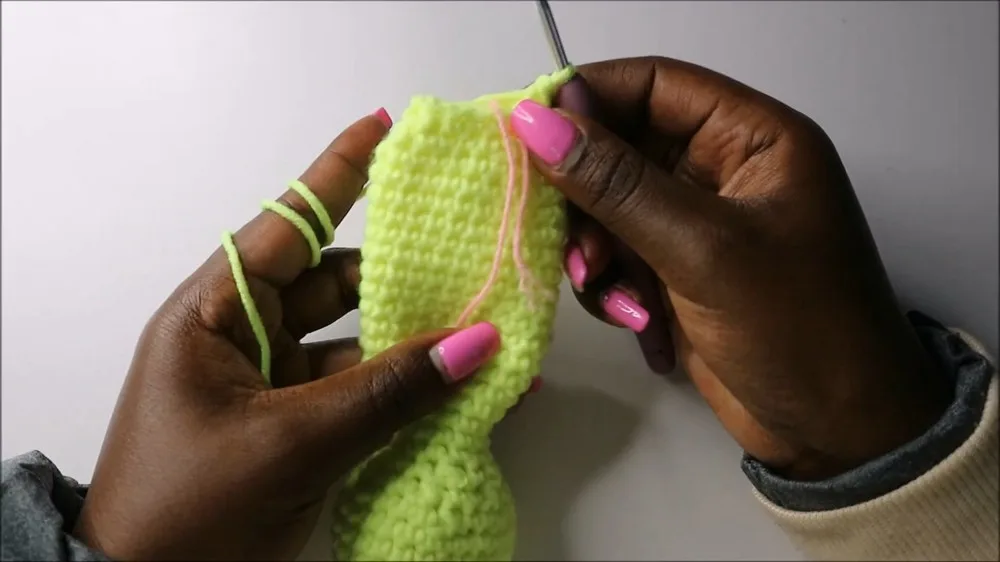
Important Notes
- 💡 The hook range matters more than usual here. A 3.5 mm (E-4) gives you a tighter, sturdier fabric that hides stuffing well, while a 4 mm (G-6) works up faster and softer. If your worsted yarn is on the thin side, go with the 3.5 mm.
- 💡 Keep two stitch markers in play: one that moves with the start of each round, and a spare you can drop in when you need to mark leg or tie placement later. Trying to find that spot again after twenty rounds is no fun.
- 💡 If you are out of polyester fiberfill, scrap yarn works as a stuffing substitute, but use light-colored scraps inside light-colored lizards so nothing shadows through the stitches.
- 💡 When you change colors for the legs or eye details, carry the old strand loosely inside the body for a few stitches rather than cutting every time. Just make sure the carried strand ends up behind the stuffing, not pressed against the fabric where it can show.
- 💡 Measure your actual curtain before you finalize the ties. A thin sheer panel needs much shorter ties than a heavy lined drape, and it is far easier to add length now than to unpick and redo it later.
- 💡 Leave a generous tail when you fasten off any piece you plan to sew on. A 12 inch tail gives you enough to position the legs, adjust them, and still weave in securely without knotting on extra yarn.
Common Mistakes and Fixes
- Losing your place because the piece is worked in continuous rounds with no join.
Move a stitch marker into the first stitch of every single round before you work it. If you do lose the start, count back from your last marked stitch rather than guessing, and check your stitch count against the round you think you are on before continuing.
- Waiting until the head is nearly closed to start stuffing.
Stuff the head while the opening is still wide, exactly as the notes instruct. Once the decreases have narrowed the piece, pushing fiberfill in cleanly becomes genuinely difficult and you end up with lumps at the neck. Add small pinches of stuffing at a time and shape as you go.
- Stitch counts drifting off after an increase or decrease round.
Recount at the end of any shaping round. Almost every mismatch comes from working a repeat one too many or one too few times, so check the repeat instruction rather than assuming you miscounted the base stitches. Frogging one round now is much faster than discovering a lopsided body ten rounds later.
- Sewing the legs and ties on by eye and ending up with a crooked, lopsided lizard.
Pin or stitch-mark the placement first and hold the piece up against the curtain before committing. Count stitches from the center of the belly on both sides so the legs mirror each other, and check that the two ties sit at the same height so the lizard hangs level.
- Attaching the eye details before shaping the face, so they end up on a rounded, unflattened head.
Decide first whether you want the flattened face. If you do, weave the yarn side-to-side through the head and pull gently to create the flat plane, then place the eyes on that surface. Placing them first means they will shift and tilt when you sculpt underneath them.
Variations
- Color is the fastest way to make this lizard yours. A classic gecko in bright leaf green with a cream belly reads instantly as a lizard, but a chameleon version in teal with coral legs is far more fun, and a sandy desert palette of camel, terracotta, and bone looks surprisingly grown-up in a living room. For a nursery, try dusty pink with sage legs, or go full pastel rainbow by changing color every few rounds down the body so the tail fades from lilac to mint. For yarn, Super Saver and Vanna's Choice both give you the dense, structured fabric this project wants, while Paintbox Simply Aran offers a huge shade range if you are matching a specific curtain. If you want a softer, floppier lizard, Feels Like Butta on the 4 mm hook is lovely. Size is easy to adjust: to fit a heavier, fuller curtain, work a few extra rounds at the widest part of the body before you begin the tail decreases, and lengthen the ties to match. For a chunky statement version, hold two strands of worsted together on a 5.5 mm hook and stuff a little more firmly than usual. Themed variations are fun too, like a frosty white and silver lizard for a winter window, a fiery orange and rust one for autumn, or an ocean version in deep blue with pale aqua legs. You can also skip the tieback entirely, shorten the ties, and turn the same body into a soft bookshelf lizard or a bag charm.
- I have made a lot of amigurumi that ends up sitting on a shelf, and what I love about this lizard is that it has a job. Every morning it holds the curtain open, and every evening it lets go. That makes it feel less like a decoration and more like a tiny roommate. Stitch-wise, I genuinely enjoy the head-to-tail construction: you cast on once, work in continuous rounds, and the shape just keeps unfolding under your hands until suddenly there is a nose, then a body, then that long skinny tail. There is no seaming a body to a head, no fiddly joins, and no wondering whether the two halves will line up. Stuffing as you go is the other quiet pleasure here, because the head firms up under your fingers while the opening is still wide and friendly. And the little decisions are all yours: how far apart the eyes sit, whether the face gets flattened with a side-to-side stitch, exactly where the legs land. Two lizards from the same pattern never look quite the same, and I think that is the whole point.
Frequently Asked Questions
Will this lizard actually hold a heavy curtain back?
It holds light to medium curtains comfortably as long as you stuff the body firmly enough to keep its shape. For heavy lined drapes, lengthen the ties and stuff a little denser so the body does not compress and slip.
Is this really doable if I have only made a few amigurumi pieces?
Yes. The entire lizard is single crochet with simple increases and decreases worked in continuous rounds, so there is no complicated stitch to learn. The only real skill is keeping track of your rounds with a stitch marker.
Can I use safety eyes instead of embroidered eye details?
You can, and they give a crisper look, but insert them before you stuff that section since the backs lock in permanently. If the lizard is going in a small child's room, embroidered eyes are the safer choice.
How much yarn does one lizard use?
One lizard uses a modest amount of worsted weight yarn, so a single skein comfortably covers the main body with plenty left over. This is a great project for using up leftovers, especially for the legs and eye details.
Do I have to stuff the tail all the way to the tip?
No, and it usually looks better if you do not. Leave the last few rounds of the tail lightly stuffed or empty so the tip stays slim and flexible instead of stiff and stubby.
Original pattern: https://redagapeblog.com/crochet-lizard-curtain-tieback/
About the Author

Marisol QuinteroWho runs Crochet Obsessed, why a stitch count sits at the end of every round, how a pattern gets written here, and the things this site will never do.
More Patterns
- IntermediateNo. 01

Slouchy everyday beanie worked flat in half double crochet
Crochet beanie pattern for a slouchy everyday look worked flat with hdc rows, then seamed into a soft,…
- IntermediateNo. 02
Crochet amigurumi doll with dress, shoes, and hat
Crochet amigurumi doll pattern with dress, shoes, and hat details for a soft, huggable keepsake you build one…
- IntermediateNo. 03
Chunky moss stitch crochet sweater with raglan-free shoulders
Chunky crochet sweater pattern using moss stitch, worked flat with a 10mm hook for a soft, fast, cool-weather…


