- LevelIntermediate
- Time4-6 hours
- Hook4 mm
- YarnWorsted
About This Pattern
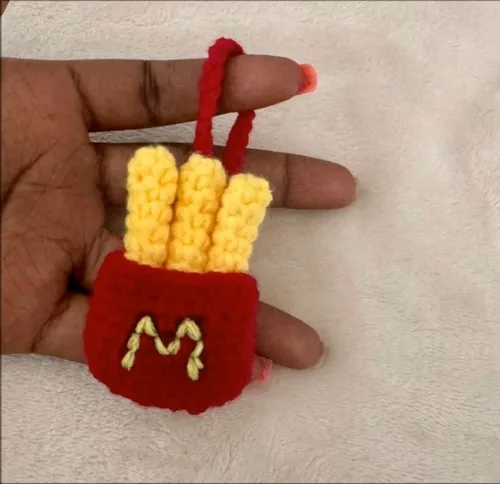
This one has the mood of a snack break turned into a toy. Red and yellow sit next to each other the way they do on a paper sleeve of fries, cheerful and a little silly. There is no quiet gradient here, just two bright colors doing their job.
Your hands stay busy with small, repeating rounds rather than anything tricky. You will work magic rings, steady single crochet, and a couple of increases on the bag, over and over until three little fries and one striped pouch take shape. It is the kind of project where your fingers find a rhythm fast.
Finished, it is a handful of yarn fries tucked into a tiny bag, swinging from a zipper pull or a backpack strap. It reads as a joke at first glance, then as something oddly sweet once someone looks closer. It sits well on a hook by the door or clipped to a tote.
- Start each fry with a magic ring, then work even single crochet rounds until it reaches its full length.
- Close the top of each fry with two decreases and a slip stitch, then fasten off and trim.
- Make three fries total, since one bag is sized to hold that many snugly.
- Build the bag starting from a chain worked along both sides to create an oval base shape.
- Increase twice on each side of the next round to widen the bag before working even rounds upward.
- Slip stitch to close the top of the bag once it reaches its final round, then fasten off.
- Nest the three fries inside the bag and stitch them in place with a yarn needle.
- Mark and embroider a letter on the bag front, then add a small chain loop for a keychain ring.
On the desk
- Yarn in red and yellow colors (medium weight is suggested, but you can adjust according to your preference).
- Crochet hook that matches your yarn (often a size G/6 or 4 mm hook, but check the yarn label).
- Yarn needle for weaving in ends and assembling.
- Scissors.
- Stitch marker or a piece of contrasting yarn to mark the beginning of the round.
Optional
- Keychain ring if you want to attach it to the bag.
Stitch shorthand
- sc — single crochet
- ch — chain
- sl st — slip stitch
Crochet french fries keychain with amigurumi bag pattern
Fries
Make 3- Round 1
Make a magic ring and work 5 single crochets (sc) into the ring; pull the yarn to close the gap and place a marker. (5)
- Round 2
1 sc in each of the next 5 stitches. (5)
- Rounds 3–10
Repeat the second round (5 sc in each round) until you reach the 10th round. (5)Remove the marker, decrease twice to close the top, slip stitch in the last stitch, cut the yarn and pull it through to fasten off.
Insert the yarn through the middle of the fries and cut off the excess.Repeat the above steps for each fry; you will need to make three fries in total.
Bag
- Round 1
Start with red yarn, chain 7; starting in the second chain from the hook, work 5 sc; in the last chain, work 4 sc in the same stitch; turn your work to continue down the opposite side of the chain; work 4 sc along the opposite side; work 3 sc in the last chain.
- Round 2
You should have a total of 16 stitches now; work 6 sc, then make 2 increases in the next 2 stitches; work another 6 sc, and then make 2 increases in the last 2 stitches.
- Rounds 3–8
Work 1 sc in each stitch (20 sc in each round). (20 sc)After the eighth round, remove the marker and slip stitch to close.
Cut the yarn, pull through the stitch to fasten off, and weave in the ends.
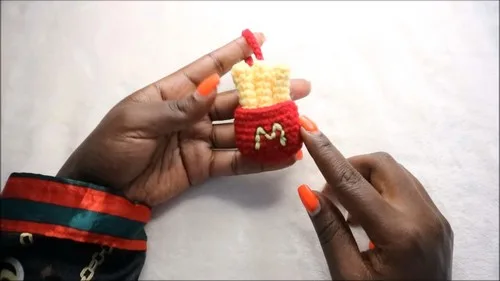
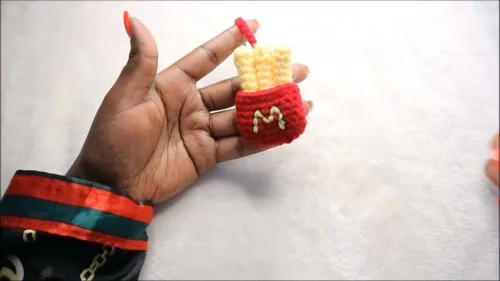
More shots
Where it goes
- Clip it to a backpack or school bag as a cheerful zipper pull that is hard to mix up with anyone else's.
- Give it as a small handmade gift tucked into a lunch bag or care package, no wrapping paper needed.
- Use it as a keychain for house keys, paired with a plain metal ring from your craft stash.
- Set it on a shelf with other amigurumi food pieces to build a tiny crochet snack collection.
Color ideas
- Classic fast-food red and yellow Work the bag rounds in red yarn as the pattern states, and keep all three fries in yellow for the traditional diner look.
- Swapped contrast Crochet the bag in yellow instead of red for a softer base, and keep the fries themselves in a warm golden yellow so they stand out less against the bag and more as a single toned bundle.
Care
Hand wash in cool water if the piece gets dirty, since medium weight acrylic or cotton yarn holds its shape best without a washing machine's agitation.
Lay flat to air dry rather than hanging, so the weight of the damp fries and bag does not pull the single crochet rounds out of shape.
Store it away from direct sun when not in use, since bright red and yellow yarn can fade with long exposure, and keep it flat or loosely coiled rather than crushed in a drawer.
Assembly
- Step 1 Place the three fries pieces inside the bag so that they fit snugly.
- Step 2 Attach the fries to the bag with a yarn needle.
- Step 3 Embroider a little 'M' (or other preferred letter/design) on the front of the bag.
- Step 4 Use a marker to draw the letter 'M', then embroider over it with yarn and a needle.
- Step 5 Attach a small chain to the back of the fry bag to serve as a loop or keychain.
Easy to get wrong
Loose magic ring on the fries
Pull the tail firmly before placing your marker so the center hole closes all the way. A gap here shows at the base of every fry once it is standing up.
Losing track of the increase round on the bag
Place your stitch marker right at the start of the round with the increases and count stitches before moving on. Sixteen stitches should become the wider count described in that round before you continue in even single crochet.
Fries sitting loose instead of snug in the bag
Check that the fries fit tightly against each other and the bag sides before you stitch them down. A few extra tacking stitches with the yarn needle keep them from flopping once the keychain is in motion.
Between the songs
- The appeal here is in the repetition that actually goes somewhere. Each fry is just a magic ring and straight single crochet rounds, so you get fast, visible progress with almost no shaping decisions to track. The bag flips that script with one real construction moment: starting chain worked on both sides to form an oval base, then two increase rounds that turn flat stitches into a little three-dimensional pouch. Assembling the three fries inside that bag and tacking them in place with a yarn needle is the satisfying finish, the point where separate small pieces suddenly read as one object. Adding an embroidered initial on the front gives you a second skill, worked right over the single crochet, so the whole make touches three different techniques without ever getting complicated.
Listener questions
Can I make the fries a different length than shown?
Yes, you can work fewer or more even single crochet rounds before closing the top. Just keep in mind the bag is sized to hold three fries of the stated length snugly, so a big change in length may change the fit.
What yarn weight works best for this pattern?
A medium worsted weight yarn paired with the matching hook size listed in the materials gives the cleanest, tightest single crochet fabric. This matters more than usual since amigurumi stitches need to stay close enough to hide stuffing.
Do I need stuffing even though it is not listed?
The materials list does not call for stuffing, so this pattern relies on the firmness of your single crochet rounds and yarn tension to hold shape. If your fries feel floppy, work with a smaller hook relative to your yarn for tighter stitches.
How do I attach the keychain ring?
The assembly steps describe adding a small chain to the back of the bag to serve as the loop. Slip your keychain ring through that chain loop once it is fastened off and woven in.
Can I embroider a different design instead of a letter?
Absolutely, the pattern uses a letter as one option but any small design works the same way. Draw it lightly with a marker first, then embroider over the lines with your yarn needle just as you would the initial.
Original pattern: https://crocheteverything.com/crochet-french-fries-amigurumi-keychain-pattern-great-for-giving-as-gift/
About the Author

Marisol QuinteroWho runs Crochet Obsessed, why a stitch count sits at the end of every round, how a pattern gets written here, and the things this site will never do.
More Patterns
- IntermediateNo. 01

Rose Granny Square Tote Crochet Pattern
Rose granny square tote crochet pattern made from 18 dimensional rose squares for a sturdy, romantic everyday bag.
- IntermediateNo. 02
Tropical octopus baby blanket crochet pattern with appliqués
Tropical octopus baby blanket crochet pattern: a cream filet base with coral and turquoise octopus appliqués, leaves, and…
- IntermediateNo. 03
Sunny lemon couple amigurumi crochet pattern
Sunny lemon couple amigurumi crochet pattern with embroidered slices and safety eyes for a cheerful handmade shelf pair.


