- LevelIntermediate
- Time4-6 hours
- Hook4 mm
- YarnBulky
About This Pattern
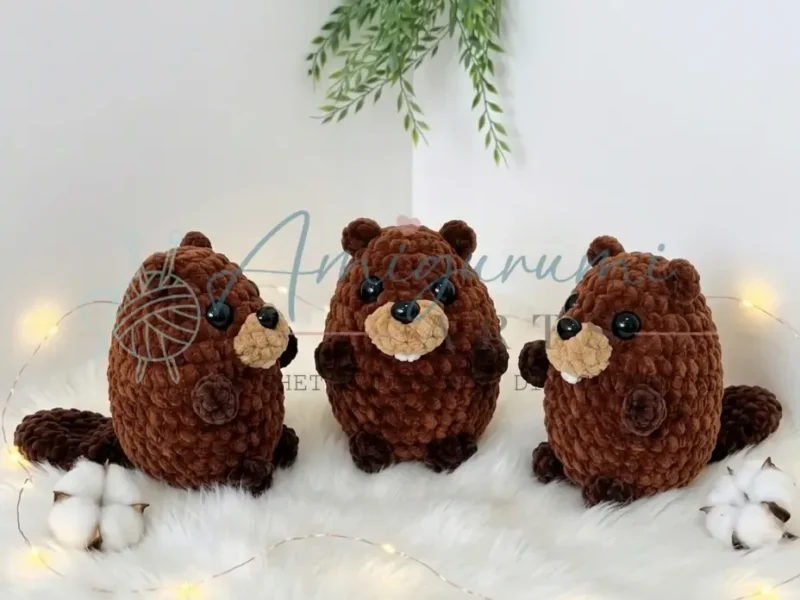
This one has a quiet, burrowed-in kind of mood, like something you'd find curled up in a log pile. The velvet yarn softens every edge before you even stuff it. I think of it as a cozy, low-key make for an evening when you want your hands busy but your mind at rest.
Your hands stay in one steady rhythm here: single crochet around and around in a continuous spiral, no joining, no turning. The ears ask for a small detour, worked directly onto the body with a chain and a single hdc, which breaks up the monotony nicely. The tail is its own short, separate build before it ever meets the body.
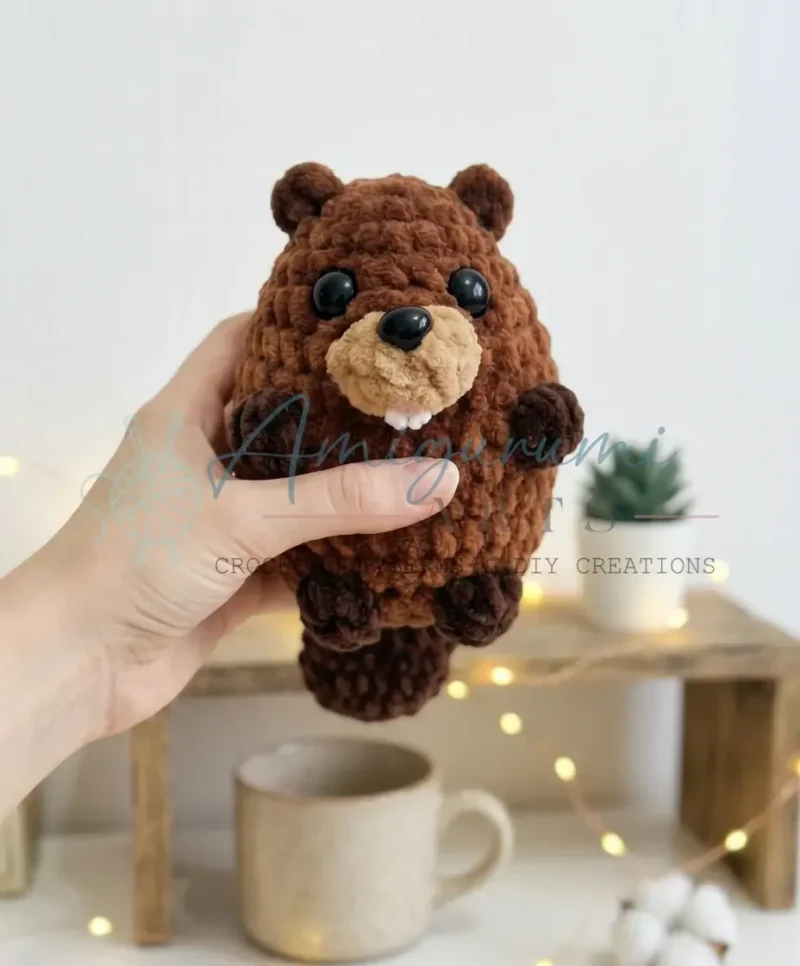
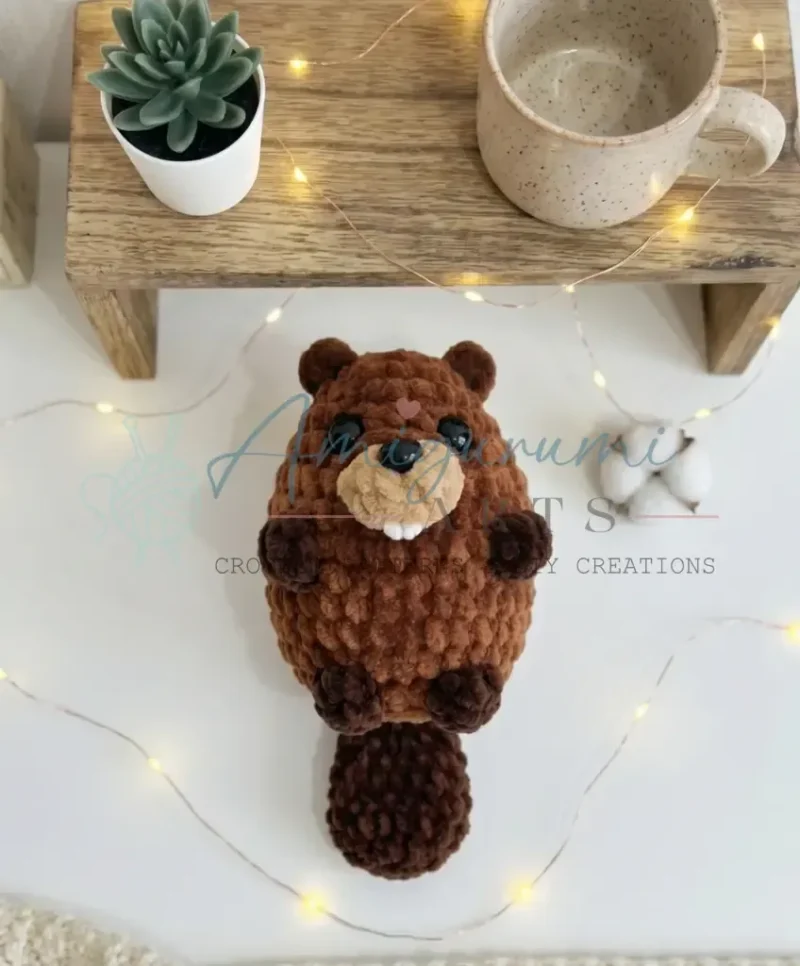
Finished, this beaver sits low and round, more paperweight than showpiece, happy on a windowsill or tucked among bookshelf clutter. The plush texture catches light differently than regular yarn, giving it a soft sheen. It reads as handmade but polished, the kind of thing a kid grabs without being told it's fragile.
This pattern is written in US crochet terminology. Gauge is not critical for this project — consistent, firm tension matters more than exact stitch measurements, since that's what keeps the stuffing from showing through the plush yarn.
- Start the tail first in the accent yarn, building it up from a magic ring through a run of increases and decreases.
- Set the tail aside and begin the body in main color yarn, starting again from a magic ring.
- Work the body increases in the early rounds to widen the base, then settle into plain single crochet rounds.
- Shift to decrease rounds as you near the top of the body to bring it back in and shape the head.
- Join main color yarn directly onto an earlier body round to work each ear with a small chain and a single hdc.
- Anchor each ear back down into the round below with a slip stitch, then cut yarn and weave in the end.
- Add safety eyes, the nose, and any muzzle detailing before the body closes up completely for stuffing.
- Finish with the embroidered teeth in white yarn beneath the nose, using neat, parallel straight stitches.
On the desk
Main color yarn
- Plush / velvet-style yarn, 100 g / 120 m (approx. Bulky weight) — main body color
- Accent color yarn (muzzle, tail, paws): Plush / velvet-style yarn — contrasting color for muzzle details; a second contrasting yarn for tail and legs
Hook
- US G-6 / 4 mm
Safety eyes
- 10 mm or 12 mm — 2 pieces
Adhesive nose
- 10 × 11 mm — 1 piece
Stuffing
- Polyester fiberfill
- Stitch markers — to track round beginnings
- Yarn needle / tapestry needle
- Scissors
- White yarn or embroidery thread — for stitching the teeth
Stitch shorthand
- ch — Chain
- dec — Invisible Decrease (insert hook in front loop of next 2 sts, draw up a loop, yarn over, pull through all 3 loops)
- hdc — Half Double Crochet
- inc — Increase (2 sc in same stitch)
- MR — Magic Ring
- puff st — Puff Stitch — for the muzzle and arms: a 4-dc puff with a single shared top (yarn over, insert hook, pull up a loop — repeat 4 times in the same stitch, then yarn over and pull through all loops on the hook); for the legs: a 3-tr puff worked the same way with treble crochets (yarn over twice per loop pickup), repeated 3 times, with a single shared top
- sc — Single Crochet
- sl st — Slip Stitch
- SM — Stitch Marker
- st / sts — Stitch / Stitches
- tr — Treble Crochet
Crochet beaver amigurumi plush pattern
Tail(worked in accent yarn — tail/paw color)
- Round 1
7 sc in MR. (7)
- Round 2
inc in each st around. (14)
- Rounds 3–4
sc in each st around. (14)
- Round 5
dec, 5 sc repeat twice. (12)
- Round 6
sc in each st around. (12)
- Round 7
dec, 4 sc repeat twice. (10)
- Round 8
sc in each st around. (10)
- Round 9
dec, 3 sc repeat twice. (8)Do not stuff the tail. Flatten the opening and work 4 sc through both layers to close. Set aside — this piece will be joined during body assembly.
Body(worked in main color yarn)
- Round 1
6 sc in MR. (6)
- Round 2
inc in each st around. (12)
- Round 3
1 sc, inc repeat 6 times. (18)
- Round 4
2 sc, inc repeat 6 times. (24)
- Round 5
sc in each st around. (24)
- Round 6
3 sc, inc repeat 6 times. (30)
- Round 7
14 sc; switch to accent yarn — work 2 puff sts (4-dc puff, single shared top) in the same position for the muzzle; switch back to main color — 14 sc. (30)The two puff stitches form the muzzle relief on the front of the body.
- Round 8
sc in each st around. (30)
- Round 9
1 sc, inc, 8 sc, work 1 arm puff st (4-dc puff, single shared top) in next st, 8 sc, work 1 arm puff st in next st, 8 sc, inc, 1 sc. (32)Arms are placed symmetrically on each side.
Insert safety eyes between Rnds 5 and 6, with 4 stitches between the inner posts of each eye, positioned above the muzzle puff stitches. - Rounds 10–13(32)
sc in each st around. (32) (4 rounds)
- Round 14
2 sc, dec, 9 sc, work 1 leg puff st (3-tr puff, single shared top) in next st, 4 sc, work 1 leg puff st in next st, 9 sc, dec, 2 sc, then work 2 sc joining the tail (working through the 2 remaining tail sts). (30)Attach the flattened tail at the back of the body during this round.
- Round 15
2 sc joining the remaining 2 tail sts, 1 sc, dec, 3 sc, dec repeat 5 times. (24)Begin stuffing the body firmly now. Continue adding fiberfill as you close.
- Round 16
12 dec. (12)
- Round 17
6 dec. (6)Pull yarn tail through remaining stitches to close. Weave in end securely.
Ears(worked directly onto the body)
Hold the finished body facing you. Join main color yarn with a sl st to a stitch in Rnd 4.
Ch 3; work 1 hdc into the 3rd ch from hook; sl st into Rnd 3 directly below.
Cut yarn and weave the end into the body. Work the second ear in the same way on the opposite side of Rnd 4.
More shots
Where it goes
- A soft desk companion that sits next to a keyboard or monitor without rolling off, pairing well with other plush amigurumi on a shelf.
- A handmade gift for a young child who likes chunky, huggable toys, paired with a small knit blanket or basket.
- A bookshelf or windowsill accent piece that adds texture next to plants or framed photos.
- A car or bag charm-sized companion if made smaller, though as written it suits a stationary spot at home.
Color ideas
- Classic woodland beaver Main color yarn in a warm brown for the entire body and ears, with the accent tail/paw yarn in a darker charcoal-brown for the tail, and a lighter contrasting shade reserved for the muzzle puff stitches.
- Soft gray river beaver Main color yarn in a muted dove gray for the body and ears, accent yarn in a deeper slate gray for the tail, and a cream or oatmeal contrast for the muzzle detailing.
Care
Hand wash gently in cool water if the plush yarn needs freshening, then press out excess water in a towel rather than wringing it, since twisting can flatten the velvet nap.
Air dry flat away from direct heat, reshaping the ears and tail with your fingers while damp so they dry sitting the way you originally worked them.
Store the finished beaver somewhere it won't get crushed under heavier items, since the plush yarn's texture can flatten permanently under sustained pressure.
Assembly
- Step 1 All major components — body, tail, arms, legs, and muzzle puff stitches — are worked directly into or joined during the body rounds. No separate sewing is needed for these elements.
- Step 2 Press the adhesive nose firmly onto the muzzle area, centered between the two muzzle puff stitches.
- Step 3 Using white yarn or embroidery thread, stitch a small set of teeth below the nose with several straight stitches. Keep the stitches neat and parallel for a clean finish.
- Step 4 Confirm safety eyes are locked securely in place from the inside.
- Step 5 Weave in all remaining yarn tails using your tapestry needle, working the ends deep into the stuffed body so nothing loosens over time.
Easy to get wrong
Losing track of the round start
Drop a stitch marker into the first stitch of every round before you move on, since the whole body and tail are worked in a continuous spiral with no joining stitch to guide you back. Velvet and plush yarns hide your stitches, so count carefully at the end of every round, especially during increases.
Ears pulling loose from the body
Make sure the join slip stitch and the anchoring slip stitch into the round below are both snug before you cut yarn, so the small chain-and-hdc ear doesn't wiggle free with handling. Since the ears are small and quick to work, hold a stitch marker at the join spot on Rnd 4 and check the placement from the front before committing.
Stuffing showing through the fabric
Keep your single crochet tension firm and even throughout the body rounds, and push fiberfill all the way to the base and into any gaps near the leg puff stitches, since gauge isn't critical here but loose stitches or thin spots will let the fiberfill peek through the velvet yarn. If the body feels soft when you squeeze it, add more stuffing.
Uneven puff stitches
uniform puff stitches on the muzzle and limbs, keep each yarn-over loop the same height before pulling through. If the puffs look uneven, try pulling all loops up to the same length before the final pull-through.
Tail puckering the body
The tail joins over two rounds (Rnds 14 and 15), which distributes the attachment across multiple stitches rather than one point. Keep the tail centered at the back and don't pull it too tight, or it will pucker the body.
Between the songs
- What I like most is how the velvet-style yarn does half the work for you, hiding minor tension slips that regular yarn would show. The continuous spiral keeps your rhythm unbroken through fourteen rounds of body shaping, from the tidy increase rounds near the base up through the decreases at the top. The ears are the clever bit: no sewing, just a joined slip stitch, a small chain, one hdc, and back down into an earlier round for anchoring. The tail gets its own short arc of increases and decreases in a contrasting color, so you're never bored working the same stitch for too long. It's a satisfying, low-fuss build with just enough technique variety to keep you paying attention.
Listener questions
What hook size should I use for this beaver pattern?
This pattern uses a US G-6 / 4 mm hook. Because you're working with plush yarn, a hook that is slightly smaller than the yarn label recommends will give you a tighter fabric that holds its shape and prevents stuffing from showing through. If your stitches feel too stiff or your hand cramps quickly, go up half a size.
Can I substitute a different yarn for this pattern?
Yes, but stay within a similar weight range. The original uses a Bulky-weight plush yarn, and swapping for another velvet or chenille yarn in the same weight will give you nearly identical results. Avoid standard acrylic or cotton for this pattern — without the plush texture, the puff stitch muzzle and limbs lose their dimensional effect and the finished beaver will look quite different.
Why shouldn't I stuff the tail?
The tail is designed to lie flat and fold closed, not stand out from the body. Stuffing it would make it round and stiff, which would both change its shape and make it harder to join cleanly during Rnds 14 and 15 of the body. A flat, unstuffed tail also creates a more realistic beaver silhouette.
When exactly do I insert the safety eyes?
Insert the safety eyes after completing Rnd 8 or 9 — before the body gets too narrow to reach inside comfortably — but they must be positioned between Rnds 5 and 6. Place them 4 stitches apart at their inner posts, directly above the muzzle puff stitches.
Original pattern: https://amigurumiarts.com/crochet-plush-beaver-amigurumi-pattern/
About the Author

Marisol QuinteroWho runs Crochet Obsessed, why a stitch count sits at the end of every round, how a pattern gets written here, and the things this site will never do.
More Patterns
- IntermediateNo. 01

Rose Granny Square Tote Crochet Pattern
Rose granny square tote crochet pattern made from 18 dimensional rose squares for a sturdy, romantic everyday bag.
- IntermediateNo. 02
Tropical octopus baby blanket crochet pattern with appliqués
Tropical octopus baby blanket crochet pattern: a cream filet base with coral and turquoise octopus appliqués, leaves, and…
- IntermediateNo. 03
Sunny lemon couple amigurumi crochet pattern
Sunny lemon couple amigurumi crochet pattern with embroidered slices and safety eyes for a cheerful handmade shelf pair.


