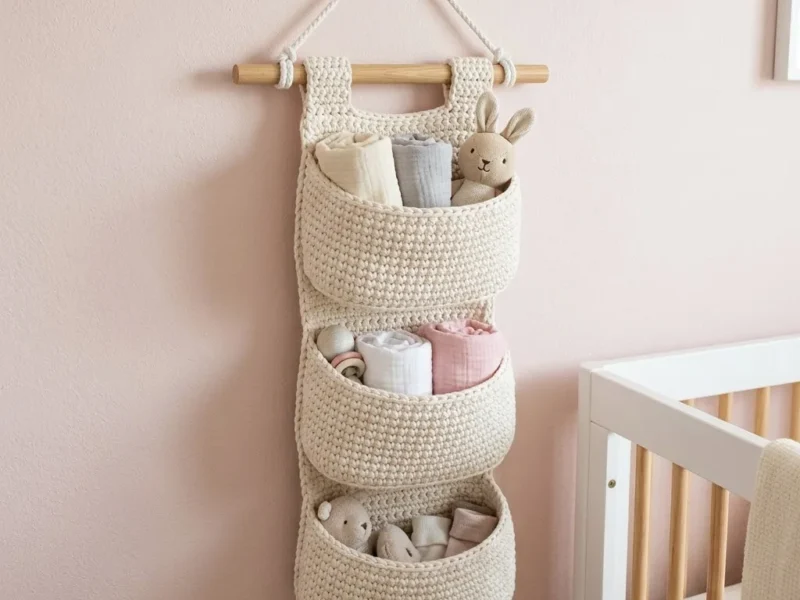
- LevelIntermediate
- Time4-6 hours
- Hook5.0 mm
- YarnWorsted
About This Pattern
This one feels like a quiet morning in a nursery that still smells like fresh paint. Cream and off-white cotton keeps everything soft and calm, nothing shouting for attention. It is the kind of piece that disappears into a room while still doing real work.
Your hands spend most of their time on long, even rows of single crochet, so this is a project for steady rhythm rather than constant pattern-reading. Then the oval pocket shifts things up with increases that round out the shape. The tabs at the end call for careful seaming and a tapestry needle.
Hung from a wooden dowel with a length of cotton rope, this organizer sits flat against a wall and holds its shape thanks to the dense cotton fabric. It works right over a changing table or tucked beside a crib. Simple, sturdy, and pleasant to look at every single day.
- Start with a long foundation chain and work straight rows of single crochet to build the cream backing panel.
- Keep checking your stitch count as you go so the rectangle stays even from top to bottom.
- Chain and join into a ring to begin the oval pocket piece worked in continuous rounds.
- Increase at each end of the oval over several rounds so the shape widens into a rounded pocket.
- Fasten off the oval and set it aside once it reaches its finished length and width.
- Crochet two flat tabs in short straight rows, leaving long tails for sewing them on later.
- Seam the oval pocket onto the cream backing panel, then attach the tabs near the top.
- Slide the wooden dowel through the tabs and knot the cotton rope on each end for hanging.
On the desk
Yarn
- Approximately 400 to 450 grams of worsted weight cotton yarn in cream or off-white. I recommend Lily Sugar’n Cream or Bernat Handicrafter Cotton for durability and stitch definition. Cotton holds its shape better than acrylic for this project.
Hook
- 5.0 mm (US H/8) crochet hook. Going down a hook size from the yarn recommendation creates the dense fabric you need.
Wooden Dowel
- One wooden dowel, 12 inches long and approximately 3/4 inch diameter. You can find these at any craft store.
Hanging Cord
- Approximately 24 inches of cotton rope or macramé cord for hanging.
Other Supplies
- Tapestry needle for weaving ends and seaming
- Scissors
- Stitch markers (optional but helpful)
- Measuring tape
- Gauge
Stitch shorthand
- ch — chain
- st — stitch
- sts — stitches
- sl st — slip stitch
- sc — single crochet
- inc — increase
- rep — repeat
Cream Crochet Wall Organizer for a Nursery
Main Pattern
- Round 1
Ch 41. Sc in 2nd ch from hook and in each ch across. (40 sts)
- Round 2
Ch 1, turn. Sc in each st across. (40 sts)Rows 3 through 112: Rep Row 2. (40 sts each row) You should have a rectangle approximately 10 inches wide and 28 inches long. If yours is shorter, add more rows until you reach the length.
Fasten off and weave in ends.
Tip for beginners: Count your stitches every 10 rows or so. If you are accidentally increasing or decreasing, catching it early is much easier than frogging later.
Pockets (Make 3)
Each pocket starts with an oval base, then you work up the sides. The base creates the depth, and the sides create the height.
Pocket Base (Oval)
Part 2
- Round 1
Ch 26. Sc in 2nd ch from hook, sc in next 23 ch, 3 sc in last ch. Working along the opposite side of the foundation chain, sc in next 23 sts, 2 sc in last st. Join with sl st to first sc. (52 sts)
- Round 2
Ch 1. Sc in first st, sc in next 23 sts, 2 sc in each of next 3 sts, sc in next 24 sts, 2 sc in each of next 2 sts. Join with sl st. (58 sts)
- Round 3
Ch 1. Sc in first 25 sts, (sc, inc) 3 times, sc in next 25 sts, (sc, inc) 2 times. Join with sl st. (64 sts)
- Round 4
Ch 1. Sc in first 26 sts, (2 sc, inc) 3 times, sc in next 26 sts, (2 sc, inc) 2 times. Join with sl st. (70 sts)
Your oval should measure approximately 10 inches long and 4 to 5 inches wide.
Pocket Sides Now you build up the walls. No more increasing from here.
- Round 5
Ch 1. Working in back loops only this round, sc in each st around. Join with sl st. (70 sts)Working in the back loop only creates a visible ridge that defines the base from the sides. It also helps the pocket stand up properly.
- Round 6(70)
through 16: Ch 1. Sc in both loops of each st around. Join with sl st. (70 sts each round)
- Round 17
Top Edge Ch 1. Sc in each st around. Join with sl st. Fasten off. (70 sts) Your pocket should be approximately 4 inches tall from base to top edge.Make 2 more pockets following the same instructions.
Troubleshooting: If your pockets are floppy, your gauge may be too loose. Try going down another hook size, or consider lightly starching the finished piece.
Hanging Tabs (Make 2)
These wrap around the wooden dowel and attach to the top of the back panel.
Part 3
- Round 1
Ch 9. Sc in 2nd ch from hook and in each ch across. (8 sts)
- Round 2
through 16: Ch 1, turn. Sc in each st across. (8 sts) Fasten off , leaving a long tail for sewing.
Your tabs should measure approximately 2 inches wide and 4 inches long.
Assembly
This is where your organizer comes together. Take your time with the seaming. Neat stitches here make the finished piece look polished.
Attaching the Tabs
Fold each tab in half lengthwise, creating a loop large enough for your dowel to slide through. Position the tabs approximately 2 inches from each side edge of the back panel, at the very top.
Using your tapestry needle and matching yarn, whip stitch both ends of each tab securely to the back of the panel. Reinforce these stitches. The tabs bear all the weight when hanging.
Positioning the Pockets
Lay your back panel flat with the right side facing up. Place your three pockets evenly spaced along the length.
Top Pocket: Position the top edge approximately 3 inches below the tabs.
Middle Pocket: Position approximately 3 inches below the bottom of the top pocket.
Bottom Pocket: Position approximately 3 inches below the middle pocket, leaving a few inches at the very bottom.
Pin or use stitch markers to hold the pockets in place before sewing.
Sewing the Pockets
Using your tapestry needle and a long length of yarn, whip stitch around the back half of each pocket base to attach it to the back panel. You are sewing through the back panel and the bottom edge of the pocket simultaneously.
Important: Only sew the back portion of each pocket to the panel. The front curves outward to create the pocket opening. Sew approximately halfway around each oval, following the curve.
When you reach the sides where the pocket curves toward you, stop sewing. This leaves the front of the pocket open and functional.
Secure your stitches well and weave in all ends.
More shots
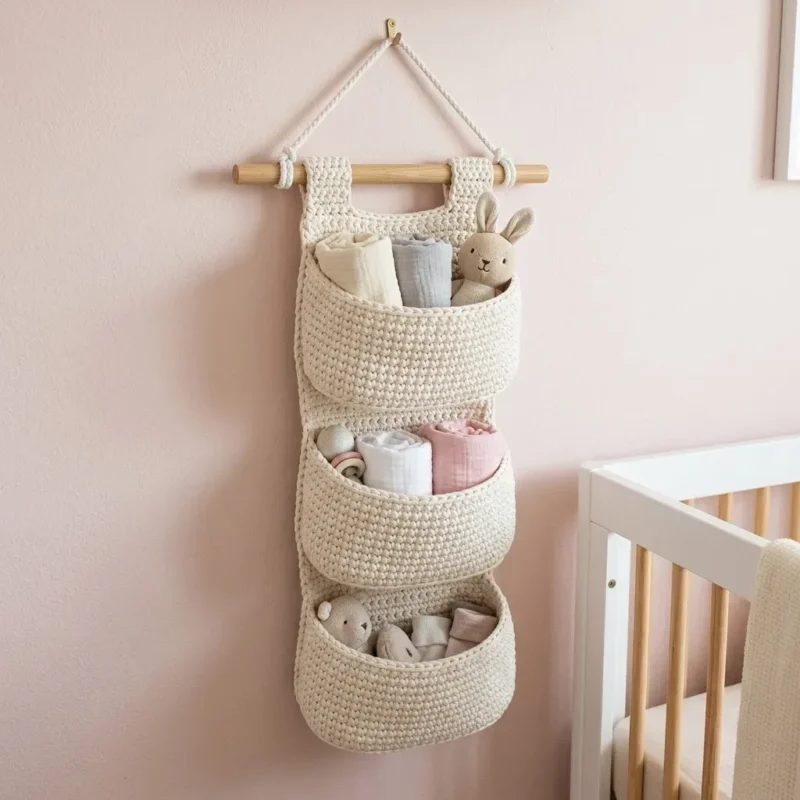
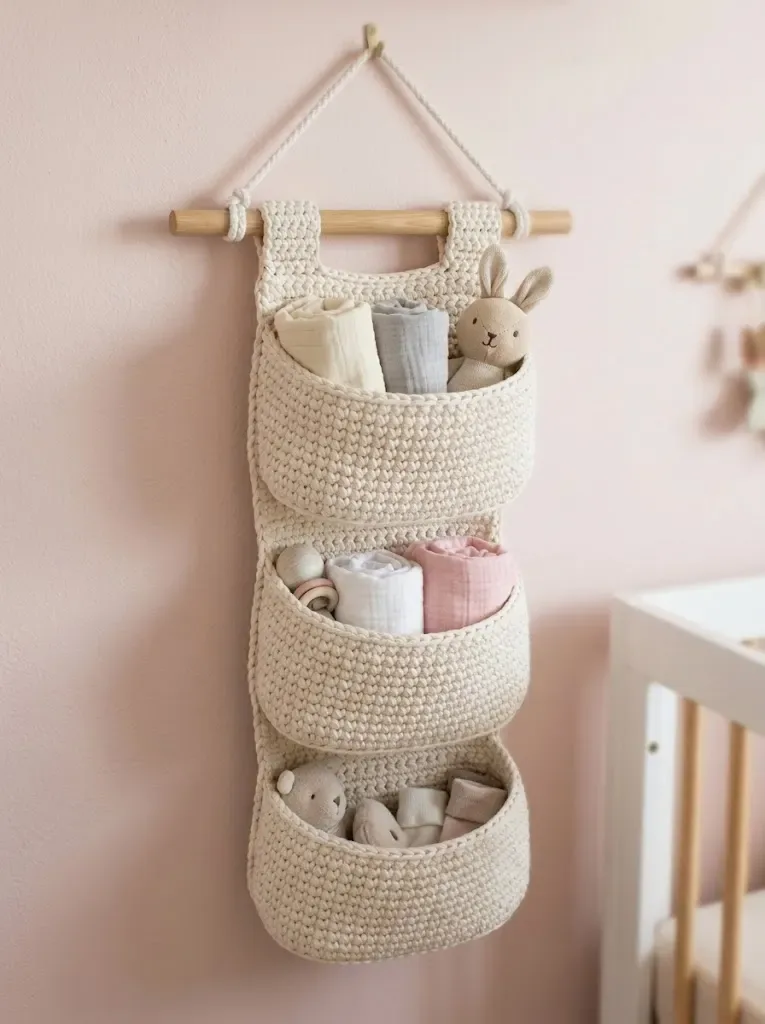
Where it goes
- Mount it over a changing table to hold diapers, wipes, and a small lotion bottle within easy reach.
- Hang it on a playroom wall for stuffed animals, board books, or soft toys that need a tidy spot.
- Use it in an entryway for mail, keys, and gloves, pairing it with a row of wall hooks.
- Hang it beside a crib for burp cloths and a pacifier, alongside a simple cotton crib blanket.
Color ideas
- Classic cream Work the backing panel, oval pocket, and tabs all in the same cream or off-white cotton for a clean, monochrome look.
Care
Hand wash the finished piece in cool water with a mild detergent, since cotton holds up well but can shrink slightly in hot water.
Lay it flat to dry and gently reshape the oval pocket while damp so it keeps its rounded form.
Store it rolled rather than folded when not hanging, to avoid sharp creases in the dense cotton fabric.
Easy to get wrong
Drifting stitch count in the long rows
Count your stitches every ten rows or so as the pattern suggests, since the backing panel runs well over a hundred rows and small errors compound fast. Catching an extra or missing stitch early saves you from frogging a huge section later.
Losing track of increase placement on the oval
Mark the first stitch of each round with a stitch marker before working the increase sequence on Part 2. This keeps the increases lined up at each end so the oval stays symmetrical.
Rushing the tab seaming
Pin the tabs in place with the long tails before sewing so you can check alignment against the dowel first. Neat, even seaming here keeps the whole piece hanging straight on the wall.
Between the songs
- What I love here is how three different techniques live in one small project. The main rectangle is pure meditative single crochet, the kind you can do while listening to a podcast. Part 2 is where it gets interesting, working in the round from a chain and shaping an oval with a specific increase sequence on each end, so you watch a flat shape become a pocket. Part 3 brings you back to flat rows for tabs, but this time every stitch matters because they carry the weight of the whole piece on the dowel. Finishing with a tapestry needle and careful seaming ties all three skills together in one satisfying afternoon project.
Listener questions
Why does the pattern recommend cotton instead of acrylic
Cotton holds its shape better over time, which matters for a piece that hangs on a wall and carries weight in its pocket. It also gives crisper stitch definition than acrylic, so the single crochet rows look neat and even.
Why go down a hook size from the yarn label
Using a 5.0 mm hook with worsted weight cotton creates a denser fabric than the yarn label's suggested hook would. That density is what keeps the backing panel sturdy enough to hold items without stretching out.
What if my rectangle comes out shorter than expected
Just keep working the repeat row until you reach the length given in the pattern, since row count can vary slightly by tension. It is normal to add a few extra rows to get there.
Can I make the oval pocket deeper
You can continue working rounds on Part 2 past where the pattern stops if you want more depth, since each round simply builds on the last without further shaping once the increases are done. Just keep your stitch count even once the increase rounds are finished.
Do I need both tabs from Part 3
Yes, both tabs are what hold the dowel in place at the top of the organizer. Skipping one would leave the dowel unsupported on that side.
Original pattern: https://bunnypatterns.com/cream-white-nursery-wall-organizer-free-crochet-pattern-2/
About the Author

Marisol QuinteroWho runs Crochet Obsessed, why a stitch count sits at the end of every round, how a pattern gets written here, and the things this site will never do.
More Patterns
- IntermediateNo. 01

Rose Granny Square Tote Crochet Pattern
Rose granny square tote crochet pattern made from 18 dimensional rose squares for a sturdy, romantic everyday bag.
- IntermediateNo. 02
Tropical octopus baby blanket crochet pattern with appliqués
Tropical octopus baby blanket crochet pattern: a cream filet base with coral and turquoise octopus appliqués, leaves, and…
- IntermediateNo. 03
Sunny lemon couple amigurumi crochet pattern
Sunny lemon couple amigurumi crochet pattern with embroidered slices and safety eyes for a cheerful handmade shelf pair.


