- LevelIntermediate
- Time4-6 hours
- Hook6.50 mm
- YarnBulky
About This Pattern
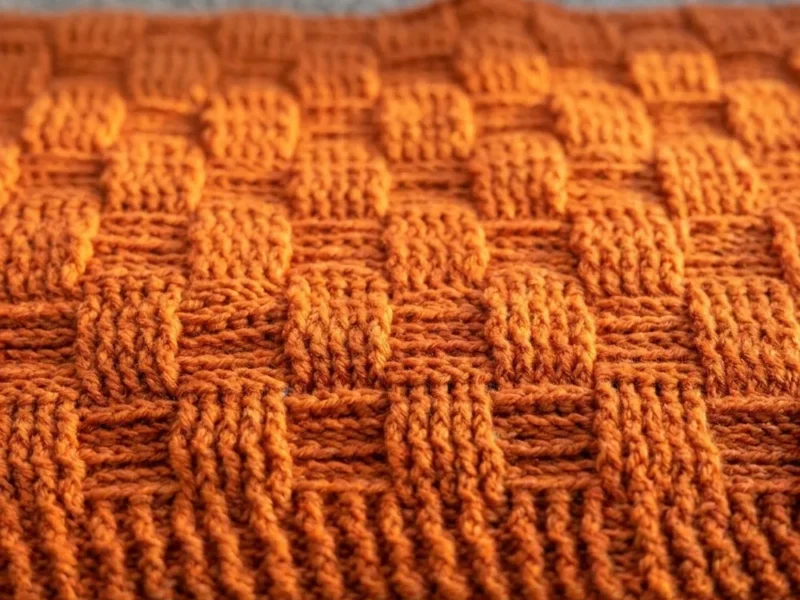
This one has a quiet, settled mood, the kind of project you pick up when you want your hands busy but your mind calm. The basketweave blocks build a steady rhythm, block after block, so there is no guessing about what comes next. It feels less like a race to the end and more like a slow, satisfying build.
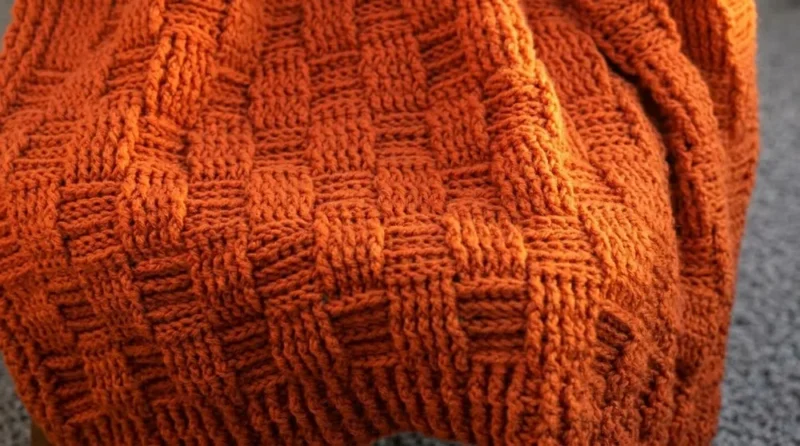
Once it is off the hook, this throw sits well folded over the arm of a couch or draped across a lap during a quiet evening. The thick basketweave texture reads as substantial without being stiff, and since it is fully reversible, either side can face out. It looks equally at home as a everyday layer or as a handmade gift waiting to be given.
A few special notes worth knowing before you start: the blanket is worked in multiples of 10, so you add or subtract 10 chains for a different width. The version shown begins with a chain of 114 for a starting count of about 111 stitches, and the length is simply a matter of repeating the motif rows as many times as you like. Turning chains and edges are kept in half double crochet throughout for a neat border, and the finished piece is fully reversible.
- Start with a foundation chain sized to the width you want, then work the opening ribbing rows to set the pattern.
- Move into the basketweave motif, alternating blocks of front post and back post double crochet across each row.
- Keep the first and last few stitches of every row worked as ribbing so a clean border runs down both sides.
- Continue repeating the same ten-row motif block over and over until the throw reaches the length you want.
- Finish the last section with ribbing rows again so both ends of the blanket match.
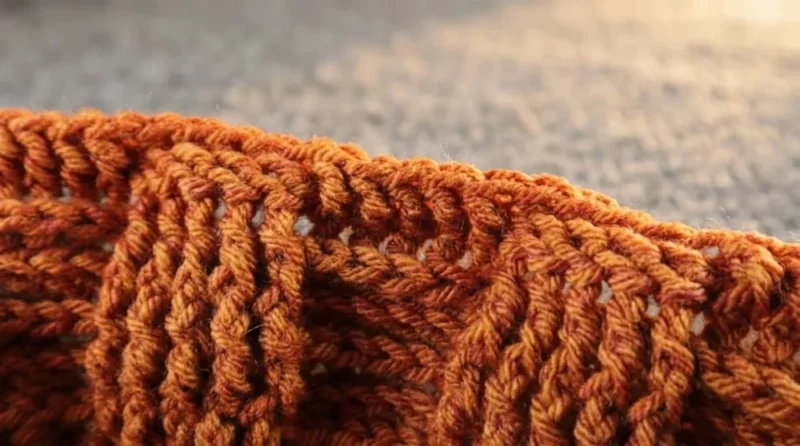
- Fasten off, then weave in every tail carefully using a yarn needle so nothing works loose with wear or washing.
On the desk
Yarn
- Paintbox Yarns Simply Chunky (100% acrylic, #5 bulky)
- 14 skeins (2086 yards) for blanket size as shown
Hook
- Size K/10.5 (6.50 mm) crochet hook
Notions
- Sharp scissors
- Yarn needle (for weaving in ends)
Stitch shorthand
- ch — chain
- st — stitch
- sts — stitches
- hdc — half double crochet
- dc — double crochet
- FPdc — front post double crochet
- BPdc — back post double crochet
- rep — repeat
Cozy basketweave throw with a ribbed trim
Foundation Row
Ch 114.
Starting in 4th ch from the hook , dc in each ch across.
Row Stitch Count: 111 dc.
Turn.
Ribbing Rows (Rows 2–5)
- Round 2
Ch 2 (counts as turning chain, not as a st). Skip first st .Alternate across the row: fpdc in next st, bpdc in next st.
Repeat fpdc, bpdc across.At the end of the row, hdc in top of turning ch .
You should have 110 post sts + 1 hdc (111 total).
Turn.
- Rounds 3–5
Ch 2, turn; skip first st. Alternate fpdc, bpdc across row. hdc in top of turning ch at end of each row.Repeat for a total of 4 ribbing rows.
Begin Basketweave Motif (Rows 6–15)
Each motif repeat is 10 rows .
- Round 6
Ch 2, turn; skip first st. Rib border: Alternate fpdc, bpdc for first 5 sts. Basketweave pattern:Across blanket: Work 5 fpdc in next 5 sts, Then 5 bpdc in next 5 sts, Repeat these blocks until last 5 stitches.
Rib border: For last 5 sts, alternate bpdc, fpdc as established for ribbing. hdc in turning ch at row end.Turn. - Rounds 7–10
Repeat Row 6 exactly: Work rib border in first and last 5 sts. For middle, work basketweave established (5 fpdc, 5 bpdc blocks).Always end with hdc in turning ch .
By Row 10, you should have 5 rows of each basketweave block .
Switch Basketweave Direction (Rows 11–15)
- Round 11
Ch 2, turn; skip first st. Rib border: Alternate fpdc, bpdc for first 5 sts. Basketweave pattern:Across blanket: 5 bpdc in next 5 sts, 5 fpdc in next 5 sts, Repeat blocks until last 5 sts.
Rib border: Alternate bpdc, fpdc in last 5 sts. hdc in turning ch at end.Turn. - Rounds 12–15
Repeat Row 11 exactly: Always match post stitches: bpdc in bpdc, fpdc in fpdc (do not switch again for these four rows).End with rib border and hdc in turning ch.
Repeat Basketweave Motif
Alternate 10-row motifs (Rows 6–15), switching the basketweave direction every five rows.
For lap blanket: repeat these sets 8 more times (total 95 rows), or until desired length.
Finish With Ribbing Rows (Rows 96–100)
- Round 96
Ch 2, turn; skip first st. Alternate fpdc, bpdc across the row. hdc in turning ch at end.
- Rounds 97–100
Ch 2, turn; skip first st. Continue ribbing: fpdc in fpdc and bpdc in bpdc. hdc in turning ch at end of each row.
More shots
Where it goes
- A lap throw for wheelchair users who need something warm, structured, and easy to grip.
- A folded accent draped over the back of a couch, paired with plain woven throw pillows so the texture stands out.
- An extra layer on a bed during cool weather, worked well alongside solid-color flat sheets.
- A thoughtful handmade gift for someone who spends a lot of time seated or reading.
Color ideas
- Tonal neutral Work the ribbing rows and the basketweave motif rows all in one heathered neutral so the texture itself becomes the whole design.
- Contrast border Work the opening and closing ribbing rows in one color and the basketweave motif rows in a second, so the finished throw reads as a framed panel of texture.
Care
Since this yarn is 100% acrylic, machine wash on a gentle cycle in cool water and skip the fabric softener, which can flatten the post stitch texture over time.
Lay the throw flat to dry rather than hanging it, since a wet bulky-weight piece can stretch out of shape under its own weight.
Fold rather than roll for storage, and give the basketweave blocks a light shake or pat afterward to help the texture spring back.
Assembly
- Step 1 Fasten off : Cut yarn leaving a long tail.
- Step 2 Use yarn needle to weave ends securely through stitches.
- Step 3 Weave in tails carefully to avoid them showing on blanket edges.
- Step 4 Pull back on the weaving occasionally to ensure ends don’t pop out after clipping.
Easy to get wrong
Mismatching post stitches mid-block
Always work fpdc into fpdc and bpdc into bpdc within a block; pause and check the stitch below before working into it if you lose your place.
Letting the ribbed edge drift inward
Keep the first and last stitches of every row worked as ribbing, not folded into the basketweave blocks, so the border stays a consistent width down both sides.
Listener questions
Can I make this blanket smaller or larger?
Yes, since the whole pattern is built in multiples of ten stitches, you add or subtract ten chains at the foundation to change the width. Length is just as flexible, since you repeat the ten-row motif as many times as you want.
Do I have to use the exact yarn listed?
No, you can substitute a worsted weight yarn if you want a lighter, thinner throw, though your yardage and finished measurements will differ from the version shown. The stitch pattern itself works the same regardless of weight.
Is this blanket reversible?
Yes, the basketweave post stitch pattern looks intentional and finished from both sides. That makes it a good project for a throw that gets tossed around and viewed from any angle.
Why does the pattern call for longer tails when weaving in ends?
The thick post stitches create a lot of texture for ends to hide in, but repeated use and washing can work short tails loose. Longer tails give you more length to weave securely and anchor through several stitches.
Original pattern: https://redagapeblog.com/simple-crochet-throw-pattern/
About the Author

Marisol QuinteroWho runs Crochet Obsessed, why a stitch count sits at the end of every round, how a pattern gets written here, and the things this site will never do.
More Patterns
- IntermediateNo. 01

Slouchy everyday beanie worked flat in half double crochet
Crochet beanie pattern for a slouchy everyday look worked flat with hdc rows, then seamed into a soft,…
- IntermediateNo. 02
Crochet amigurumi doll with dress, shoes, and hat
Crochet amigurumi doll pattern with dress, shoes, and hat details for a soft, huggable keepsake you build one…
- IntermediateNo. 03
Chunky moss stitch crochet sweater with raglan-free shoulders
Chunky crochet sweater pattern using moss stitch, worked flat with a 10mm hook for a soft, fast, cool-weather…


