- LevelIntermediate
- Time4-6 Hours
- Hook4.0 mm
- YarnWorsted
About This Pattern
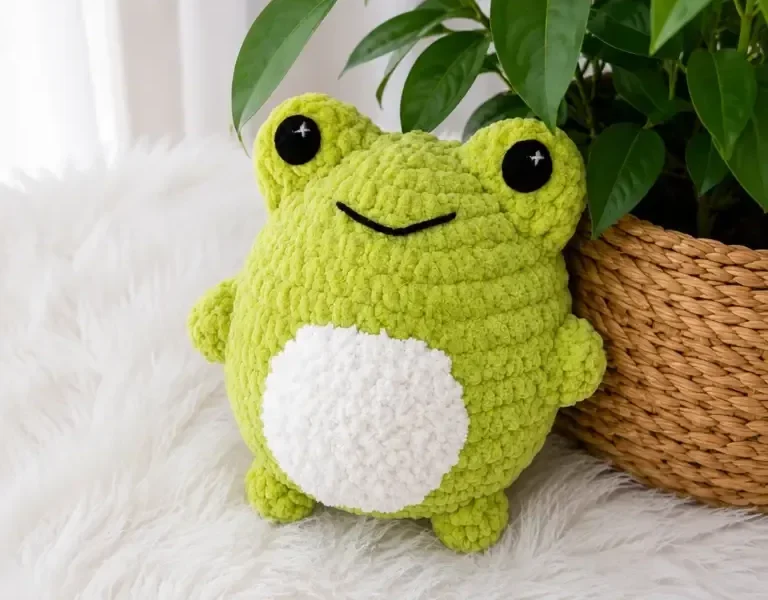
This chubby frog pattern creates the roundest, squishiest little amphibian you'll ever crochet — a plump green body with a contrasting white belly, googly little eyes, and four stubby paws that make him instantly huggable. What makes this design special is how the color-blocked belly panel gives him real dimension and personality without any complicated colorwork. He's perfect for anyone who loves amigurumi with a bit of charm and character, whether you're making him for a nursery shelf, a kid's toy basket, or just to keep yourself company at your desk.
You'll work through a 14-round main body worked in a continuous spiral, plus a flat belly circle, and smaller pieces for the eyes and paws, all shaped with simple increases and decreases. If you're comfortable with single crochet, increases, and decreases, you have everything you need for this pattern — it's a great second or third amigurumi project for building confidence with shaping and assembly. Expect to spend somewhere around 4-6 hours from first stitch to final sewn-on paw, spread across a cozy evening or two.
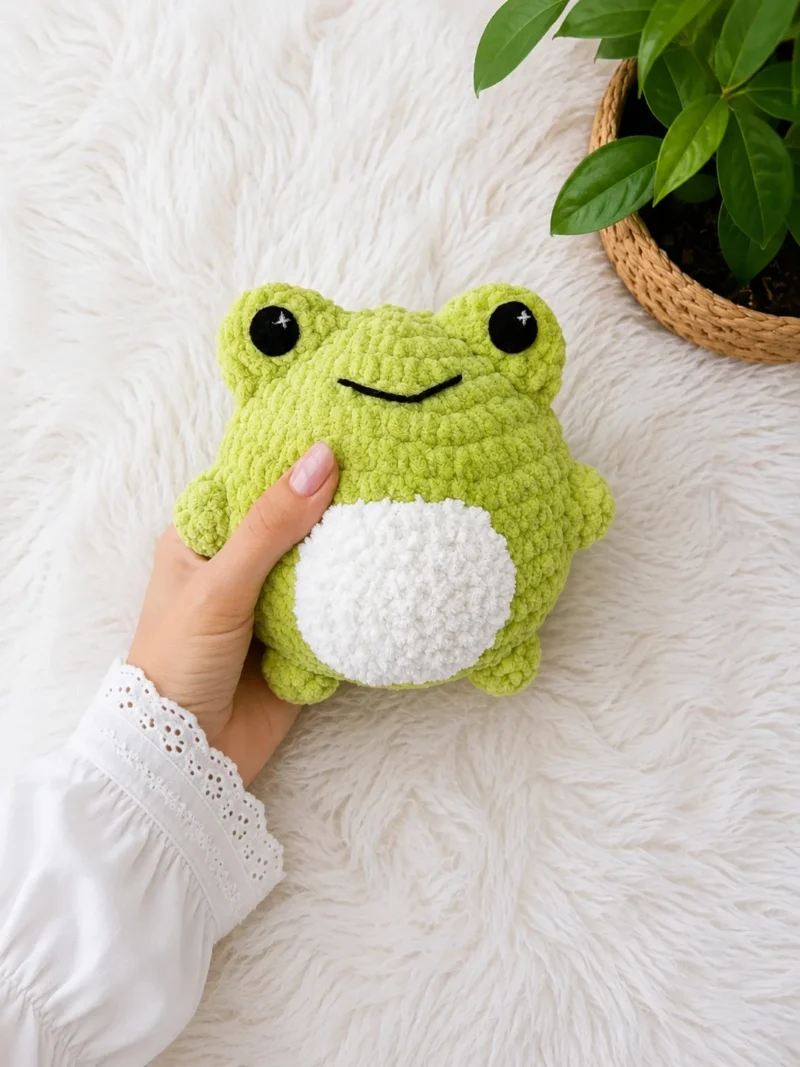
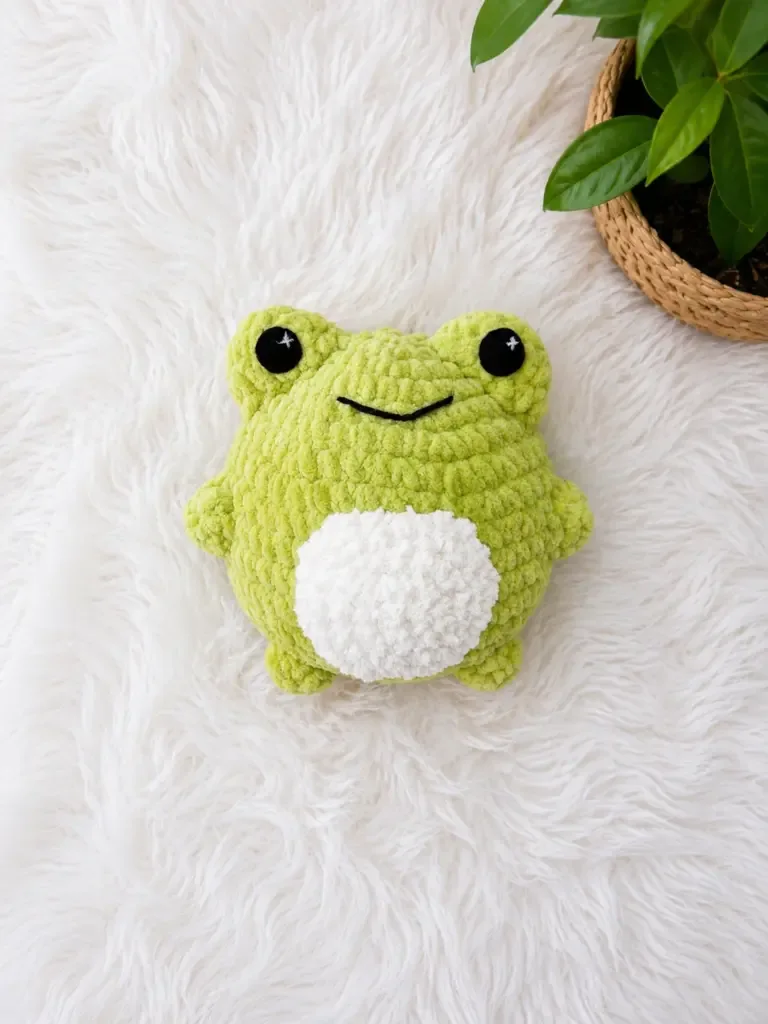
The finished frog ends up delightfully round and dense, thanks to the tight-tension spiral construction and generous fiberfill stuffing, with a soft belly panel that begs to be squeezed. He's substantial enough to sit proudly on a shelf but soft enough to be a genuine cuddle toy. Whether he's headed for a baby shower gift, a birthday surprise, or your own crochet collection, this little guy has that irresistible 'pick me up' quality that makes handmade amigurumi so much fun to give and receive.
- Start the green body with a magic ring and work increasing rounds in a continuous spiral to build the chubby rounded shape.
- Track your place carefully with a stitch marker since the spiral has no join at the end of each round.
- Crochet a separate flat white belly circle, then sew it onto the front of the body before finishing the decrease rounds.
- Add fiberfill gradually as the final body rounds close up so the shape stays firm and even.
- Crochet two small eye pieces and four paw pieces separately using the main green color.
- Pin the eyes and all four paws onto the stuffed body to check placement and balance before sewing.
- Sew each piece securely in place, adjusting positioning until the frog looks proportional from every angle.
- Finish by embroidering a simple mouth with black thread to complete his cheerful expression.
Materials
Yarn
- Worsted weight yarn in green (main color) and white (belly) — any smooth worsted weight works well
Hook size
- G-6 / 4.0 mm (or whichever hook suits your yarn)
- Black acrylic embroidery thread — for stitching the mouth
Tools
- Fiberfill / stuffing
- Stitch markers
- Pins — for positioning pieces before sewing
- Yarn needle / tapestry needle
- Scissors
- Safety eyes or felt — 10 mm, 2 pieces (felt circles or plastic safety eyes both work)
Crochet Abbreviations
- ch
- Chain
- dec
- Invisible Decrease (2 sc worked together)
- inc
- Increase (2 sc in the same stitch)
- MR
- Magic Ring
- sc
- Single Crochet
- sl st
- Slip Stitch
- SM
- Stitch Marker
- st / sts
- Stitch / Stitches
Chubby Frog Amigurumi – Free Crochet Pattern
Body (Main Color — Green)
- Round 1
6 sc in MR. (6)
- Round 2
inc in each st around. (12)
- Round 3
sc, inc repeat 6 times around. (18)
- Round 4
2 sc, inc repeat 6 times around. (24)
- Round 5
3 sc, inc repeat 6 times around. (30)
- Round 6
4 sc, inc repeat 6 times around. (36)
- Round 7
5 sc, inc repeat 6 times around. (42)
- Round 8-12
sc in each st around. (42)
Before continuing, sew the Belly piece onto the front of the body now — it is much easier to attach while the opening is still wide. Stuff the body firmly, then continue.
- Round 13
5 sc, dec repeat 6 times around. (36)
- Round 14
4 sc, dec repeat 6 times around. (30)
- Round 15
3 sc, dec repeat 6 times around. (24)
- Round 16
2 sc, dec repeat 6 times around. (18)
- Round 17
sc, dec repeat 6 times around. (12)
- Round 18
dec 6 times around. (6)Cut yarn, leaving a tail. Thread onto yarn needle and weave through the remaining 6 stitches to close the opening. Pull tight and fasten off.
Belly (White — Make 1)
- Round 1
6 sc in MR. (6)
- Round 2
inc in each st around. (12)
- Round 3
sc, inc repeat 6 times around. (18)
- Round 4
2 sc, inc repeat 6 times around. (24)Fasten off, leaving a long yarn tail for sewing. Sew the belly onto the front of the body between Rnds 8–12.
Eyes (Make 2 — Main Color)
- Round 1
5 sc in MR. (5)
- Round 2
inc in each st around. (10)
- Round 3
sc in each st around. (10)Fasten off, leaving a long yarn tail for sewing. If using plastic safety eyes, attach them through the center of each eye bump now, before sewing the bumps to the body. Sew the eyes onto the body between Rnds 2–6.
Paws (Make 4 — Main Color)
- Round 1
4 sc in MR. (4)
- Round 2
inc in each st around. (8)Fasten off, leaving a long yarn tail for sewing. Do not stuff the paws.
Sew the front paws onto the sides of the body approximately at Rnds 9–11. Sew the back paws onto the sides approximately at Rnds 14–17.
More photos
Assembly Instructions
- Step 1 Sew the Belly onto the front of the body between Rnds 8–12, centering it on the lower front. Use the yarn tail and a whipstitch around the edge.
- Step 2 Sew the two Eye bumps onto the top of the head between Rnds 2–6, spacing them evenly apart. Pull firmly so they sit upright and perky.
- Step 3 Attach your safety eyes or felt circles to the center of each eye bump. If using felt, cut two small circles and glue or stitch them in place.
- Step 4 Using black acrylic embroidery thread, stitch a small curved smile onto the face below the eyes.
- Step 5 Sew the two front paws to the sides of the body at approximately Rnds 9–11.
- Step 6 Sew the two back paws to the sides of the body at approximately Rnds 14–17.
- Step 7 Weave in all remaining yarn ends securely.
Important Notes
- 💡 Use a stitch marker in the very first stitch of each round from start to finish — since this pattern is worked in a continuous spiral with no join, it's easy to lose your place without one.
- 💡 A G-6 / 4.0mm hook is the suggested starting point, but if your stitches look loose or fiberfill shows through, size down slightly for denser, more polished fabric.
- 💡 Stuff the body firmly but in stages as you complete the final rounds, rather than cramming it all in at the very end, so the shape stays even and round.
- 💡 Keep your yarn tails long when finishing the eyes and paws (make 4) so you have plenty to work with when sewing them onto the body during assembly.
- 💡 Pin the belly panel, eyes, and all four paws in place before sewing anything permanently — this lets you step back and adjust positioning until your frog looks balanced.
- 💡 Save the black embroidery thread mouth for last, after the body is fully stuffed and closed, so you can see exactly how the face will sit before committing to stitches.
- 💡 This pattern is written in US crochet terminology, and gauge is not critical — just be sure your tension is tight enough that no fiberfill shows through the fabric.
Common Mistakes and Fixes
- Working rounds too loosely, causing
Drop down half a hook size if your stitches look gappy, and aim for tension tight enough that you can barely see light through the fabric before you even add stuffing.
- Losing track of the beginning
Place a stitch marker in the first stitch of every round and move it up each time you complete a round — this is essential since there's no join to mark your place.
- Overstuffing the body before the belly
Add stuffing gradually as you work the final rounds of the body rather than stuffing everything at once at the end, and check the belly placement stays centered as you go.
- Sewing the four paws on unevenly
Pin all four paws in place first and set the frog on a flat surface to check his balance before sewing anything permanently.
- Embroidering the mouth before the head
Finish stuffing and closing the body first, then use pins to map out the mouth curve before stitching with the black embroidery thread.
Variations
- Once you've made one chubby frog, the color possibilities are endless. Swap the classic green-and-white combo for a poison-dart-frog look with a lime green body (try Vanna's Choice in 'Lime') and a bright yellow belly and paws, or go moody with an olive or forest green main color and a cream belly for a more naturalistic amphibian. For a completely different creature energy, try a soft gray body with a pale pink belly for a whimsical 'frog prince' vibe, or deep teal with a mint belly for something more jewel-toned. If you want a mini version, drop down to a DK weight yarn with a 3.5mm hook and expect your finished frog to shrink by roughly 20-25%, which also makes him perfect for keychains or ornament-sized keepsakes worked as a single small round body without the separate paw pieces. Going the other direction, a bulky weight yarn with a 6mm hook turns him into an oversized floor pillow-style frog, though you'll want extra stuffing to keep the shape from softening too much. Themed variations are fun too — add a tiny crocheted lily pad base in a flat circle of green for him to sit on, or stitch on small white oval highlights over the eyes for a cartoonish, wide-eyed look. You could even make a whole frog family by repeating the pattern in three different sizes using worsted, DK, and bulky yarns side by side. For yarn substitutions, any smooth worsted weight acrylic or cotton-acrylic blend works beautifully — just keep your tension consistent across pieces so the paws and eyes match the density of the body.
- I adore how this chubby frog pattern turns a handful of simple amigurumi pieces into something with so much personality. Working the body in a continuous spiral means no visible seams or jogs from joining rounds — just smooth, satisfying progress round after round, especially once that white belly section starts taking shape against the green. There's something so pleasing about crocheting the eyes and paws separately; it feels almost meditative, and it means you can prep all four paws while watching TV before tackling assembly. The mouth embroidery is my favorite moment in the whole process — just a few strokes of black thread and suddenly he has that classic wide, goofy frog grin staring back at you. I also love that gauge isn't fussy here; the pattern gives you real freedom as long as your tension keeps the fiberfill from peeking through. By the time you're pinning the paws and eyes into place before sewing, you can already tell he's going to be one of those toys people can't resist picking up off the shelf.
Frequently Asked Questions
What yarn weight works best for this chubby frog pattern?
This pattern is designed for worsted weight yarn, which gives the frog its satisfying chubby shape. You can use a lighter weight yarn with a smaller hook if you want a miniature version, but keep your tension tight regardless of weight so the fiberfill does not show through the stitches.
Can I use felt eyes instead of plastic safety eyes?
Yes — felt circles work beautifully for this project and are actually the safer choice for toys made for very young children, since there are no hardware pieces to come loose. Cut two circles of white felt and two smaller circles of black felt, layer them, and either glue or stitch them onto the crocheted eye bumps.
How do I keep the eye bumps from flopping to the sides?
The key is sewing them on with firm, even tension and pulling the yarn tail through the head to anchor the base of each bump. Using a pin to hold the eye in position while you sew helps a lot. Make sure you are catching both the edge stitches of the bump and the body fabric with each stitch of your seam.
Is this pattern suitable for a beginner crocheter?
Absolutely. If you are comfortable with single crochet, increases, and decreases, you have everything you need for this pattern. The body is a classic amigurumi sphere, the paws are just two rounds each, and the belly is a simple flat circle. It is a great second or third amigurumi project for building confidence with shaping and assembly.
Original pattern: https://amistitch.com/crochet-chubby-frog-amigurumi/
About the Author

Marisol QuinteroWho runs Crochet Obsessed, why a stitch count sits at the end of every round, how a pattern gets written here, and the things this site will never do.
More Patterns
- IntermediateNo. 01

Slouchy everyday beanie worked flat in half double crochet
Crochet beanie pattern for a slouchy everyday look worked flat with hdc rows, then seamed into a soft,…
- IntermediateNo. 02
Crochet amigurumi doll with dress, shoes, and hat
Crochet amigurumi doll pattern with dress, shoes, and hat details for a soft, huggable keepsake you build one…
- IntermediateNo. 03
Chunky moss stitch crochet sweater with raglan-free shoulders
Chunky crochet sweater pattern using moss stitch, worked flat with a 10mm hook for a soft, fast, cool-weather…


