- LevelIntermediate
- Time4-6 hours
- Hook4.0 mm
- YarnWorsted
About This Pattern
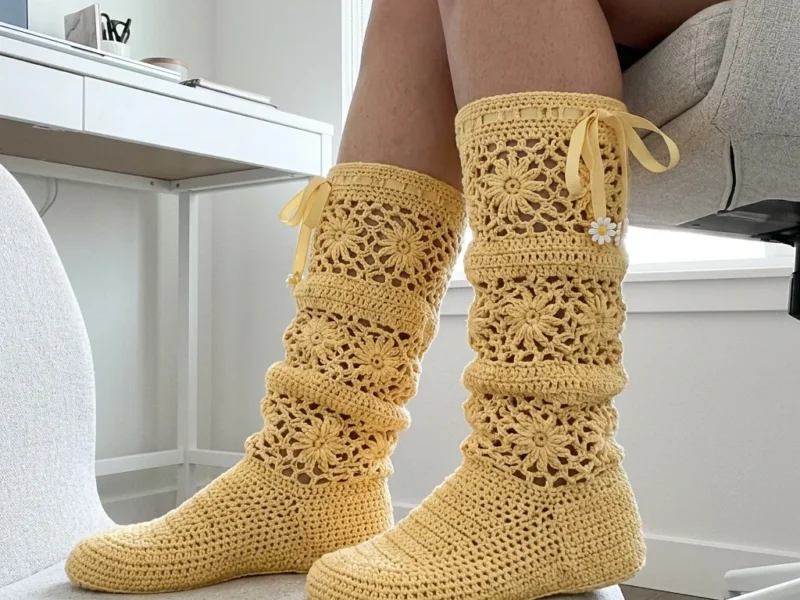
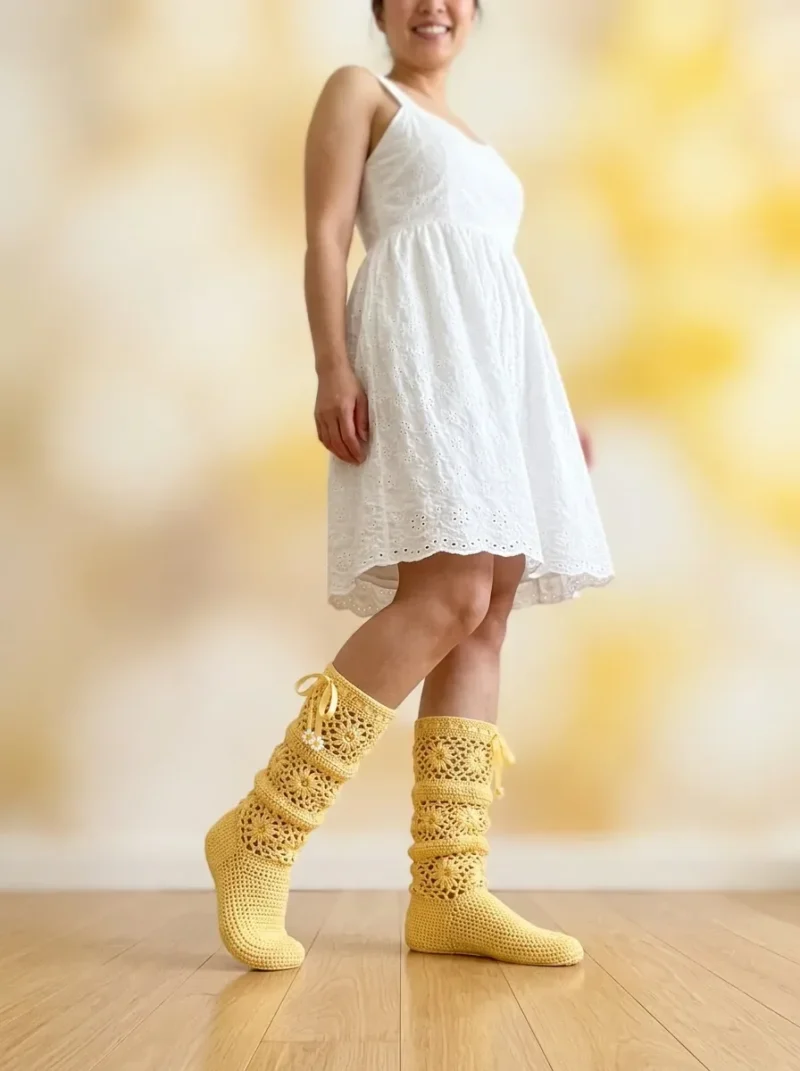
There's something cheerful about a boot the color of butter left out on the counter. These work up soft and sunny, the kind of yellow that looks good against bare feet and wood floors alike. I think of them as the slippers you reach for when you want the room to feel a little warmer.
Your hands move through two different rhythms here. First the plain, steady single crochet of the boot body, rows building up like a conversation that doesn't need much thinking. Then the fussier joy of the floral granny square, with its magic ring center and elongated daisy petals that ask for a slower, more careful hand.
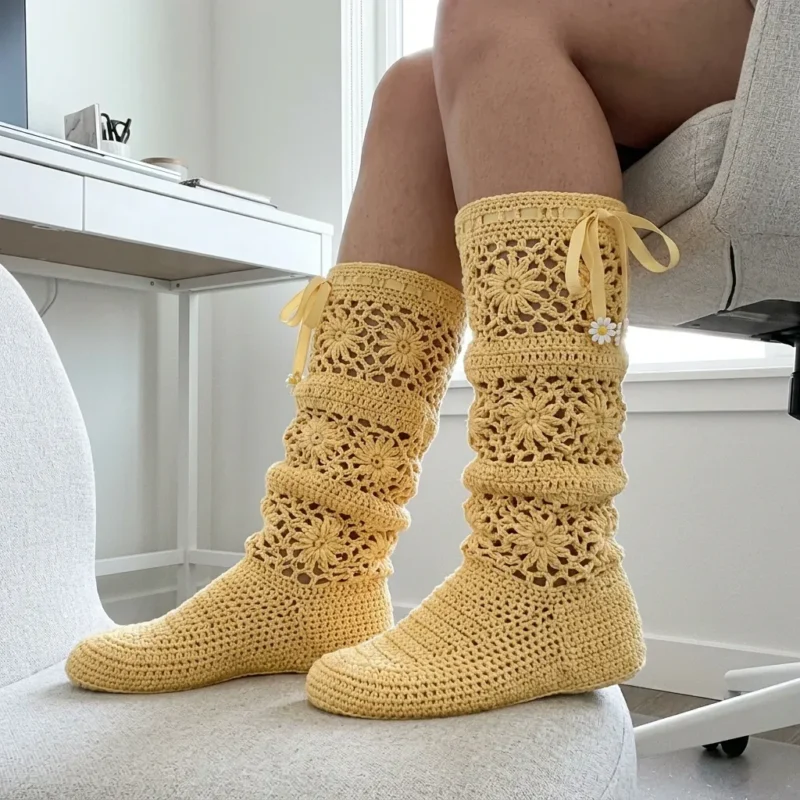
Picture these by the back door or tucked under a chair in the living room, ribbon ties loose and waiting. The daisy squares catch the light at the ankle in a way that makes them look dressed up even over pajama pants. They're the kind of handmade thing a guest notices and asks about.
- Start with the sole and foot section, building up the single crochet rows with increases at the edges to shape the toe.
- Work the ankle portion of the boot separately, following the heel shaping rows to cup the back of the foot.
- Set the boot body aside and make the flower center, starting from a magic ring and working two rounds to form the daisy petals.
- Build out the floral granny square with a border round that squares off the circular flower into a corner-to-corner shape.
- Join the finished squares together so they form a band that will sit around the top of the boot.
- Attach the joined squares to the top edge of the ankle piece, matching the square band to the boot opening.
- Work the top border rounds across the joined edge to tidy the transition between boot and squares.
- Thread the satin ribbon through the border to create a drawstring, then tie it in a bow at the front of each boot.
On the desk
Yarn
- Approximately 400-450 yards of worsted weight yarn (weight category 4) in your chosen color
- The sample uses a soft buttercream yellow with excellent stitch definition
Brands to consider
- Lily Sugar’n Cream, Paintbox Cotton DK, or any smooth worsted cotton
Hook
- 4.0mm (G/6) crochet hook for the main body
- 3.5mm (E/4) crochet hook for tighter sections if needed (optional)
Notions
- Tapestry needle for weaving ends and seaming
- Stitch markers (at least 4)
- Approximately 1 yard of satin ribbon (3/8 inch wide) per boot for the drawstring
- Small decorative daisy charms (optional)
- Scissors
- Measuring tape
Gauge
- 16 stitches and 18 rows = 4 inches in single crochet
- One floral granny square measures approximately 4 inches across
- Stitch Abbreviations and Definitions
Stitch shorthand
- ch — chain
- st — stitch
- sts — stitches
- sl st — slip stitch
- sc — single crochet
- dc — double crochet
- tr — treble crochet
- sc2tog — single crochet 2 stitches together (decrease)
- sk — skip
Buttercream yellow sunshine crochet boots with daisy squares
Foundation
- Round 1
Sc in 2nd ch from hook and in each ch across. (12 sc)
- Round 2
Ch 1, turn. 2 sc in first st (increase made), sc in each st across to last st, 2 sc in last st. (14 sc)
- Round 3
Ch 1, turn. Sc in each st across. (14 sc)
- Rounds 4–5
Repeat Row 2, then Row 3. (16 sc after Row 4)
- Rounds 6–7
Repeat Row 2, then Row 3. (18 sc after Row 6)
- Rounds 8–17
Ch 1, turn. Sc in each st across. (18 sc) You should now have a rounded toe piece measuring about 3.5 inches long.
Foundation
- Round 1
Sc in 2nd ch from hook and in each ch across. (36 sc)
- Round 2
Ch 1, turn. 2 sc in first st, sc to last st, 2 sc in last st. (38 sc)
- Rounds 3–4
Ch 1, turn. Sc in each st across. (38 sc)
- Round 5
Ch 1, turn. 2 sc in first st, sc to last st, 2 sc in last st. (40 sc)
- Rounds 6–8
Ch 1, turn. Sc in each st across. (40 sc) *Heel shaping:*
- Round 9
Ch 1, turn. Sc2tog, sc to last 2 sts, sc2tog. (38 sc)
- Round 10
Ch 1, turn. Sc in each st across. (38 sc)
- Rounds 11–14
Repeat Rows 9-10 twice more. (34 sc after Row 13)
- Round 15
Ch 1, turn. Sc2tog, sc to last 2 sts, sc2tog. (32 sc) Fasten off, leaving a long tail for seaming.
The Flower Center
Magic ring: Create a magic ring (or ch 4 and sl st to first ch to form a ring).
- Round 1
Ch 3 (counts as first dc), 11 dc into ring. Sl st to top of ch-3 to join. Pull ring closed. (12 dc)
- Round 2(6)
Ch 1, sc in same st, *ch 4, tr in same st, ch 4, sc in same st, sc in next st* around, ending last repeat without the final sc. Sl st to first sc. (6 petals made)
This creates those beautiful elongated daisy petals you see in the photo.
Top Border
Join yarn at any corner of the top edge.
- Round 1
Ch 1, sc evenly around the top edge, working 3 sc in each corner ch-sp. Sl st to join.
- Round 2
Eyelet Round Ch 1, *sc, ch 1, sk 1* around. Sl st to join.
- Round 3
Ch 1, sc in each st and ch-sp around. Sl st to join. Fasten off and weave in ends.
The Square Border
- Round 3
Working behind the petals, sl st into the back of any sc from Round 1. Ch 5, *dc in back of next sc, ch 2* around. Sl st to 3rd ch of beginning ch-5. (6 ch-2 spaces)
- Round 4
Sl st into first ch-sp, ch 3, 2 dc in same sp, ch 1, *3 dc in next ch-sp, ch 1* around. Sl st to top of ch-3.
- Round 5
Corner Round Sl st to center dc of first 3-dc group. Ch 3, 2 dc in same st, ch 1, 3 dc in next dc (corner made), *ch 1, 3 dc in center dc of next group, ch 1, 3 dc in same dc (corner), ch 1, 3 dc in center dc of next group* around. Sl st to join. (4 corners, 4 sides)
- Round 6
Ch 3, dc in each dc and ch-sp around, working (2 dc, ch 2, 2 dc) in each corner ch-1 space. Sl st to join.Fasten off, leaving a long tail for joining.
Each completed square should measure approximately 4 inches. Make 8 squares per boot (16 total for the pair).
Hook
4.0mm (G/6) crochet hook for the main body 3.5mm (E/4) crochet hook for tighter sections if needed (optional)
Notions
Tapestry needle for weaving ends and seaming Stitch markers (at least 4)
Approximately 1 yard of satin ribbon (3/8 inch wide) per boot for the drawstring Small decorative daisy charms (optional)
Scissors Measuring tape
Gauge
16 stitches and 18 rows = 4 inches in single crochet One floral granny square measures approximately 4 inches across Always check your gauge before starting. Your boots need to fit!
Construction overview
1. Toe and foot (worked flat, then seamed)
2. Heel shaping (worked in rounds)
3. Ankle ribbing (worked in rows, joined)
4. Floral granny squares (made separately)
5. Assembly and finishing 6. Ribbon drawstring
Joining Squares
Using a simple whip stitch or sl st join, attach squares as follows: 1. Join 2 squares side by side for each row (creates 4 double-wide strips)
2. Stack and join the strips vertically 3. Join the side edges to form a tube Pro tip:
Lay your squares flat and plan the arrangement before sewing anything. Make sure all the flower centers face the same direction.
Attaching Leg to Ankle
Position the completed leg tube over the ribbed ankle section. The bottom edge of your lowest granny square row should overlap the top of the ankle ribbing by about half an inch.
Using matching yarn, whip stitch the leg tube to the ankle, working through both layers securely.
Adding the Ribbon
Cut a piece of satin ribbon approximately 18 inches long. Using a tapestry needle or safety pin, weave the ribbon through the eyelet round at the top of the boot. Tie in a bow at the front or side.
Repeat for the ankle eyelet row if desired, using a shorter piece of ribbon.
More shots
Where it goes
- Slip them on for slow mornings around the house, paired with a long cardigan and bare ankles.
- Give them as a housewarming gift alongside a mug or a small plant, since the color suits a living room or kitchen.
- Wear them as cozy indoor footwear during a reading night, paired with a soft throw blanket in a neutral shade.
- Use them as a photo-friendly prop for a crochet portfolio, styled next to other cotton granny-square pieces.
Color ideas
- Buttercream and cream Keep the boot body and flower centers in buttercream yellow, then work the square border and top border rounds in soft cream for a two-tone contrast at the ankle.
- Sunny multi-floral Crochet each flower center in a different warm shade, such as yellow, coral, and soft orange, while keeping the boot body and square border in a single matching cream for cohesion.
Care
Hand wash the boots in cool water since the cotton yarn holds its stitch definition best without a hot wash cycle.
Lay them flat to dry on a towel, gently reshaping the toe and ankle while damp so the single crochet rows keep their form.
Store the boots flat or loosely stuffed with tissue paper rather than folded, which keeps the floral granny squares from creasing.
Easy to get wrong
Losing count during heel shaping rows
Place a stitch marker at the start of each heel shaping row so you can confirm the stitch count before moving to the next row.
Uneven daisy petals on the flower center
Keep your chain-4 loops and treble crochet stitches consistent in tension by pulling up each loop to the same height before completing the stitch.
Floral squares sitting crooked on the ankle
Use stitch markers to pin the joined square band to the top border before attaching, checking that the seam lines up evenly all the way around.
Listener questions
Can I make these boots without the ribbon drawstring?
Yes, you can skip the ribbon and let the top border sit as a simple finished edge. The boots will fit a bit more loosely around the ankle without the cinch.
What if I don't have the 3.5mm hook for tighter sections?
The pattern lists the 3.5mm hook as optional, so you can work the entire boot with just the 4.0mm hook. Just keep your tension even and consistent throughout.
Do I need to use cotton yarn, or will another worsted weight work?
Cotton or a cotton blend is recommended for the structure and breathability these boots need as footwear. A different worsted weight fiber will still work up at gauge, but the finished boots may feel softer and less sturdy underfoot.
How many floral granny squares do I need per boot?
The pattern builds the ankle band from joined floral granny squares, with the exact quantity depending on how far around your ankle piece measures. Make squares as you go and join them until the band matches the top edge of the boot.
Can I skip the daisy charms mentioned in the materials?
The decorative daisy charms are listed as optional, so the boots look complete with just the crocheted flower squares. Add the charms only if you want extra texture at the center of each flower.
Original pattern: https://crochetwithmia.com/buttercream-yellow-sunshine-crochet-boots-free-pattern/
About the Author

Marisol QuinteroWho runs Crochet Obsessed, why a stitch count sits at the end of every round, how a pattern gets written here, and the things this site will never do.
More Patterns
- IntermediateNo. 01

Rose Granny Square Tote Crochet Pattern
Rose granny square tote crochet pattern made from 18 dimensional rose squares for a sturdy, romantic everyday bag.
- IntermediateNo. 02
Tropical octopus baby blanket crochet pattern with appliqués
Tropical octopus baby blanket crochet pattern: a cream filet base with coral and turquoise octopus appliqués, leaves, and…
- IntermediateNo. 03
Sunny lemon couple amigurumi crochet pattern
Sunny lemon couple amigurumi crochet pattern with embroidered slices and safety eyes for a cheerful handmade shelf pair.


