- LevelIntermediate
- Time8-12 hours
- Hook4.0 mm
- YarnDK (Light Worsted)
About This Pattern
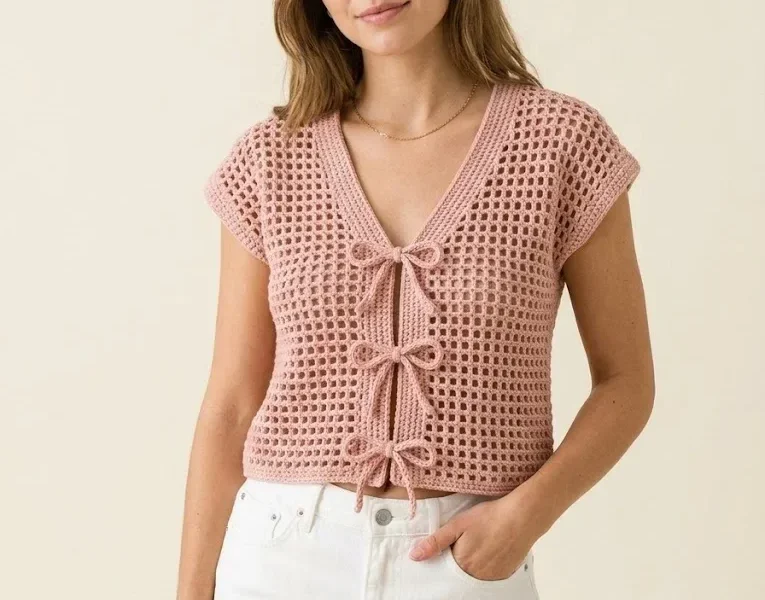
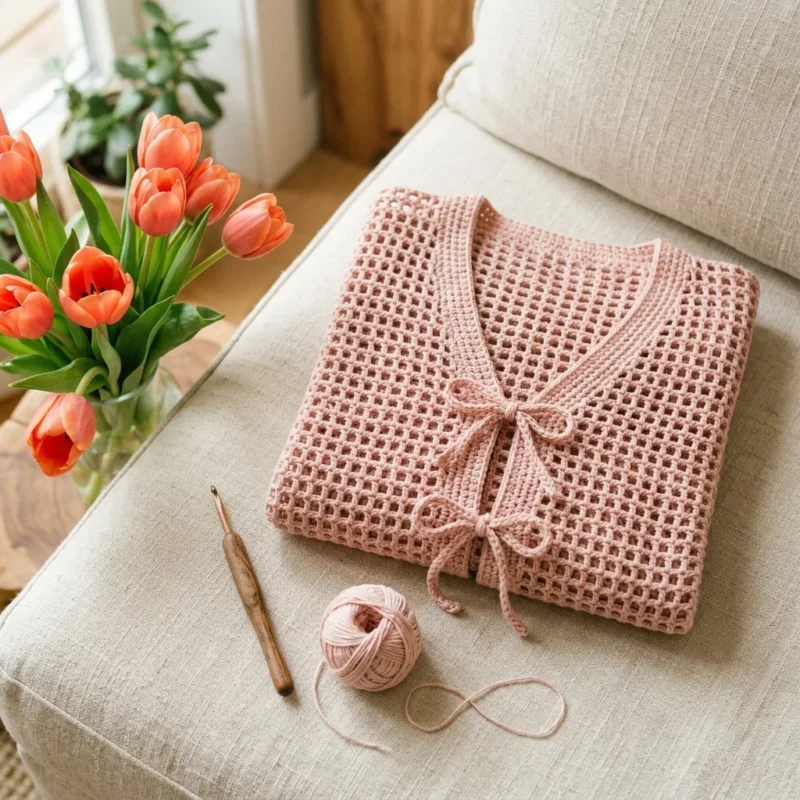
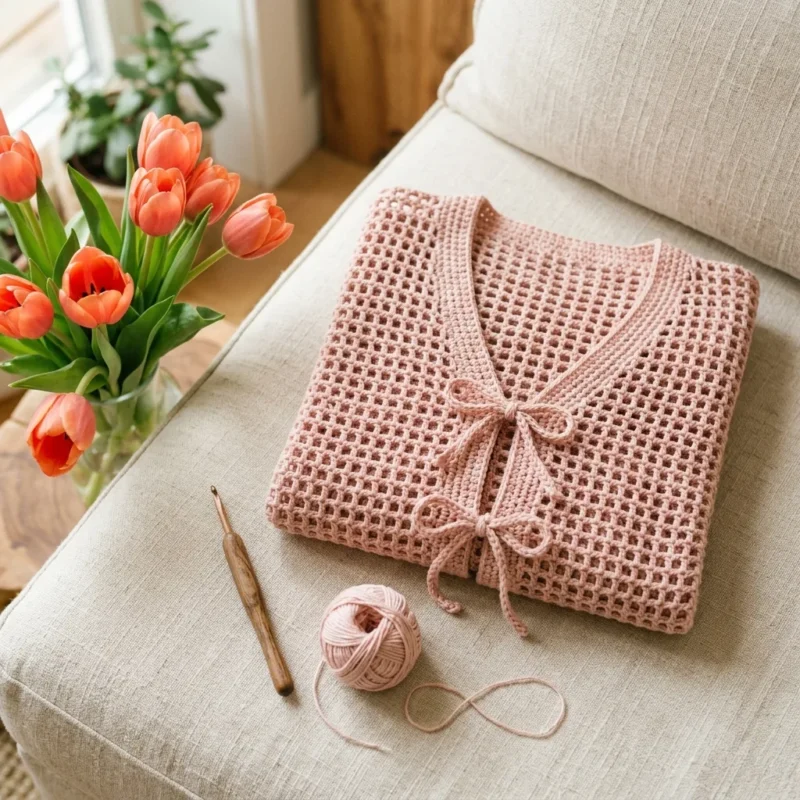
This cardigan has an easy, romantic feel, built from an open dc mesh that lets the blush pink cotton blend show through in soft diagonal lines. It is the kind of piece you reach for when you want to look pulled together without much effort, with bow ties doing the work a button closure usually does. The whole thing reads soft and a little sweet, like a cardigan borrowed from a closet where things were made slower and prettier.
Your hands spend most of this project in one steady rhythm: double crochet, chain one, skip one, across the row, then back again. The practice swatch gets that rhythm into your muscle memory before you commit to the long back panel foundation chain. Once you reach the front panels, your hands learn a new skill, shaping the V-neck by leaving stitches unworked at the row's edge, a small decrease you repeat on each side.
Finished, this cardigan drapes over the back of a reading chair or hangs loose on a hook by the door, blush pink against whatever room it lands in. The mesh stitch catches light at an angle, so it looks different thrown over furniture than it does worn, with movement changing the whole texture. Tied instead of buttoned, it photographs well on a hanger too, bow ties resting loose against the open front panels.
- Start with a practice swatch to get comfortable with the double crochet and chain-one mesh rhythm.
- Chain a long foundation row and work the open mesh stitch pattern across for the back panel.
- Repeat the mesh pattern row after row until the back panel reaches its full length.
- Chain a shorter foundation for the left and right front panels and work the same mesh stitch pattern on each.
- Shape the V-neck on each front panel by leaving stitches unworked at the neck edge, mirroring the decreases on the two panels.
- Work both sleeves flat in the same mesh pattern, then seam the shoulders, attach the sleeves, and sew the side and sleeve seams.
- Work single crochet rounds around the neckline and front edges to finish the opening with a clean edge.
- Crochet a tie for each side of the front to create the bow closure.
- Thread the ties through the mesh openings on each front panel and weave in all your ends with a tapestry needle once every panel is finished.
On the desk
- Approximately 1000 to 1200 yards of DK weight yarn (light worsted, category 3)
- The sample uses a cotton blend in a soft blush pink shade
- Look for yarn with good stitch definition like Paintbox Cotton DK, Lion Brand 24/7 Cotton, or Drops Safran
- 4.0mm (G/6) crochet hook for main body
- 3.5mm (E/4) crochet hook for ribbed edging (optional, for tighter trim)
- Tapestry needle for weaving ends
- Scissors
- Stitch markers
- Measuring tape
Stitch shorthand
- ch — chain
- sl st — slip stitch
- sc — single crochet
- hdc — half double crochet
- dc — double crochet
- sk — skip
- sp — space
- rep — repeat
Blush pink bow front cardigan crochet pattern
Gauge, Skill Level & Fit
Gauge 16 stitches and 8 rows = 4 inches in mesh pattern. Always check your gauge before starting.
Skill Level Easy to Intermediate. This pattern uses basic stitches throughout. The construction involves making separate panels and seaming them together, which is much simpler than working in one piece with complicated shaping.
Finished Measurements This pattern is written for size Medium with a finished bust of approximately 40 inches and length of 22 inches. Notes for adjusting size are included throughout.
Practice Swatch
The beautiful open grid texture of this cardigan comes from a simple filet mesh pattern: double crochets separated by chain stitches. The basic mesh pattern is (dc, ch 1, sk 1) repeated across the row. On the following row, you work your double crochets into the chain-1 spaces from the row below, creating the perfect little squares you see in the finished piece. This swatch gets that rhythm into your hands before you commit to the real foundation chain.
Ch 22.
- Round 1
Dc in 4th ch from hook, *ch 1, sk 1 ch, dc in next ch*, rep from * to * across. (10 mesh squares)
- Round 2
Ch 3 (counts as dc), turn, *dc in next ch-1 sp, ch 1*, rep from * to * across, dc in top of turning chain. (10 mesh squares)Repeat Row 2 until you feel comfortable with the rhythm.
Back Panel
The back is worked flat in one rectangular piece. Ch 82.
- Round 1
Dc in 4th ch from hook (skipped chains count as first dc), *ch 1, sk 1 ch, dc in next ch*, rep from * to * across. Turn. (40 mesh squares)
- Round 2
Ch 3 (counts as dc here and throughout), *dc in next ch-1 sp, ch 1*, rep from * to * across, ending with dc in top of turning chain. Turn. (40 mesh squares)Rows 3 through 44: Rep Row 2. Your back panel should measure approximately 20 inches wide and 22 inches long. Fasten off and weave in ends.
Left Front Panel
The front panels are narrower than the back and include shaping for the V-neckline. Ch 42.
- Round 1
Dc in 4th ch from hook, *ch 1, sk 1 ch, dc in next ch*, rep from * to * across. Turn. (20 mesh squares)Rows 2 through 30: Work even in mesh pattern as established. (20 mesh squares per row) Begin V-Neck Shaping:
- Round 31
Ch 3, work in mesh pattern across to last 2 mesh squares, dc in next ch-1 sp. Turn, leaving remaining stitches unworked. (18 mesh squares)
- Round 32
Ch 3, sk first ch-1 sp, dc in next ch-1 sp, work in pattern to end. Turn. (17 mesh squares)Rows 33 through 40: Continue decreasing 1 mesh square at neck edge every row. (9 mesh squares remain after Row 40)
Rows 41 through 44: Work even on remaining 9 mesh squares. Fasten off and weave in ends.
Right Front Panel
Work same as Left Front Panel through Row 30.
Begin V-Neck Shaping:
- Round 31
Ch 3, sk first ch-1 sp, dc in next ch-1 sp, work in pattern to end. Turn. (18 mesh squares)
- Round 32
Ch 3, work in pattern across to last 2 mesh squares, dc in next ch-1 sp. Turn. (17 mesh squares)Rows 33 through 40: Continue decreasing 1 mesh square at neck edge every row, keeping decreases on the opposite edge from Left Front. (9 mesh squares remain after Row 40)
Rows 41 through 44: Work even on remaining 9 mesh squares. Fasten off and weave in ends.
Sleeves (Make 2)
Make 2The sleeves are worked flat and seamed. Ch 62.
- Round 1
Dc in 4th ch from hook, *ch 1, sk 1 ch, dc in next ch*, rep from * to * across. Turn. (30 mesh squares)Rows 2 through 32: Work even in mesh pattern. (30 mesh squares) Your sleeve should measure approximately 15 inches wide and 16 inches long. Fasten off.
Assembly
Now comes the satisfying part: putting it all together.
Shoulder Seams Place right sides of Back and Left Front together. Using a tapestry needle and yarn, whip stitch or mattress stitch the shoulder seam, joining approximately 4 inches (9 mesh squares) at the outer shoulder edge. Repeat for Right Front.
Attach Sleeves Find the center of one sleeve's top edge. Match this to the shoulder seam. Pin in place. Sew the sleeve to the body, attaching it to both front and back panels. The sleeve should sit smoothly without puckering. Repeat for second sleeve.
Side and Sleeve Seams Starting at the bottom hem of the body, sew the side seam up to the underarm. Continue sewing down the sleeve seam to the cuff. Repeat on other side.
Neckline and Front Edging
This creates the clean finished edge you see around the V-neck and front opening.
- Round 1
Join yarn at bottom right front corner with a sl st. Ch 1, sc evenly up the right front edge, working approximately 2 sc for every mesh row. Continue around the neckline, working 3 sc in the point of the V for a smooth curve. Sc down the left front edge. Sl st to join. Turn.
- Round 2
Ch 1, sc in each sc around, working 3 sc in corner at bottom of V. Sl st to join. Turn.
- Rounds 3–4
Rep Round 2.Fasten off and weave in ends.
Bow Ties (Make 2)
Make 2The bow ties are simple chains that thread through the mesh openings. For each tie: Ch 120 (or desired length, approximately 24 inches).
- Round 1
Sc in 2nd ch from hook, sc in each ch across. (119 sc) Fasten off and weave in ends.
Attaching the Ties
Locate a mesh opening approximately 2 inches below where the V-neck shaping begins on each front panel. Thread one tie through the right front panel, pulling it halfway through so equal lengths hang on each side. Repeat with second tie on left front panel, placing it at the same height.
When worn, tie both sets in bows at the front center.
Bottom Ribbing (Optional)
For a more polished hem, add a ribbed border to the bottom edge.
- Round 1
Join yarn at one side seam at bottom of body. Ch 1, sc evenly across entire bottom edge. Turn.
- Rounds 2–6
Ch 1, working in back loops only (BLO), sc in each sc across. Turn.Fasten off and sew short ends of ribbing together.
More shots
Where it goes
- Tossed over a sundress for a cool evening on the patio, paired with sandals and simple jewelry.
- Worn over a fitted tank for an easy daytime look, paired with jeans and sneakers.
- Layered on top of a slip dress for an evening out, tied at the front instead of buttoned.
- Kept folded on a chair by the door as a quick layer for cooler mornings, ready to grab with any outfit.
Color ideas
- Blush Pink (As Shown) The sample cardigan is worked entirely in a soft blush pink cotton blend, from the back panel and sleeves to the ribbed edging and ties, for a dreamy, monochrome finish.
- Alternate Solid Colors This design works beautifully in any solid or tonal yarn. Try a soft sage, a creamy ivory, or even a bold terracotta for a fall-ready version.
Care
Hand wash the finished cardigan in cool water since the cotton blend can lose shape in a hot machine wash.
Lay it flat on a towel to dry rather than hanging it wet, so the mesh panels and ties do not stretch out of shape.
Fold and store it flat in a drawer instead of on a hanger, which keeps the shoulders and bow ties from sagging over time.
Easy to get wrong
Skipping the practice swatch
Work the swatch until the dc, chain-one, skip-one rhythm feels automatic before starting the foundation chain. It saves you from reworking the back panel later.
Losing count of mesh squares
Count the mesh squares at the end of each row against the number given for that row. This catches a missed chain-one space before it compounds down the panel.
Rushing the V-neck shaping rows
Slow down at the start of each shaping row on the front panels and check which stitches are meant to stay unworked. Marking the last worked stitch with a scrap of yarn helps keep both front panels matching.
Listener questions
What hook size do I actually need for this cardigan?
A 4.0mm hook handles the main mesh stitch for the back and front panels. A 3.5mm hook is optional, used only if you want a tighter ribbed edging.
Can I skip the ribbed edging and still finish the cardigan?
Yes, the ribbed edging is listed as optional in the materials. You can work the entire cardigan with the 4.0mm hook and leave out the tighter trim.
How do I know if my back panel is coming out the right size?
Check your mesh square count after each row against the count given, since that tells you if your tension matches the pattern. The back panel should measure approximately 20 inches wide and 22 inches long once all its rows are complete.
What yarn works best for this project?
A DK weight cotton blend with good stitch definition, such as Paintbox Cotton DK, 24/7 Cotton, or Drops Safran, works well here. The sample is worked in a soft blush pink, but any DK weight cotton blend in that yardage range will behave the same way.
Is this a good pattern for a newer crocheter to attempt?
It is listed as intermediate because of the V-neck shaping and the ongoing mesh square tracking, but the practice swatch is there to ease you into it. If you are comfortable with basic double crochet and chain stitches, the swatch will get you ready for the rest.
Original pattern: https://crochr.com/blush-pink-bow-front-crochet-cardigan-free-pattern/
About the Author

Marisol QuinteroWho runs Crochet Obsessed, why a stitch count sits at the end of every round, how a pattern gets written here, and the things this site will never do.
More Patterns
- IntermediateNo. 01

Flamingo, pineapple and monstera leaf charm trio pattern
Flamingo pineapple monstera leaf charm trio: tiny thread crochet and amigurumi shaping turn small motifs into three charming…
- IntermediateNo. 02
Sage green daisy bow bucket bag crochet pattern
Sage green daisy bow bucket bag crochet pattern with a sculpted bucket base, gathered rim, and a petaled…
- IntermediateNo. 03
Sage green garden wrap with dimensional rose brooch
Sage green garden wrap crochet pattern: a flowing cotton capelet with beaded fringe and a rose brooch you'll…