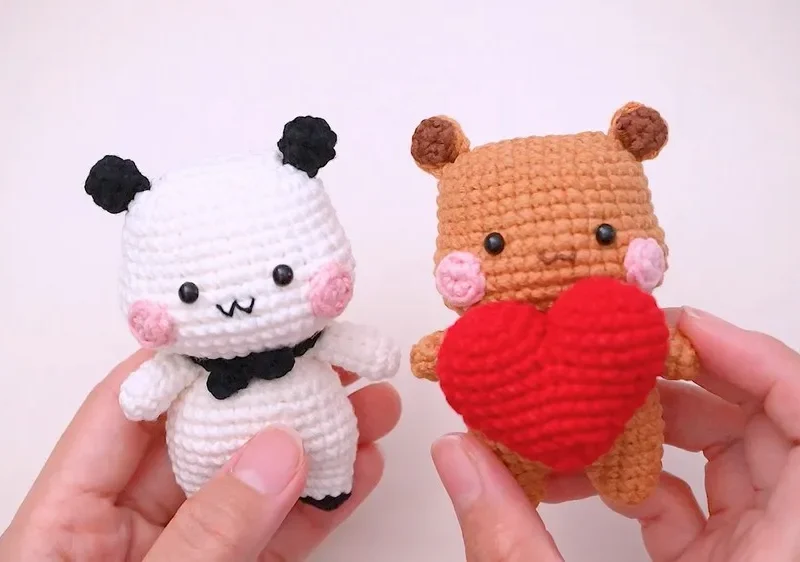
- LevelIntermediate
- Time4-6 hours
- Hook3 mm
- YarnSport
About This Pattern
There is something calm about working in just two colors. No juggling a dozen skeins, no wondering what comes next in a busy stripe sequence. Just black, then white, then a little shelf-ready pair looking back at you when you are done.
Once stuffed and joined, Bubu and Dudu sit low and round, the kind of shape that holds a windowsill or a stack of books without tipping. They read as a matched set, not two random toys. Put them anywhere you want a little graphic punch of black and white.
- Practice the yarn-over color change on the legs so the join stays neat instead of bulky.
- Build the head from a starting chain, working into the back bumps to keep the base tidy.
- Shape the head through its increase rounds, letting the stitch count climb toward its final oval curve.
- Join both legs into the body base, working sc and an increase across each leg to bridge them.
- Grow the body with a single increase round, then work several plain rounds straight up.
- Shape the lower body back in with an invisible decrease round so the base closes smoothly.
- Stuff the head, body, and hands firmly with polyester fiber before sewing everything together.
On the desk
- Sport weight cotton yarn
- 3mm crochet hook
- Stuffing tool
- Scissors
- Needle
Stitch shorthand
- sc — single crochet
Black and white amigurumi duo crochet pattern
Legs (Make 2)
Start with a magic ring.
Make 6 single crochets (sc) into the magic ring.
Close each round with a slip stitch.
- Round 1
(1 sc, increase) repeat 3 times using X stitch. Total 9 stitches. Start with black yarn for Dudu, and switch to white yarn in the next round.To switch colors, yarn over with the new color and pull through the loop on the hook, then make a chain stitch.
- Round 2
1 sc in each stitch around. Total 9 stitches.
- Joining Legs
Make 4 chains, then slip stitch into the other leg to join both legs together.
Head
Start by making 6 chains.
- Round 1
Chain 1, work into back bumps of the chain: 1 increase, 4 sc, then 4 sc in the last chain, turn your work around, do 4 sc and finish with an increase in the first bump. Slip stitch to close. Total 16 stitches.
- Round 2
1 increase, 5 sc, then (1 increase in next 3 stitches) 3 times, followed by 5 sc and finish with 2 increases. Slip stitch to close.
- Round 3
(1 sc, 1 increase, 5 sc) repeat process, inserting increases as specified, ending with 28 stitches.
Body
- Round 3
Chain 1, then make 4 sc, 1 increase, and 4 sc on the first leg. Work 4 sc into the back bumps of the chain (to avoid gaps), then repeat the 4 sc, 1 increase, and 4 sc on the second leg. Finish with 4 sc in both loops of the chain and slip stitch to the first stitch. Total 28 stitches.
- Round 4
1 sc in each stitch around. In Round 5: (6 sc, increase) repeat 4 times. Total 32 stitches.
- Rounds 6–9
1 sc in each stitch around.
- Round 10
(6 sc, decrease) repeat 4 times using an invisible decrease method. Total 28 stitches.Continue following the pattern provided for the body.
More shots
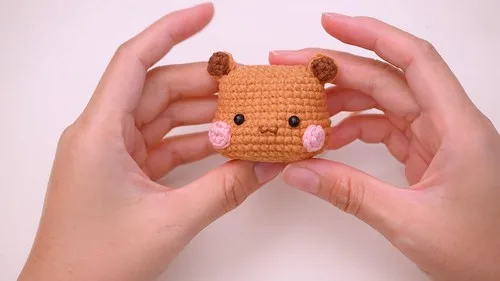
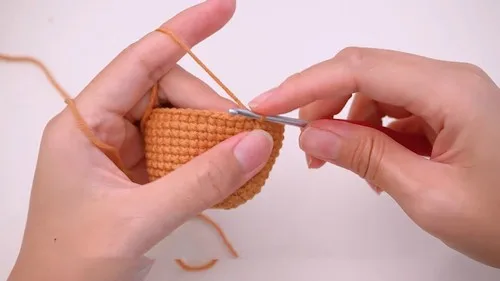
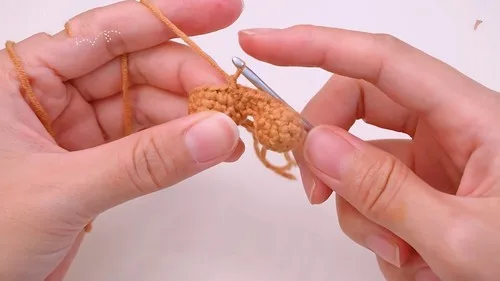
Where it goes
- A matched pair for a bookshelf or desk, sitting close together like bookends with personality.
- A windowsill accent that pairs well with plants or a stack of paperbacks for contrast.
- A housewarming gift for someone who likes graphic, black-and-white decor over pastels.
- A photo-shelf prop that pairs nicely with framed prints or a small gallery wall.
Care
Hand wash the finished pair in cool water since sport weight cotton holds its shape better than a machine cycle allows.
Lay flat to dry rather than hanging, so the stuffed head and body do not stretch out of round.
Store on a shelf away from direct sun so the black and white cotton keeps its crisp contrast over time.
Assembly
- Step 1 Fill the body, head, and hands with polyester fiber.
- Step 2 Sew the head to the body and attach the hands on each side.
Easy to get wrong
Sloppy color change on the legs
Yarn over with the new color before pulling through the last loop, then chain immediately so the join sits flush instead of loose.
Skipping the back bumps on the head chain
Work into the back bumps of the starting chain, not the top loops, so the base edge stays even and gap-free.
Loose invisible decreases on the body
Pull the decrease stitch snug right after working it so round 10 closes cleanly instead of leaving a visible pucker.
Listener questions
Why does the head start with a chain instead of a magic ring?
Starting from six chains gives the head a slightly elongated, oval base rather than a perfectly round one. It is a small technique shift from the legs and body, both of which begin in a magic ring.
How do I keep the color change from looking messy?
Yarn over with the new color right on the last stitch of the old color, pull through, then chain one before continuing. That chain locks the join and keeps the color line crisp.
How firmly should I stuff the pieces?
Pack the head, body, and hands with polyester fiber until they feel dense and hold their shape when pressed. Under-stuffing is the main reason amigurumi look floppy once assembled.
What is the invisible decrease and why does it matter here?
It is a decrease method that keeps the stitch tops aligned so round 10 closes without a visible ridge. It matters most here because the body shaping is the last visual detail before assembly.
Original pattern: https://crocheteverything.com/beautiful-crochet-amigurumi-bubu-dudu-tutorial-for-room-charm/
About the Author

Marisol QuinteroWho runs Crochet Obsessed, why a stitch count sits at the end of every round, how a pattern gets written here, and the things this site will never do.
More Patterns
- IntermediateNo. 01

Rose Granny Square Tote Crochet Pattern
Rose granny square tote crochet pattern made from 18 dimensional rose squares for a sturdy, romantic everyday bag.
- IntermediateNo. 02
Tropical octopus baby blanket crochet pattern with appliqués
Tropical octopus baby blanket crochet pattern: a cream filet base with coral and turquoise octopus appliqués, leaves, and…
- IntermediateNo. 03
Sunny lemon couple amigurumi crochet pattern
Sunny lemon couple amigurumi crochet pattern with embroidered slices and safety eyes for a cheerful handmade shelf pair.


