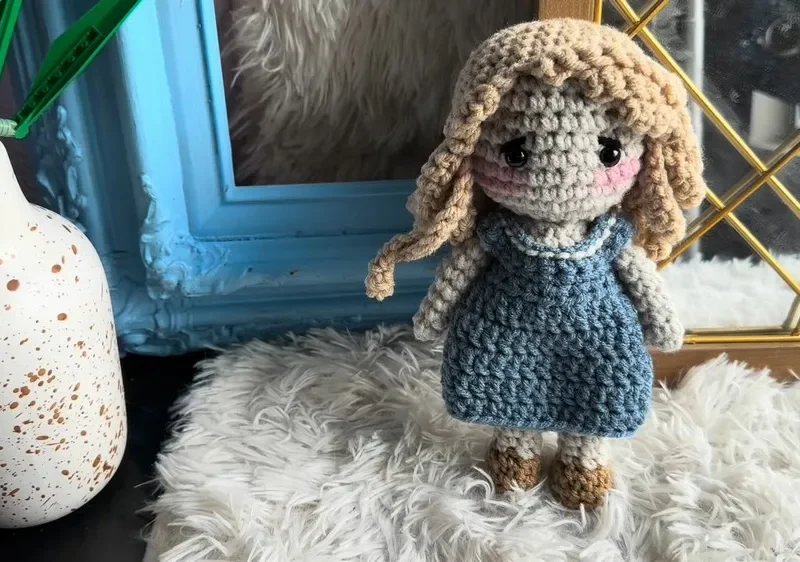
- LevelIntermediate
- Time4-6 hours
- YarnWorsted
About This Pattern
This doll has that quiet, companionable mood I love in amigurumi: nothing flashy, just a small steady figure taking shape round by round. I think of it as a weekend project that fills an evening with good noise - the TV on low, yarn moving through my fingers. By the time the legs are stuffed and ready to join, it already feels like a little someone.
Your hands stay busy with the basics here - magic circles, single crochet increases, a back-loop-only round that gives the shoe its edge. There is a color change to land cleanly, decreases to count out on the Doll Legs, and stuffing to pack in firmly before each piece closes. It is forgiving work, repetitive in the best way, the kind you can do without staring at a chart.
Finished, this doll sits well on a shelf or a child's bed, legs tucked under or dangling over an edge. It has the scale and softness that makes people reach out and pick it up without asking. In a room full of plastic toys, it reads as the one thing someone actually made.
- Begin each leg with a magic circle in the shoe color and build up the foot with single crochet increases.
- Work the decrease round and let the color change happen naturally at the end of that round.
- Continue straight single crochet rounds up the leg, stuffing firmly before you close the top.
- Repeat the whole leg sequence a second time so you have a matching pair.
- Join the two legs with slip stitches in the shorts color, then single crochet around to start shaping the body.
- Finish each piece by weaving the tail through the final round's stitches to fasten off securely, then add the wig cap hair and the removable chained dress.
On the desk
- Yarn in various colors for the body, clothes, hair, etc.
- Crochet hook (sizes mentioned in individual sections)
- Safety eyes
- Stuffing material
- Tapestry needle
- Stitch marker
Stitch shorthand
- ch — chain
- st — stitch
- sl st — slip stitch
- sc — single crochet
- hdc — half double crochet
- dc — double crochet
- inc — increase
- dec — decrease
- mr — magic ring
- fo — finish off
Basic crochet doll amigurumi with hair and dress
Doll Arms (Make 2)
Make 2- Round 1(6)
Start with a magic circle and work 6 single crochets into the circle. Pull the tail to close the gap.
- Rounds 2–9
Work 1 single crochet in each stitch around (6 stitches). Use a stitch marker to keep track of rounds.
- Closing
Pinch the arm closed and work 2 single crochets across both sides to close it off. Leave a tail for sewing onto the body.
Doll Legs
- Round 1(6)
Start with a magic circle in shoe color yarn and make 6 single crochets. Pull tight to close.
- Round 2(12)
Increase in each stitch around (12 stitches).
- Round 3(12)
1 single crochet in the back loop only of each stitch around (12 stitches).
- Round 4
Single crochet in the first two stitches, then make 4 decreases, single crochet in next stitches, ending with a color change in the last stitch.
- Rounds 5–14
1 single crochet in each stitch around. Stuff the leg before closing.
- Closing
Cut the yarn, leaving a tail for sewing, and fasten off by weaving the end through the final round's stitches.
More shots
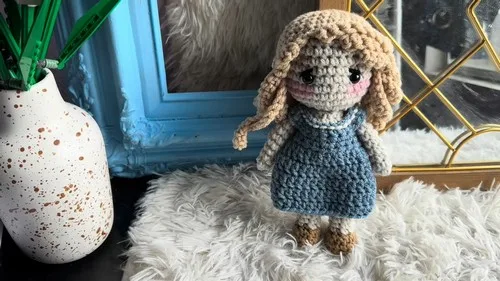
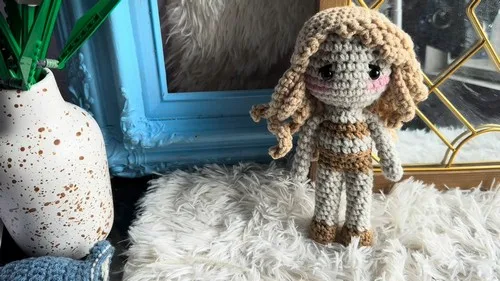
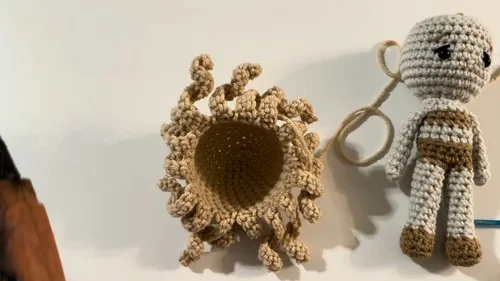
Where it goes
- A soft, huggable companion for imaginative play that holds up to being carried, dressed, and set down again.
- A handmade keepsake gift that pairs nicely with a small crochet blanket or a tiny knit sweater set.
- A shelf or bookcase accent that sits comfortably alongside other amigurumi figures in a growing collection.
- A craft-fair or small-batch sale item, especially paired with a simple crocheted carry pouch or doll-sized basket.
Color ideas
- Classic schoolyard Soft skin-tone yarn for the body and legs, red or navy for the shoe rounds, and a contrasting shorts color used to slip stitch the legs together at the join.
- Soft neutrals Cream or oatmeal for the main body rounds, a muted rose for the shoe color at the start of the Doll Legs, and a dusty blue for the shorts color that joins the legs into the body.
Care
Hand wash the finished doll gently in cool water since most amigurumi yarns hold shape better without a machine cycle agitating the stuffing.
Lay it flat on a towel to air dry, reshaping the legs and shoes with your fingers while damp so the back-loop ridge stays crisp.
Store it upright or lying flat in a drawer away from direct sun, which keeps the shoe and shorts colors from fading over time.
Assembly
- Joining Legs With the shorts color yarn, slip stitch to join legs together, then single crochet around to create the body, increasing where necessary for the doll's shape.
- Building the Body Continue working rounds in single crochets, changing colors for the clothing as desired.
- Starting the Head Change to skin color yarn and begin to increase in rounds to form the head.
- Safety Eyes Place safety eyes between rounds that align with the face desired.
- Decreasing for Head Begin decreasing rounds to form the top of the head.
- Closing Head Finish off by decreasing until you can close the head. Weave the end through the stitches to seal and create a loop with the yarn to form a nose.
- Hair - Wig Cap Create a wig cap by working in rounds, increasing to fit the doll's head. Attach hair strands or work hairstyles as desired.
- Dress - Chain Chain 29, single crochet in the second chain from the hook and each across (28).(28)
- Dress - Armholes Skip stitches to create armholes, continuing to single crochet around the rest of the rounds.
- Dress - Skirt Work increases to create the flare of the dress and continue in rounds, finishing with a slip stitch to join.
- Dress - Detailing On the last round of the dress, work a border or edging in a contrasting color or stitch for decorative effect. Finish off with a tie or fastening mechanism.
Easy to get wrong
Losing track of rounds
Place your stitch marker in the first stitch of every round and move it up each time, especially through the repeated single crochet rounds on the Doll Arms and Doll Legs. A dropped marker is the fastest way to end up with a lopsided leg.
Working the back loop round incorrectly
Double-check you are catching only the back loop on Round 3 of the Doll Legs, not the whole stitch. This is what creates the visible ridge between shoe and leg, so a missed stitch here flattens the shoe line.
Under-stuffing before closing the leg
Pack stuffing in firmly as you work the final rounds of the leg, not all at once at the end. A leg stuffed too late tends to look thin and lets the color-changed shoe sag.
Between the songs
- What I love about this doll is how much personality comes from so few techniques. The magic circle start on the legs and shoes keeps everything neat at the center, and that back-loop-only round on Round 3 of the Doll Legs is the small detail that quietly defines the shoe shape. The color change built into Round 4 forces you to plan ahead, which makes the finished leg feel intentional rather than accidental. Joining the legs with slip stitches before single crocheting the body is satisfying too - it is the moment the doll stops being parts and starts being one piece. Stuffing the leg before closing it means you feel the shape firm up in your hands as you go, not after.
Listener questions
Can I make the legs in different colors from each other?
Yes, since each leg starts its own magic circle in the shoe color, you can vary them from the start. Just keep the shorts color consistent when you join the two legs together so the body transition still reads cleanly.
Why does Round 4 of the Doll Legs include a color change?
That round is where the shoe stops and the leg begins, so the color change at the end sets up the new shade for the rounds above. Plan your decreases and the color swap together so the transition lands on the same round.
How firmly should I stuff the legs before closing them?
Stuff firmly enough that the leg holds its shape when you press it, since a soft leg will look flat once the body is joined on top. Add stuffing gradually as you work up through the single crochet rounds rather than cramming it in at the very end.
What is the back loop only round actually doing?
Working into just the back loop on Round 3 leaves the front loops exposed as a visible ridge, which is what separates the shoe from the leg visually. It is a small technique but it is the detail that makes the shoe look deliberate rather than just a color change.
How do the legs become the body?
Once both legs are stuffed and closed, you slip stitch them together in the shorts color and single crochet around, increasing where the doll needs more width. This single step is what turns two separate leg pieces into one continuous body shape.
Original pattern: https://crocheteverything.com/cute-crochet-basic-doll-amigurumi-pattern-with-hair-dress/
About the Author

Marisol QuinteroWho runs Crochet Obsessed, why a stitch count sits at the end of every round, how a pattern gets written here, and the things this site will never do.
More Patterns
- IntermediateNo. 01

Rose Granny Square Tote Crochet Pattern
Rose granny square tote crochet pattern made from 18 dimensional rose squares for a sturdy, romantic everyday bag.
- IntermediateNo. 02
Tropical octopus baby blanket crochet pattern with appliqués
Tropical octopus baby blanket crochet pattern: a cream filet base with coral and turquoise octopus appliqués, leaves, and…
- IntermediateNo. 03
Sunny lemon couple amigurumi crochet pattern
Sunny lemon couple amigurumi crochet pattern with embroidered slices and safety eyes for a cheerful handmade shelf pair.


