- LevelIntermediate
- Time4-6 hours
- Hook8 mm
- YarnBulky
About This Pattern
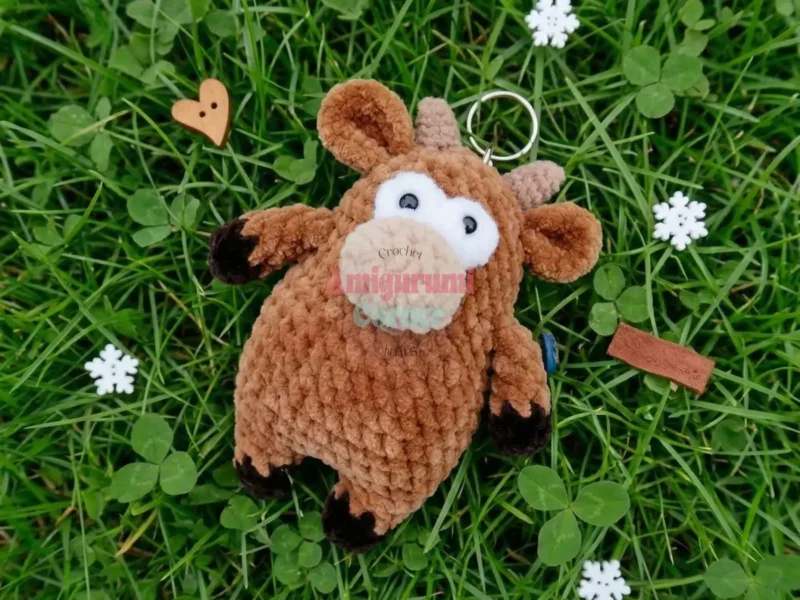
This one has a gentle, barnyard kind of warmth to it. There's nothing fierce about this bull, even with the horns. He comes out soft-faced and a little round in the middle, the kind of toy that looks like it has been loved for years before you have even finished sewing him together.
Your hands will spend most of their time in continuous spirals, round after round with no joining and no turning, which is the part of amigurumi I find almost meditative. Then they shift gears for the muzzle, working short rows back and forth in that light brown yarn to build its rounded shape. The horns ask for a finer hook and a steadier grip, since you are moving from bulky chenille down to thin cotton blend.
Set him on a shelf or a windowsill and he holds his own without looking fussy. He is substantial thanks to that plush chenille body, so he anchors a group of smaller amigurumi nicely. Children seem to go for the stubby arms and legs right away, before they even notice the horns.
Standing approximately 5 inches (13 cm) tall including his little horns, he works up quickly and makes a wonderful gift, holiday ornament, or keychain charm.
A few key techniques help this pattern come out looking its best. For the magic ring, cast on 2 chains, then work the required number of single crochets into the second chain from the hook, continuing in the round without joining. The whole pattern is worked in continuous spiral rounds — don't join at the end of rounds and don't turn your work unless specifically instructed; placing a stitch marker at the beginning of each round helps you keep track. When stuffing the head and body, push fiberfill from the center outward toward the sides rather than packing it straight in from the top, which creates a rounder, more even shape. For the invisible decrease, insert your hook into the front loop of the first stitch, then into the front loop of the next stitch, yarn over and draw through both loops, then yarn over and draw through the remaining 2 loops on the hook.
- Crochet the ears separately so they are ready to attach once the head is shaped.
- Work both legs on their own, then join them into one continuous piece to build the body and head without a seam.
- Shape the muzzle in light brown yarn using short rows worked back and forth, not in the round.
- Crochet the eye whites as a quick, nearly instant round each, ready to pair with or replace with safety eyes.
- Stuff the body and head firmly as you go, then attach the eyes between the rounds marked for the face.
- Sew the muzzle, horns, ears, and tail into place to finish the bull.
On the desk
Main yarn
- Bulky plush/chenille yarn (100% polyester, 100g/120m) in brown, dark brown, white, and light brown for the muzzle
Accent yarn
- Thin cotton/acrylic blend (55% cotton/45% acrylic, 50g/160m) — used for sewing parts together and crocheting the horns
Tail yarn
- A small amount of fluffy or novelty yarn
Eyes
- Black safety eyes, 6–8mm
Hooks
- US Size G/4.0mm for the main body; US Size B/2.0mm for the horns
Notions
- Blunt tapestry needle, scissors, fiberfill stuffing
Stitch shorthand
- ch — chain
- st — stitch
- sl st — slip stitch
- sc — single crochet
- inc — increase
- dec — decrease
- mr — magic ring
- rnd — round
- rnds — rounds
Baby bull amigurumi: a plush crochet project worth starting
Arms — Make 2
Begin with dark color yarn.
- Round 1
6 sc in mr (6)
- Round 2
6 sc (6)Switch to main color yarn.
- Rounds 3–6
6 sc (4 rounds) (6)Fold the piece flat. Work 3 sc through both layers to close. Fasten off and weave in ends. Do not stuff.
Ears — Make 2
Main color yarn.
- Round 1
6 sc in mr (6)
- Round 2
inc × 6, sl st (12)Fasten off and weave in ends.
Legs & Body
The legs are crocheted separately, then joined to form the body in one continuous piece — a clever construction that keeps the project tidy with minimal seaming.
Begin with hoof color yarn.
Leg 1:
- Round 1
6 sc in mr (6)
- Round 2
6 sc (6)Switch to main color yarn.
- Round 3
6 sc (6)
- Round 4
(1 sc, inc) × 3 (9)Fasten off and weave in ends on Leg 1 only.
Leg 2: Repeat Rnds 1–4 as above. Do not fasten off — continue directly into the body.
Joining Legs & Body (worked from Leg 2):
- Round 5
Ch 2; working across Leg 1: 10 sc (the 10th sc is worked into the first stitch under the ch-2 bridge); 2 sc across ch-2; 10 sc across Leg 2; 2 sc across opposite side of ch-2 (24)
- Round 6
(3 sc, inc) × 6 (30)
- Round 7
30 sc (30)
- Round 8
29 sc; ch 4; sl st in 2nd ch from hook, sl st in next 2 ch (this forms the tail — position tail between legs!) ; sl st in same base stitch; 1 sc (30)
- Rounds 9–12
30 sc (4 rounds) (30)
- Round 13
(3 sc, dec) × 6 (24)
- Rounds 14–15
24 sc (2 rounds) (24)
If arms are not aligning evenly, work 1 or more extra sc before Rnd 16 to adjust positioning.
- Round 16
4 sc; [hold Arm against body, work 3 sc through arm and body together]; 9 sc; [hold second Arm against body, work 3 sc through arm and body together]; 5 sc (24)
- Rounds 17–19
24 sc (3 rounds) (24)
- Round 20
(2 sc, dec) × 6 (18)Stuff body firmly.
If using push-in safety eyes without crocheted whites, insert them between Rnds 19–20 now.
Joining Ears (Rnd 21):
- Round 21
4 sc; [fold Ear in half, work 2 sc through both outer edges of Ear and body together]; 7 sc; [fold second Ear in half, work 2 sc through both outer edges and body together]; 3 sc (18)
- Round 22
(1 sc, dec) × 6 (12)Finish stuffing head.
- Round 23
dec × 6 (6)Close opening, fasten off, and weave in ends.
Muzzle
Light brown yarn.
- Row 1
Ch 4; inc in 2nd ch from hook; 1 sc; 4 sc in last ch; working back along opposite side of foundation ch: 1 sc; inc (10)
- Row 2
1 sc, inc, 1 sc, inc, 2 sc, inc, 1 sc, inc, 1 sc (14)
- Row 3
14 sc, sl st (14)Fasten off and weave in ends.
Eye Whites — Make 2
Skip this section if safety eyes were already inserted directly into the body.
White yarn.
- Round 1
6 sc in mr, sl st (6)Fasten off. Insert a safety eye through the center of each piece.
Horns — Make 2
Thin cotton yarn; US Size B/2.0mm hook.
- Round 1
6 sc in mr (6)
- Round 2
6 sc (6)
- Round 3
(1 sc, inc) × 3 (9)
- Rounds 4–5
9 sc (2 rounds) (9)Stuff lightly. Fasten off, leaving a long tail for sewing.
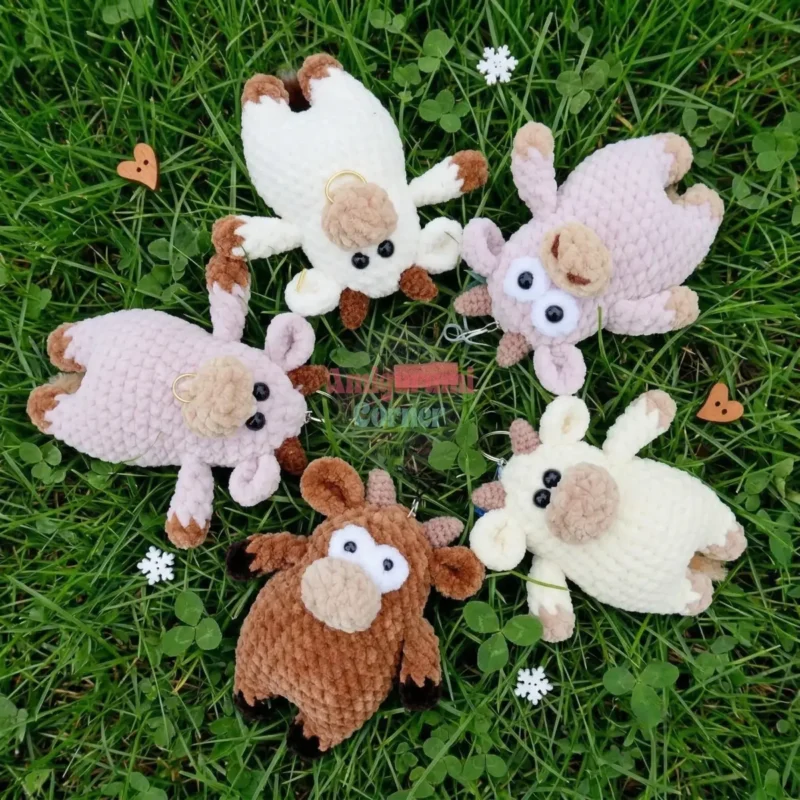
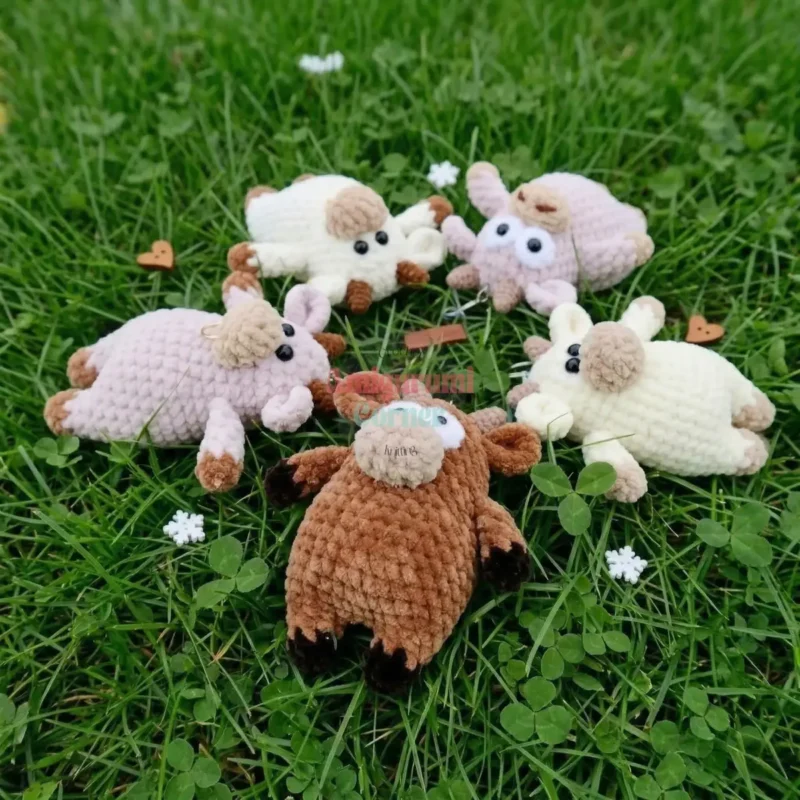
More shots
Where it goes
- A nursery shelf piece that pairs well with other soft farm-animal amigurumi for a themed lineup.
- A first stuffed toy for a toddler, sturdy enough for grabbing thanks to the chenille body.
- A desk or windowsill companion for anyone who collects handmade animal figures.
- A thoughtful handmade gift for a baby shower or new-nursery setup, paired with a knit blanket or soft rattle.
Color ideas
- Classic brown bull Brown chenille for the main body, legs, arms, and ears; dark brown for the start of each arm and for the hooves on the legs; light brown for the muzzle; thin cotton blend horns left natural or cream.
- Soft two-tone calf Light brown chenille for the entire body, legs, and arms; dark brown kept only for the hoof tips and ear accents; white used for the eye whites; horns crocheted in a matching light neutral thin cotton blend.
Care
Hand wash in cool water if needed, since the plush polyester chenille holds its texture better without a washing machine's agitation.
Air dry flat away from direct heat, reshaping the muzzle and ears gently with your fingers while still damp.
Store him stuffed and upright on a shelf rather than packed flat, so the chenille pile and the fiberfill shape stay even over time.
Assembly
- Step 1 Once all pieces are complete, it's time to bring your bull to life:
- Step 2 Eyes: Attach the crocheted eye whites (or push-in safety eyes) between Rnds 19–20 of the head, evenly spaced.
- Step 3 Muzzle: Sew the muzzle beneath the eyes, stuffing it lightly as you go to give it a rounded, prominent shape.
- Step 4 Horns: Sew the horns to the very top of the head, positioned just above the ears.
- Step 5 Tail: Thread a length of fluffy novelty yarn through the tail loop and tie in a secure knot. Use a slicker brush to fluff it out, then trim to your desired length.
- Step 6 Optional finishing: For a keychain version, attach a metal ring to the top of the head. You can also add a decorative ring through the nose or ear for extra character.
Easy to get wrong
Losing stitch definition in chenille
Work a touch more snugly than you would with worsted yarn, since the plush texture already hides stitches and loose tension makes the fabric gappy. Count stitches carefully rather than relying on sight.
Rushing the muzzle's short rows
The muzzle is worked flat in rows, not in continuous spiral rounds like the rest of the body, so pause and turn your work as instructed. Skipping the turn flattens the rounded shape you want beneath the eyes.
Listener questions
What yarn weight is best for this Baby Bull pattern?
This pattern is designed for bulky weight (Category 5) plush or chenille yarn, such as Himalaya Dolphin Baby. Using a different weight will change the finished size and the amount of yarn needed, so keep that in mind if you're substituting.
Can I use regular safety eyes instead of crocheting the eye whites?
Yes! The pattern offers both options. You can insert 6–8mm black safety eyes directly into the body between Rnds 19–20, or crochet the white eye pieces separately and attach safety eyes through their centers for a more expressive, cartoon-like look.
Is this pattern suitable for beginners?
This pattern is beginner-friendly, though some familiarity with basic amigurumi techniques — such as working in continuous spiral rounds, joining pieces, and the invisible decrease — will be very helpful. If you're comfortable making a magic ring and counting rounds, you should be able to follow along with ease.
How do I turn this toy into a keychain?
To make a keychain version, simply attach a metal jump ring or keychain hardware to the top of the finished bull's head after assembly. The pattern is compact enough at approximately 5 inches tall to work well as a bag charm or keychain accessory.
Original pattern: https://amigurumicorner.com/baby-bull-amigurumi-crochet-pattern/
About the Author

Marisol QuinteroWho runs Crochet Obsessed, why a stitch count sits at the end of every round, how a pattern gets written here, and the things this site will never do.
More Patterns
- IntermediateNo. 01

Rose Granny Square Tote Crochet Pattern
Rose granny square tote crochet pattern made from 18 dimensional rose squares for a sturdy, romantic everyday bag.
- IntermediateNo. 02
Tropical octopus baby blanket crochet pattern with appliqués
Tropical octopus baby blanket crochet pattern: a cream filet base with coral and turquoise octopus appliqués, leaves, and…
- IntermediateNo. 03
Sunny lemon couple amigurumi crochet pattern
Sunny lemon couple amigurumi crochet pattern with embroidered slices and safety eyes for a cheerful handmade shelf pair.


