- LevelIntermediate
- Time4-6 hours
- Hook12 mm
- YarnWorsted
About This Pattern
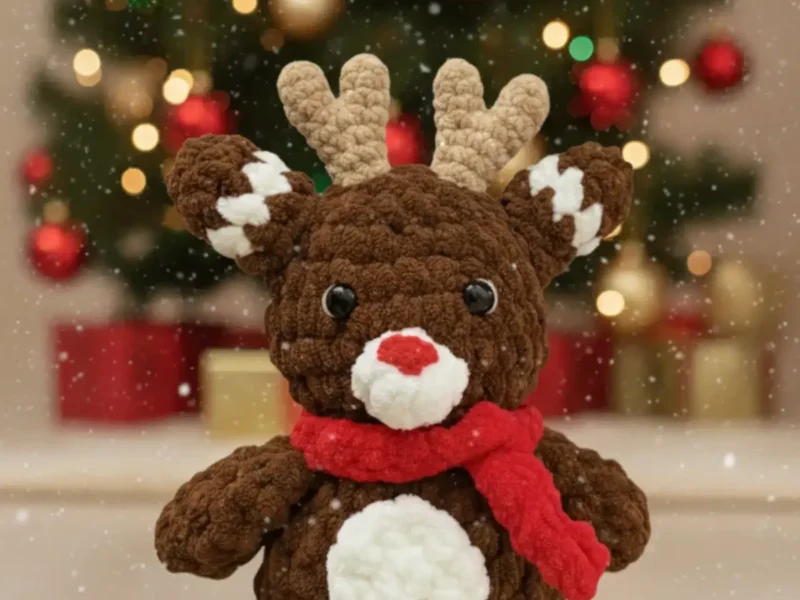
There is something hushed and sweet about this little fawn as it takes shape under your hook. I think of it as a quiet-afternoon project, the kind where the plush yarn does half the charm work before you even add a face. It is not fussy, just patient.
Finished, this fawn sits well on a shelf or tucked into a pile of pillows, its soft antlers and rounded belly catching the light. It reads as both cozy and a little whimsical, the kind of piece that makes a room feel lived-in. Kids tend to reach for it first.
- Start with the legs worked separately in single crochet before joining them into one rounded body.
- Continue the body in consistent single crochet rounds, stuffing firmly as the decreases begin.
- Shape the head separately with its own longer sequence of rounds, building from narrow to full and back.
- Crochet two matching arms with simple decreases at the tips to close them neatly.
- Work the ears with planned thread color changes so each one shows layered stripes.
- Add the belly and small novelty-yarn pieces, including the muzzle, nose, and main horn section.
- Assemble everything with a tapestry needle and strong thread, attaching ears, arms, belly, muzzle, nose, and antlers to the body.
- Finish with facial sculpting thread pulls around the eyes and embroidered eyebrows for the final expression.
On the desk
- Plush yarn such as Himalaya Dolphin Baby or YarnArt Dolce (100g/120m) – half a skein in your main color, plus a small amount of contrasting color
- Standard yarn (50g/200m) for details
- Children’s novelty yarn for the nose and horns
- Crochet hook No. 4 or 4.5 (I recommend 4.5 for this pattern)
- 12mm safety eyes
- Strong thread for securing parts and facial features
- Holofiber or synthetic stuffing
- Tapestry needle with large eye
- Scissors
- Stitch marker
- Black embroidery floss for eyebrows
Stitch shorthand
- ring — amigurumi magic ring
- sc — single crochet
- inc — increase (two stitches in one)
- dec — decrease (combine two stitches)
- ss — slip stitch
- Important reminder — Fill your work progressively as you crochet to ensure proper shaping!
Crochet a plush amigurumi fawn with soft antlers
Body Construction
The construction begins from the ground up, starting with the legs that seamlessly transition into the body.
Step by step First Leg: Create 6 sc in a magic ring; work 6 inc for a total of 12 stitches; continue with 12 sc without changes. Repeat these steps for the second leg, then connect both legs with a single crochet stitch. Place your stitch marker here – this marks the beginning of your rounds.
- Round 1
12 sc on first leg, 12 sc on second leg (24 total)
- Rounds 2–6
Work 24 sc for 5 consecutive rounds
- Round 7
(2 sc, dec) repeat 6 times (18 stitches) Remember to stuff firmly as you progress
- Round 8(12)
(1 sc, dec) repeat 6 times (12 stitches)
Crafting the Arms (Pens)
Create two identical arms: Work 6 sc in magic ring
- Rounds 2–5
Continue with 6 sc for 4 rounds
- Round 6
1 dec, 4 sc
- Round 7
Decrease through both loops
Ears (Make Two)
Work 6 sc in magic ring
- Rounds 2–3
1 sc, change thread color, 2 sc, change thread color, 3 sc
- Round 4
1 sc, decrease through both loops, finish with ss
Belly
Work 6 sc in magic ring
- Round 2
6 inc (12 stitches) Leave a long tail for sewing
Small sections (Make 2)
Creating the Antlers: the distinctive horns give your deer its woodland charm.
Work 6 sc in magic ring
- Rounds 2–4
Work 6 sc for 3 rounds
Main horn piece
Work 6 sc in magic ring
- Rounds 2–4
Work 6 sc for 3 rounds Connect with small section to create 9 sc in the round
- Rounds 4–7
Work 9 sc for 4 rounds Leave a long tail for sewing. Repeat to create the second antler.
Shaping the Head
The head connects directly to the body, creating the characteristic fawn silhouette.
- Round 9(18)
(1 sc, inc) repeat 6 times (18 stitches)
- Round 10(24)
(2 sc, inc) repeat 6 times (24 stitches)
- Round 11(30)
(3 sc, inc) repeat 6 times (30 stitches)
- Rounds 12–13
Work 30 sc for 2 rounds without changes
- Round 14(24)
(3 sc, dec) repeat 6 times (24 stitches)
- Rounds 15–16
Work 24 sc for 2 rounds Position the safety eyes between rounds 14 and 15
- Round 17(18)
(2 sc, dec) repeat 6 times (18 stitches)
- Round 18(12)
(1 sc, dec) repeat 6 times (12 stitches)
- Round 19
Continue decreasing until the opening closes
Muzzle
Create 6 sc in magic ring Work 6 sc without changes, finish with ss Leave tail for attachment
Nose
Work 6 sc in magic ring, finish with ss. Leave tail for sewing to the muzzle.
The Perfect Accessory: Scarf
Complete your deer with a cozy scarf:
- Row 1
Chain 90 stitches
- Row 2
Starting from the second chain from the hook, work single crochet stitches back along the chain
- Row 3
Finish with a slip stitchCut yarn and weave in ends.
More shots
Where it goes
- A soft centerpiece for a woodland-themed nursery shelf, paired with other plush animals in neutral tones.
- A gift for a new baby, especially alongside a knit blanket in a complementary main color.
- A photo prop for seasonal family pictures, set among pinecones or fall leaves for texture.
- A quiet comfort toy for a child's reading corner, paired with a small basket of picture books.
Color ideas
- Classic fawn Main color plush yarn covers the body, head, and arms; a small amount of contrasting color goes into the belly and ear stripes, with the novelty yarn kept natural-toned for the muzzle, nose, and horns.
- Soft gray woodland Use a pale gray as the main color for the body and head, swap in a warm cream as the contrasting color for the belly and the ear color-change rounds, and let the novelty yarn horns stay a soft neutral to stand apart.
- Experiment freely Don't hesitate to experiment with different color combinations – try a classic brown and white, or get creative with pastels or bright hues. Each deer you create will have its own unique personality.
Care
Hand wash the plush yarn body in cool water with a gentle detergent, since the softer fibers in plush yarn can mat if agitated too much.
Lay the fawn flat to dry away from direct heat, reshaping the ears and arms gently with your fingers while still damp.
Store it upright or lightly stuffed in a fabric bag rather than a sealed plastic bin, so the holofiber stuffing keeps its loft between uses.
Assembly
- Step 1 This is where your fawn truly comes to life!
- Step 2 Secure all components: Attach the ears, arms, belly, muzzle, nose, and antlers to the body using your tapestry needle and strong thread
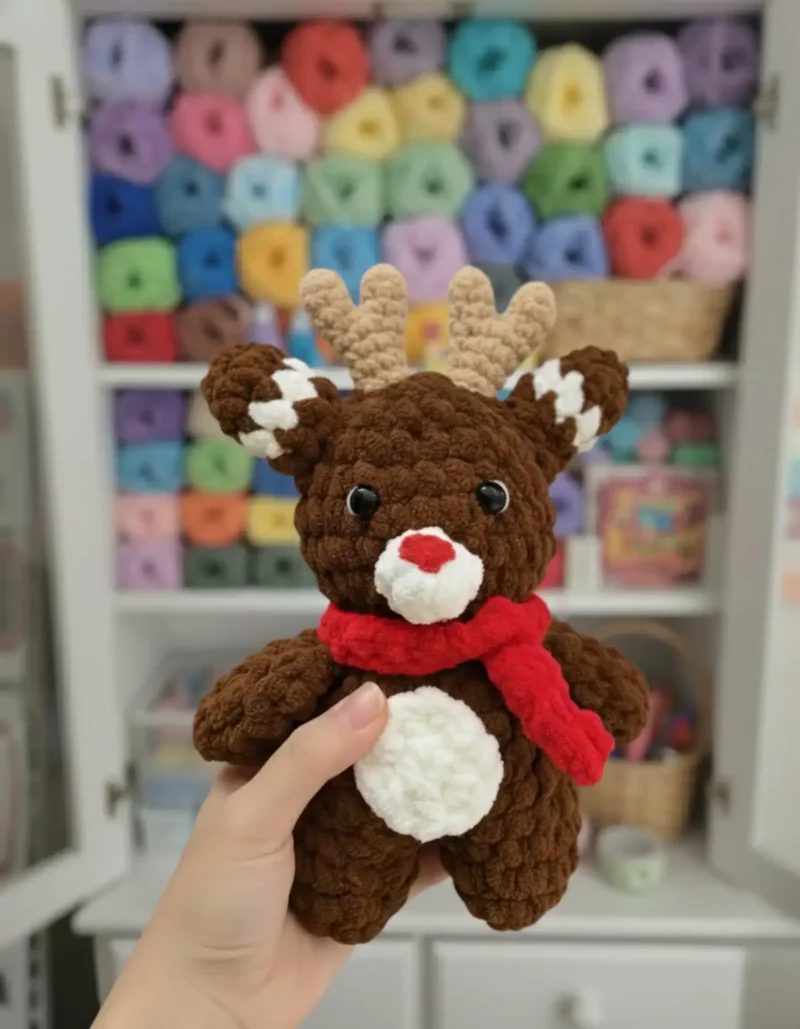
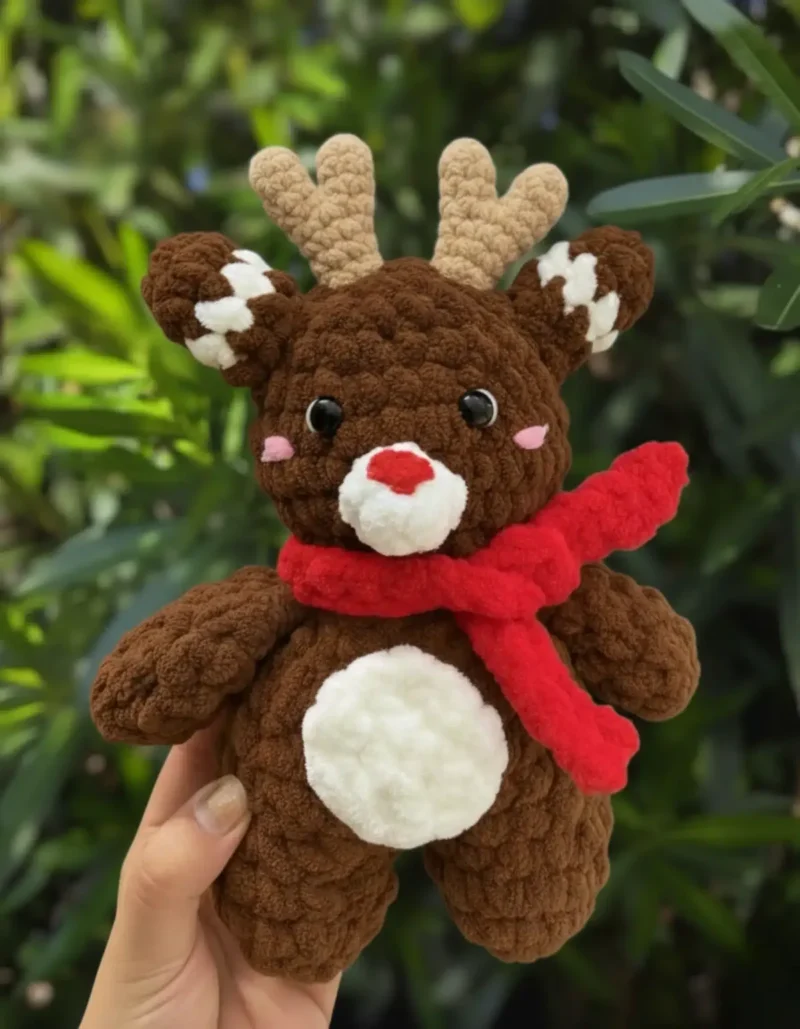
- Step 3 Facial sculpting: Create definition by making strategic thread pulls where indicated in reference photos – first around one eye pulling downward, then the second eye, and finally under both
- Step 4 Embroider details: Use black floss to add eyebrows and any additional facial features
- Step 5 Weave in ends: Carefully hide all yarn tails inside the body
Easy to get wrong
Forgetting to stuff before closing decreases
Stuff firmly during the decrease rounds on the body, not after, since the opening gets too small to pack tightly once those rounds are complete.
Uneven ear color changes
Carry the old color loosely inside the stitches instead of cutting it each time, so the stripes on both ears line up and the inside stays tidy.
Rushing the facial sculpting step
Work the thread pulls around one eye, then the other, then under both, checking against a reference photo before you knot off so the expression stays symmetrical.
Between the songs
- What I love here is how much personality comes from so few techniques. The body is just steady single crochet with planned decreases, but the color-changing ears turn a plain shape into something layered and textured. The real payoff is the facial sculpting step: pulling thread strategically around the eyes gives this fawn an expression you simply cannot get from stitches alone. Working the small horn pieces and muzzle in novelty yarn adds a tactile contrast against the plush body, so your fingers notice the difference between parts as you assemble them. By the time you are stitching the belly on and weaving in ends, you have practiced shaping, color work, and a bit of sculptural finishing, all in one compact make.
Listener questions
What hook size works best for this fawn?
A No. 4 or 4.5 hook both work, but I recommend the 4.5 for this pattern since it keeps the plush yarn stitches a touch looser and easier to see. That looser gauge also makes stuffing the legs and body more comfortable.
Can I use a different yarn than plush yarn for the body?
You can, though the softness of plush yarn is part of what gives this fawn its cuddly look and feel. If you swap it out, expect a firmer, less velvety finish on the body and head.
Why does the pattern call for novelty yarn on the nose and horns?
The children's novelty yarn adds texture that contrasts nicely against the smooth plush body, making the muzzle and horns stand out. It also tends to hold its shape well in small pieces like these.
How do I get the facial expression to look right?
The thread pulls around the eyes and under both are what create the expression, so take your time and check a reference photo as you go. Pulling one eye before the other, then finishing under both, keeps the face from looking lopsided.
Do I need a stitch marker for this project?
Yes, a stitch marker helps you track where each round begins, especially through the longer sequences on the head and body. It is a small tool but it saves you from losing your place during the decrease rounds.
Original pattern: https://amigurumicorner.com/amigurumi-deer-complete-pattern-guide/
About the Author

Marisol QuinteroWho runs Crochet Obsessed, why a stitch count sits at the end of every round, how a pattern gets written here, and the things this site will never do.
More Patterns
- IntermediateNo. 01

Rose Granny Square Tote Crochet Pattern
Rose granny square tote crochet pattern made from 18 dimensional rose squares for a sturdy, romantic everyday bag.
- IntermediateNo. 02
Tropical octopus baby blanket crochet pattern with appliqués
Tropical octopus baby blanket crochet pattern: a cream filet base with coral and turquoise octopus appliqués, leaves, and…
- IntermediateNo. 03
Sunny lemon couple amigurumi crochet pattern
Sunny lemon couple amigurumi crochet pattern with embroidered slices and safety eyes for a cheerful handmade shelf pair.


