- LevelIntermediate
- Time4-6 hours
- Hook4.5 mm
- YarnWorsted
About This Pattern
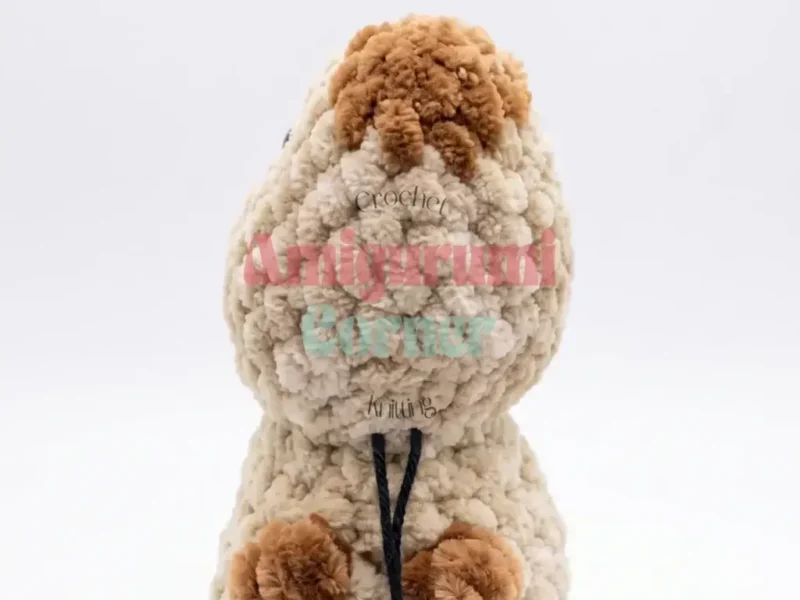
There is something quietly funny about a capybara. They are the calmest animal in the room, and this little keychain version carries that same unbothered energy. I think of this as a between-songs project, something you pick up when you want your hands busy and your shoulders down.
Once it is stuffed and assembled, this capybara sits happily clipped to a backpack zipper or perched on a shelf next to your keys. It is small enough to tuck in a pocket, substantial enough to hold its shape on a desk. A little round body with a flat, patient face that fits in the palm of one hand.
Finished size: this capybara measures about 5.5 inches (14 cm) tall. Gauge is not critical for this project — just keep your stitches snug enough that the stuffing doesn't peek through.
- Start the head and body as a single continuous spiral piece, moving your stitch marker up every round.
- Work the early rounds in your main color, increasing steadily to shape the rounded head.
- Return to main color between contrast sections so the shaping continues without a visible break.
- Stuff the piece firmly as you go so the fiberfill does not show through the stitches later.
- Use your tapestry needle to define the neck, stitching a gentle indent between head and body.
- Attach the safety eyes and secure them with a dab of clear-drying glue for extra hold.
- Embroider the nose in black yarn and give the finished capybara one more check for loose ends.
On the desk
Yarn
- Worsted weight yarn (such as Himalaya Dolphin Baby or similar plush yarn) in a main color and a contrast color for the ears and feet
- Small amount of black yarn for embroidering the nose
Hook
- US G-7 / 4.5 mm crochet hook
Safety eyes
- 2 half-round cabochon-style safety eyes
- Fiberfill stuffing
- Stitch marker
- Yarn needle / tapestry needle
- Craft glue (clear-drying, for securing the eyes)
- Scissors
Stitch shorthand
- dec — Decrease
- FLO — Front Loop Only
- inc — Increase
- MR — Magic Ring
- puff st — Puff Stitch
- sc — Single Crochet
- sl st — Slip Stitch
Little Capybara Keychain Crochet Pattern
Head & Body (make 1)
This pattern is written in US crochet terminology. The Head & Body piece is worked in a continuous spiral — do not join rounds. Use a stitch marker to track the beginning of each round and move it up as you go. Stitch count is given at the end of each round in parentheses, like this: (12). Work rounds 1–4 in your main color. Switch to your contrast color for each puff stitch as noted, then return to main color to continue.
- Round 1
6 sc in MR. (6)
- Round 2
inc in each st around. (12)
- Round 3
1 sc, inc repeat around. (18)
- Round 4
2 sc, inc repeat around. (24)
Puff stitches are worked in the contrast color to form the ears and feet directly into the body. Stuff the piece as you go, since it will be difficult to add filling once the opening closes.
- Round 5
9 sc, puff st, 4 sc, puff st, 9 sc. (24)
- Rounds 6–9
sc in each st around. (24)
- Round 10
10 sc, dec repeat 3 times, 8 sc. (21)
- Round 11
10 sc, puff st, 2 sc, puff st, 7 sc. (21)
- Round 12
dec, 5 sc repeat around. (18)
- Round 13
4 sc, dec repeat 6 times, 2 sc. (12)Place the safety eyes now, spacing them evenly across the front of the face before continuing to the next round.
The front-loop-only slip stitch sections in rounds 14 through 17 create a subtle ridge that shapes the capybara's snout, so take your time there. Work those slip stitches a little looser than your regular single crochets; because you're only catching one loop, it's easy to pull them too tight and pucker the fabric.
- Round 14
inc repeat 4 times, 6 sl st in FLO, inc repeat 2 times. (18)
- Round 15
1 sc, inc repeat 4 times, 6 sl st in FLO, 1 sc, inc repeat 2 times. (24)
- Round 16
13 sc, 6 sl st in FLO, 5 sc. (24)
- Round 17
2 sc, puff st, 3 sc, puff st, 6 sc, 6 sl st in FLO, 5 sc. (24)
- Round 18
15 sc, dec repeat 3 times, 3 sc. (21)
- Round 19
dec, 5 sc repeat around. (18)
- Round 20
dec, 4 sc repeat around. (15)
- Round 21
dec, 3 sc repeat around. (12)
Check your stuffing here — this is your last chance to add more before the opening closes.
- Round 22
8 sc; switch to contrast color; 4 sc. (12)
- Round 23
dec repeat 6 times. (6)Fasten off, leaving a long tail. Weave the tail through the front loops of the remaining 6 stitches and pull tight to close the opening.
More shots
Where it goes
- Clip it to a backpack or tote strap as a soft, recognizable zipper pull for school or travel.
- Thread it onto a keyring so your house keys are easy to spot in a bag.
- Set it on a desk or shelf as a small plush companion next to pens and notebooks.
- Wrap it with a ribbon and tuck it into a card as a handmade small gift.
Color ideas
- Classic capybara Tan or warm brown as the main color for the whole head and body, with a darker brown contrast for the puff-stitch ears and feet.
- Soft blush A dusty rose or cream main color for the head and body, paired with a deeper mauve contrast for the ears and feet puff stitches.
Care
Hand wash the finished capybara in cool water with a gentle detergent, since plush worsted-weight yarn like this holds its loft best without a washing machine.
Reshape it gently while damp, smoothing the puff-stitch ears and feet back into shape, then lay it flat to air dry away from direct heat.
Store it somewhere dry and uncompressed, such as a shelf rather than the bottom of a packed bag, so the stitches do not flatten over time.
Assembly
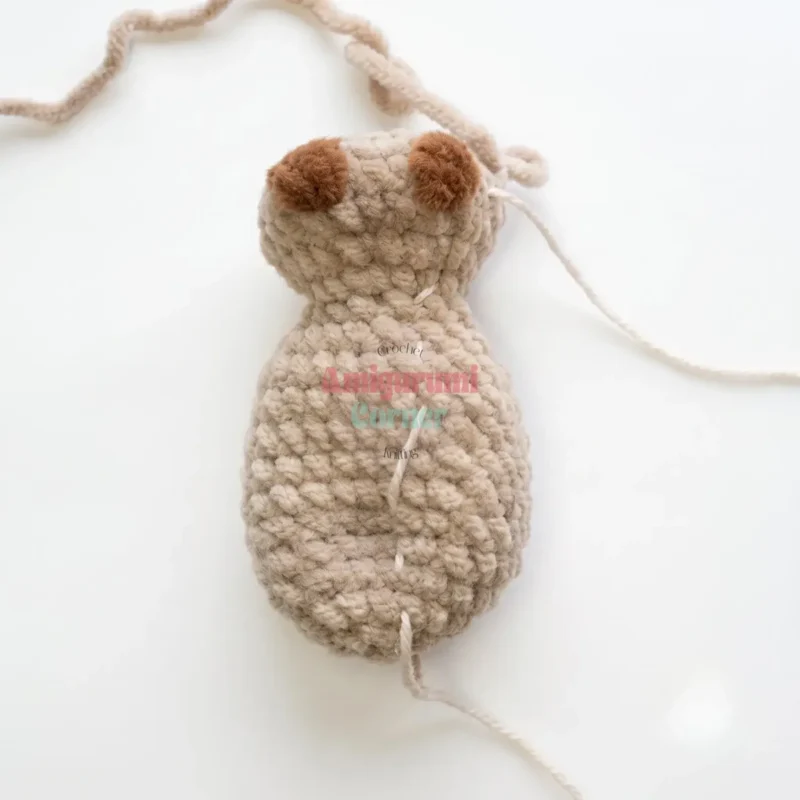
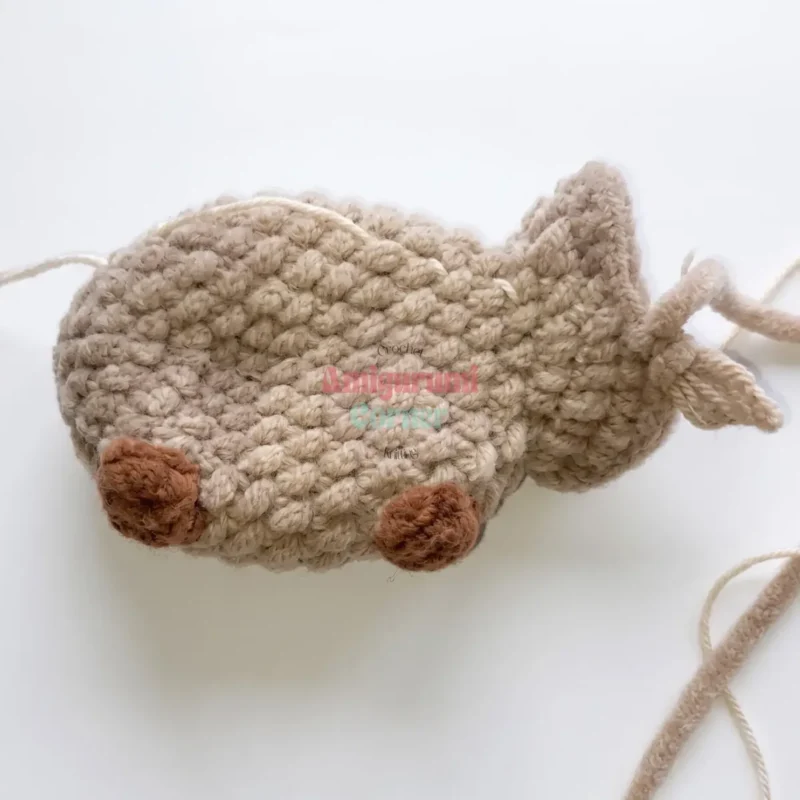
- Step 1 With the Head & Body piece complete and stuffed, thread a strong length of yarn onto your tapestry needle. This step defines the neck and separates the head from the body.
- Step 2 Insert the needle into the neck area (the natural gap between the head and body shaping) and bring it out about 2 rounds below one ear, leaving a starting tail.
- Step 3 Insert the needle back in nearby, skip 1 stitch, and bring it out on the opposite side of the neck.
- Step 4 Insert the needle again nearby, skip 1 stitch, and bring it out at the neck, one stitch over from your starting point.
- Step 5 Pull the yarn firmly to cinch the neck into shape, then tie off with several secure knots.
- Step 6 Weave in all remaining yarn tails, including the starting tail from step 2, so no ends are visible.
- Step 7 Embroider the nose using black yarn, working small straight stitches at the center-front of the face below the eyes.
- Step 8 Glue the safety eyes in place if they aren't already secured through the fabric, holding them until the glue sets.
Easy to get wrong
Losing track of the spiral start
Keep your stitch marker in the first stitch of every round and move it up as soon as you finish the round. Skipping this step for even one round makes it hard to tell where increases should land.
Under-stuffing before closing the neck
Add fiberfill generously as you work upward, checking that no stuffing peeks through the stitches. It is much easier to stuff while the opening is still large than to push fill in afterward.
Pulling FLO slip stitches too tight
In rounds 14 through 17, the front-loop-only slip stitches create a subtle ridge that shapes the snout. Because you're only catching one loop, it's easy to pull them too tight and pucker the fabric — work them a little looser than your regular single crochets.
Between the songs
- What I like about this pattern is how much personality comes from so few moves. You work the whole head and body as one continuous spiral, no joining, no seams to fight with later, just a stitch marker climbing with you round after round. The contrast color swaps for ears and feet are a nice small puzzle, and the puff stitches add texture without adding real difficulty. Assembly is where it gets satisfying: defining the neck with a few careful stitches turns a plain rounded shape into something that reads instantly as a capybara. It is a project that rewards patience in short bursts rather than demanding long stretches of concentration.
Listener questions
Do I need to join each round when making this capybara keychain?
No, this pattern is worked in a continuous spiral rather than joined rounds. Use a stitch marker to mark the first stitch of each round and simply move it up as you go, without slip stitching to close each round.
What yarn weight works best for this amigurumi pattern?
A worsted weight yarn with a soft, plush texture, similar to Himalaya Dolphin Baby, works best for this project. The slight halo on this type of yarn helps recreate the capybara's fuzzy coat and also helps disguise small tension differences between stitches.
Why does the pattern use puff stitches instead of separate pieces for the ears and feet?
Working the ears and feet as puff stitches directly into the main piece keeps the construction simple and avoids extra sewing. It also gives the finished capybara a seamless, rounded look that matches its soft, real-life appearance.
When should I insert the safety eyes?
Insert the safety eyes after completing round 13, before you begin the front-loop slip stitch shaping in round 14. Placing them at this stage lets you check spacing and symmetry while the opening is still large enough to adjust the washers from the inside.
How do I know if my tension is right?
Gauge is not critical for this project, so do not worry about matching an exact measurement. The main thing is working tightly enough that the fiberfill stuffing does not peek through the stitches; if your stitches feel loose, try dropping down half a hook size.
Why does the neck step matter so much in assembly?
The neck-defining stitches in the assembly steps are what separate the rounded head from the body shape underneath. Skipping or rushing this step leaves the capybara looking like one plain ball rather than a recognizable animal, so pull the cinching yarn snug and check the shape from multiple angles before you knot it off.
Original pattern: https://amigurumicorner.com/amigurumi-capybara-keychain-pattern/
About the Author

Marisol QuinteroWho runs Crochet Obsessed, why a stitch count sits at the end of every round, how a pattern gets written here, and the things this site will never do.
More Patterns
- IntermediateNo. 01

Rose Granny Square Tote Crochet Pattern
Rose granny square tote crochet pattern made from 18 dimensional rose squares for a sturdy, romantic everyday bag.
- IntermediateNo. 02
Tropical octopus baby blanket crochet pattern with appliqués
Tropical octopus baby blanket crochet pattern: a cream filet base with coral and turquoise octopus appliqués, leaves, and…
- IntermediateNo. 03
Sunny lemon couple amigurumi crochet pattern
Sunny lemon couple amigurumi crochet pattern with embroidered slices and safety eyes for a cheerful handmade shelf pair.


