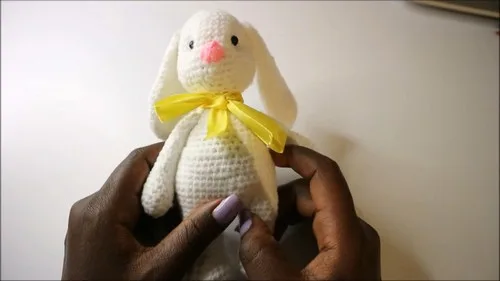
- LevelIntermediate
- Time4-6 hours
- YarnWorsted
About This Pattern
There is something quietly cheerful about this bunny before it even has a face. I love how the rounds build a soft, rounded head first, so the personality shows up stitch by stitch rather than all at once. By the time the legs join to the body, you already feel like you know this little creature.
Your hands stay busy with single crochets and increases, round after round, until the shaping clicks into place. You will track stitch counts closely, especially where the legs meet the body, so this is a project for hands that like steady, repetitive work with a clear payoff. It rewards patience more than speed.
Finished, this bunny sits happily on a shelf, a windowsill, or tucked into a kid's arm at bedtime. It has enough presence to hold its own spot in a room without shouting for attention. A small, soft thing that looks handmade because it is.
- Start the head with a magic ring and work increase rounds until it domes into a rounded shape.
- Set the head aside once its rounds are complete and move on to the legs.
- Crochet one leg from a magic ring, increasing early on and decreasing later to shape the foot end.
- Repeat the same magic ring, increase, and decrease sequence to make the second leg.
- Join the two legs with a chain bridge and a slip stitch so they sit side by side.
- Single crochet around both legs and over the chain bridge in one combined round to start the body.
- Keep working the body in rounds, increasing and decreasing as shaped, stuffing firmly as you go.
- Make the arms from a fresh magic ring using the same increase approach before attaching everything together.
On the desk
- Worsted weight yarn
- Crochet hook (size to suit your yarn)
Stitch shorthand
- sc — single crochet
Amigurumi bunny pattern with jointed legs and arms
Head
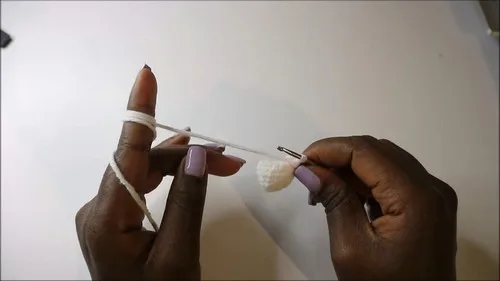
Start with a magic ring.
- Round 1
6 single crochets (sc) into the magic ring.
- Round 2(18)
Increase in each stitch around (12 stitches total). For Round 3: Single crochet in the next stitch, increase in the next stitch. Repeat around (18 stitches total).
- Round 4(24)
Single crochet in the next 2 stitches, increase in the next stitch. Repeat around (24 stitches total).
- Round 5(30)
Single crochet in the next 3 stitches, increase in the next stitch. Repeat around (30 stitches total).
After Round 6:
Single crochet in the next 4 stitches, increase in the next stitch. Repeat around (36 stitches total).
Round 7-11: Single crochets all the way around (36 stitches each round).
- Round 12(42)
Single crochet in the next 5 stitches, increase in the next stitch. Repeat around (42 stitches total).In Round 13-14: Single crochets all the way around (42 stitches each round).
- Round 15(36)
Single crochet in the next 5 stitches, then decrease. Repeat around (36 stitches total).
- Round 16(30)
Single crochet in the next 4 stitches, then decrease. Repeat around (30 stitches total).For Round 17: Single crochet in the next 3 stitches, then decrease. Repeat around (24 stitches total).
- Round 18(18)
Single crochet in the next 2 stitches, then decrease. Repeat around (18 stitches total).
- Round 19
Single crochet in the next stitch, then decrease. Repeat around (12 stitches total). Cut the yarn, leaving a long tail for sewing. Stuff the head fully before closing.
Legs
Start with a magic ring.
- Round 1
6 single crochets into the magic ring.
- Round 2(18)
Increase in each stitch around (12 stitches total). For Round 3: Single crochet in the next stitch, then increase. Repeat around (18 stitches total).
- Round 4(24)
Single crochet in the next 2 stitches, then increase. Repeat around (24 stitches total).
- Round 5
Single crochets all the way around (24 stitches total). After Round 6: Start decreasing as follows: decrease two times, 6 single crochets, decrease four times, then single crochet in the remaining stitches.
- Round 7
Decrease, then 5 single crochets, decrease three times, and end with single crochets in the remaining stitches.
- Round 8(12)
5 single crochets, then decrease twice, followed by single crochets in the remaining stitches (12 stitches total).In Round 9-11: Single crochets all the way around (12 stitches each round).
- Round 12(14)
Single crochet in the next 5 stitches, then increase. Repeat twice (14 stitches total).
- Round 13(16)
Single crochet in the next 6 stitches, then increase. Repeat twice (16 stitches total).For making the legs face to the side, continue with 5 more single crochets after the last round. For the first leg: slip stitch, cut off yarn. For the second leg: Do not cut off the yarn, use it to join the legs.
Joining Legs
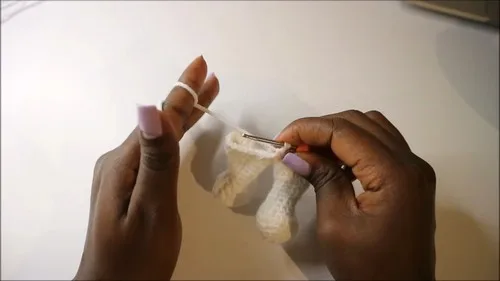
With the second leg's yarn, chain 2, then join the legs with a slip stitch.
- Round 1
after Joining: Single crochets around the first leg, over the chain 2 bridge, and around the second leg, totaling 36 stitches.Continue making the body according to the pattern steps, increasing and decreasing as instructed to shape the body, and stuffing as you go.
More shots
Where it goes
- A nursery shelf companion that sits well next to board books and a soft reading lamp.
- A handmade gift for a baby shower, paired with a knit blanket or a wooden rattle.
- A desk or windowsill mascot for someone who likes a little whimsy at their workspace.
- A travel companion toy sized to tuck into a backpack or car seat pocket.
Color ideas
- Soft and classic Cream for the head and body, a blush pink for the legs and arms, so the bunny reads as one gentle, unified creature.
- Two-tone contrast A pale gray for the head and joined body, with the legs and arms worked in a warm oatmeal so the limbs stand out against the torso.
Care
Hand wash the finished bunny in cool water with a gentle soap, since worsted weight fiber holds its shape best without a washing machine's agitation.
Lay it flat on a towel to air dry, reshaping the head and legs gently with your fingers while damp so the rounds settle evenly.
Store it in a breathable fabric bag rather than plastic, and keep it away from direct sun so the yarn color stays true.
Assembly
- Step 1 Joining Legs:: With the second leg's yarn, chain 2, then join the legs with a slip stitch.
- Step 2 Round 1 after Joining:
- Step 3 : Single crochets around the first leg, over the chain 2 bridge, and around the second leg, totaling 36 stitches.
- Step 4 Continue making the body according to the pattern steps, increasing and decreasing as instructed to shape the body, and stuffing as you go.
- Step 5 Arms:: Start with a magic ring.
- Step 6 Follow the similar procedure of increases and single crochets as described for the head and legs, adjusting the numbers of stitches as per the instructions.
- Step 7 Ears:: Similarly, ears start with a magic ring and follow a pattern of increases and single crochet rounds to achieve the desired shape.
Easy to get wrong
Losing count during increase rounds
Use a stitch marker at the start of every round on the head and legs, since the increase pattern shifts each round and it is easy to drift off by one.
Rushing the leg-to-body join
Check that the chain-2 bridge sits evenly between both legs before you slip stitch, so the single crochet round around both legs comes out even on each side.
Understuffing before closing rounds
Stuff the head and legs firmly as you go rather than waiting until the end, since it is much harder to add filling once a round has decreased down.
Between the songs
- What I enjoy most here is the shaping work. The head grows from a tidy magic ring through a steady sequence of increase rounds, so you watch a flat circle become a dome with real volume. The legs use the same increase logic but then decrease back down, which teaches your hands both directions of amigurumi shaping in one project. Joining the two legs with a chain-2 bridge before working the body in one continuous round is the real satisfying trick: it turns two separate pieces into one shape without a seam. Stuffing as you go keeps the bunny firm rather than floppy. By the time you reach the arms, the increase pattern feels familiar instead of fiddly.
Listener questions
Do I need to finish both legs before joining them?
Yes, both legs should be fully worked and ready before you join them with the chain-2 bridge. That join is what sets up the single round that carries you into the body.
What happens after the legs are joined?
You work a round of single crochets around both legs and over the chain bridge together, which brings everything onto one continuous round. From there you keep shaping the body with increases and decreases while stuffing as you go.
Are the arms worked the same way as the legs?
The arms start from their own magic ring and follow a similar sequence of increases and single crochet rounds as the legs and head. Once you have worked the head and legs, the arm rounds will feel familiar.
How do I keep the head nicely rounded instead of lumpy?
Keep your stuffing even as you go rather than packing it all in at the last few rounds. Gentle, steady stuffing after each round or two helps the dome shape hold without any flat or bulging spots.
Can I make this bunny in a different size?
You can size up or down by changing your hook and yarn weight, keeping the same round-by-round structure. Just know the stitch counts in the pattern apply to the gauge it was written for, so proportions may shift slightly with a different yarn.
Original pattern: https://crocheteverything.com/crochet-amigurumi-bunny-pattern-great-for-giving-as-gift/
About the Author

Marisol QuinteroWho runs Crochet Obsessed, why a stitch count sits at the end of every round, how a pattern gets written here, and the things this site will never do.
More Patterns
- IntermediateNo. 01

Rose Granny Square Tote Crochet Pattern
Rose granny square tote crochet pattern made from 18 dimensional rose squares for a sturdy, romantic everyday bag.
- IntermediateNo. 02
Tropical octopus baby blanket crochet pattern with appliqués
Tropical octopus baby blanket crochet pattern: a cream filet base with coral and turquoise octopus appliqués, leaves, and…
- IntermediateNo. 03
Sunny lemon couple amigurumi crochet pattern
Sunny lemon couple amigurumi crochet pattern with embroidered slices and safety eyes for a cheerful handmade shelf pair.


