- LevelIntermediate
- Time4-6 hours
- Hook2.0 mm
- YarnFingering/Bulky
About This Pattern
This one has a soft, pocket-sized cheerfulness to it. You are making a bunny that could ride on your bag zipper or sit on a shelf, and either way it comes out looking a little bit pleased with itself. There is nothing somber about this project — it is quick company for your hook.
Your hands will spend most of their time in small, steady spirals, building the head, body, and those long cupped ears round by round. You will fold and pinch fabric to shape the ears, cinch the face with thread pulled eye to eye, and sew several small parts onto one body. It rewards patience more than speed.
Finished, the bunny toy sits upright with its arms and legs settled against a rounded body, ears standing or tipped forward depending on how you shaped them. The keychain version rides lighter, dangling off a bag or a set of keys, barely bigger than your palm. Either way it reads as handmade and a little bit cheeky.
- Start each piece from a magic ring and work steady single crochet rounds in a continuous spiral without joining.
- Shape the head, body, and ears by increasing early and holding the stitch count steady through the middle rounds.
- Decrease the head gradually using the invisible decrease so the top closes in smoothly rather than coming to a point.
- Fold and pinch the base of each ear into quarters before sewing so it holds a natural cupped curve.
- Place the safety eyes into the head between the rounds noted in the pattern, spacing them evenly apart.
- Cinch the face by drawing strong black thread from eye to eye, then embroider the nose and mouth beneath them.
- Stuff each piece firmly as you go rather than waiting until the whole part is finished.
- Sew the ears, arms, legs, and tail onto the body, then finish with a keychain clasp or leave as a plush toy.
On the desk
- Yarn (keychain version): Yarn Art Dolce Baby or equivalent — 1 skein (100% micro polyester, 50 g / 85 m), Fingering weight
- Yarn (toy version): Himalaya Dolphin Baby or equivalent — 1 skein (100% polyester, 100 g / 120 m), Bulky/fluffy weight
- Hook (keychain): B-1 / 2.0 mm
- Hook (toy): E-4 / 3.5 mm
Strong black thread
- for sewing and tightening eyes, and embroidering the face (waxed thread, embroidery floss, or reinforced sewing thread, doubled or tripled)
Stuffing
- Fiberfill or polyester stuffing
- Stitch marker (or a contrasting yarn scrap)
- Tapestry needle (large eye) and a sharp hand-sewing needle
- Keychain clasp / lobster claw clip
- Optional embellishments: satin ribbon and a small charm
Stitch shorthand
- ch — Chain
- dec — Decrease (invisible decrease: insert hook through front loops of next 2 sts, pull up loop, yarn over, draw through all loops)
- inc — Increase (2 sc in same stitch)
- MR — Magic Ring
- sc — Single Crochet
- sl st — Slip Stitch
- SM — Stitch Marker
- st / sts — Stitch / Stitches
Amigurumi bunny pattern for a keychain and a plush toy
Upper Arms
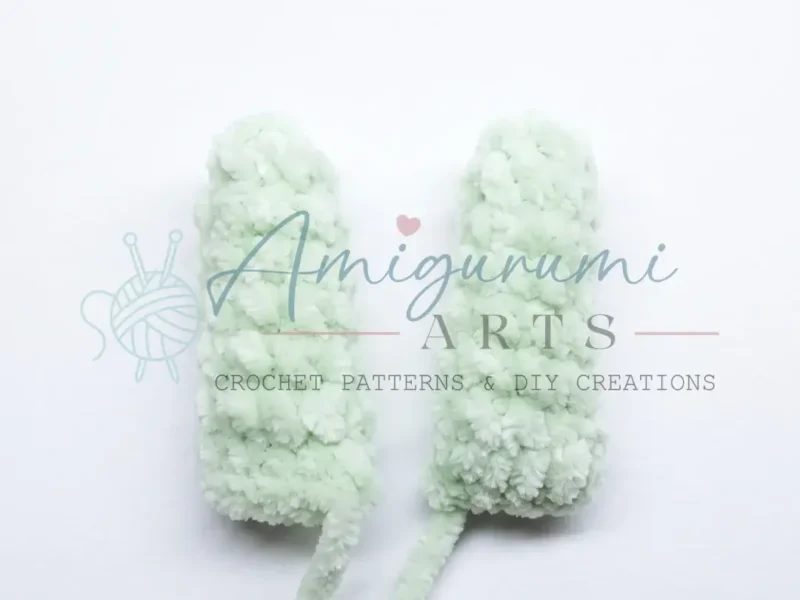
Make 2Set aside. Make the second arm the same way.
Make the second leg the same way — do not cut the yarn on the second leg. You will join directly into the body.
- Round 1
Ch 2, work 6 sc in the 2nd ch from hook. (6)
- Round 2
(inc, 2 sc) repeat 2 times. (8)Step by step: 12 sc around, sl st to close. (12).
- Rounds 3–7(8)
8 sc around. (8) (5 rounds total)Shift 2 sts: Work 2 sc and move the stitch marker to the new start position.
Closing row: Working through both front loops only, work 4 sc across, then sl st. (4)
Ears
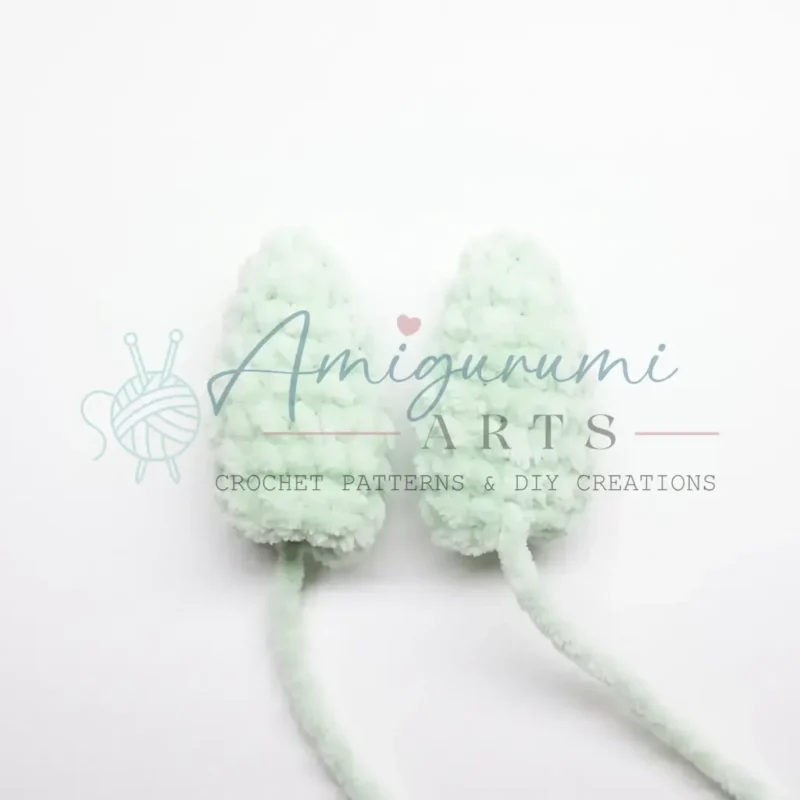
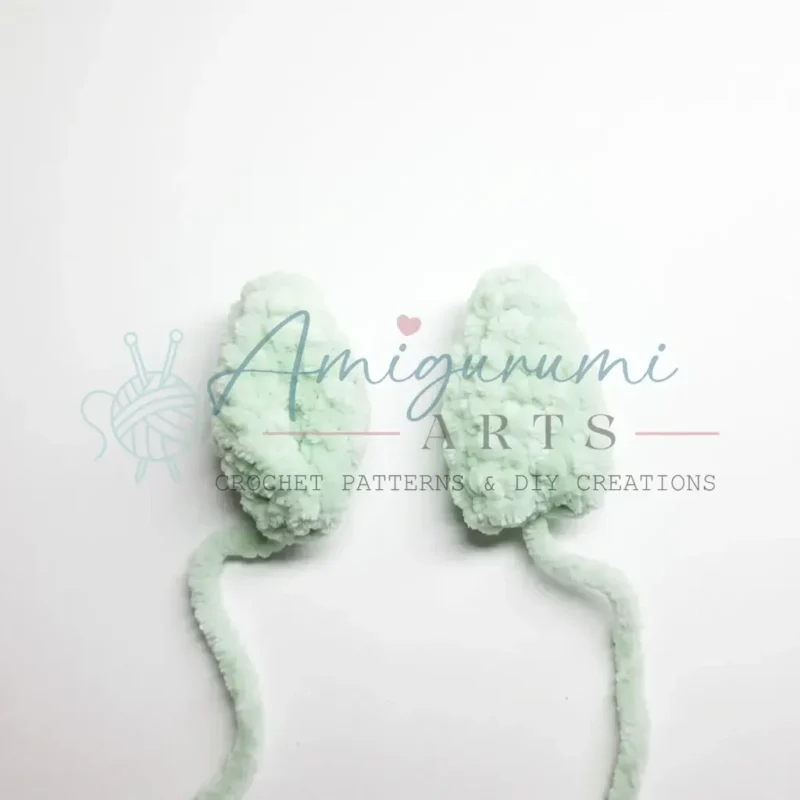
Make 2Leave a 12-inch yarn tail for sewing. Make the second ear the same way.
Fold the base of each ear into quarters and pinch it together with a few stitches of yarn so the ear has a natural cupped shape before sewing on.
- Round 1
Ch 2, work 6 sc in the 2nd ch from hook. (6)
- Round 2
(inc, 2 sc) repeat 2 times. (8)
- Round 3
(inc, 3 sc) repeat 2 times. (10)
- Round 4
(inc, 4 sc) repeat 2 times. (12)
- Rounds 5–7(12)
12 sc around. (12) (3 rounds total)Shift 2 sts: Work 2 sc and move the stitch marker.
Closing row: (dec, 4 sc) repeat 2 times, sl st. (10)
Tail
Leave a 12-inch yarn tail for sewing. Pull the round closed by drawing the yarn through the front loops. Stuff lightly before sewing on.
- Round 1
Ch 2, work 6 sc in the 2nd ch from hook. (6)
- Round 2
inc in each st around. (12)
- Round 3
12 sc around, then sl st to close. (12)
Head
The head grows directly from the 12-stitch opening at the top of the body.
Stuff the head firmly before the opening becomes too small. Pull the final round closed by drawing yarn through the front loops of the remaining 6 stitches. Weave in the end securely.
- Round 1
(inc, 1 sc) repeat 6 times. (12)
- Round 2
(inc, 2 sc) repeat 6 times. (24)
- Round 3
(inc, 3 sc) repeat 6 times. (30)
- Round 4
(inc, 4 sc) repeat 6 times. (36)
- Rounds 5–8(36)
36 sc around. (36) (4 rounds total)
- Round 9
(dec, 4 sc) repeat 6 times. (30)
- Round 10
(dec, 3 sc) repeat 6 times. (24)
- Round 11
(dec, 2 sc) repeat 6 times. (18)
- Round 12
(dec, 1 sc) repeat 6 times. (12)
- Round 13
dec 6 times around. (6)
Body
The body is worked continuously from the second leg, joining both legs together.
Stuff the body firmly before closing.
Continue directly into the head.
- Round 4
Work 26 sc across both legs to join them. (26)
- Rounds 5–8(26)
26 sc around. (26) (4 rounds total)
- Round 9
7 sc, dec, 11 sc, dec, 4 sc. (24)
- Round 10
(dec, 2 sc) repeat 6 times. (18)
- Round 11
(dec, 1 sc) repeat 6 times. (12)
- Round 12
Joining the upper arms 2 sc, then work 4 sc across the first arm (incorporating it into the body), 2 sc, then work 4 sc across the second arm. (12)
More shots
Where it goes
- Clip it onto a backpack or diaper bag zipper as a small, recognizable charm for a kid or yourself.
- Set the bulkier toy version on a nursery shelf or bed alongside other soft stuffed animals.
- Hang the keychain version off a lanyard or purse strap paired with a satin ribbon bow.
- Give the plush toy as a first stuffed animal, paired with a small charm tucked into its arms.
Color ideas
- Classic cream bunny Work the head, body, upper arms, lower legs, and tail all in a soft cream, then make the ears in the same cream with a contrasting pale pink lining stitched onto the inner ear fold.
Care
Hand wash the finished bunny in cool water with a mild soap, since both the micro polyester and the polyester bulky yarn hold their shape better without a washing machine's agitation.
Reshape the ears and limbs gently while damp and let the piece air dry fully away from direct heat, which keeps the polyester fibers from matting or losing loft.
Store the toy loosely stuffed and uncompressed on a shelf rather than packed in a bin, so the rounds keep their shape and the ears do not flatten over time.
Assembly
- Step 1 Attach the safety eyes on the head between Rnds 5 and 6 of the head section, spacing them approximately 6–7 sts apart. If using beads or embroidered eyes, mark their position with pins first.
- Step 2 Cinch and embroider the face. Using strong black thread, draw the thread through the head from eye to eye to create slight indentations (the eye-tightening technique). Then embroider the nose and mouth directly below the eyes with small, confident straight stitches.
- Step 3 Sew on the ears. Position each ear on the top of the head, folded base facing downward, and sew firmly using the yarn tail and a tapestry needle. A whipstitch around the base perimeter gives the most secure hold.
- Step 4 Attach the tail. Sew the tail to the back lower section of the body using the yarn tail and a whipstitch around the edge.
- Step 5 Attach the keychain clasp to the top of the head or through a secure yarn loop at the crown, depending on your preference.
- Step 6 Add optional embellishments — tie a satin ribbon around the bunny's neck, or attach a small charm to the keychain clasp.
- Step 7 Weave in all remaining ends thoroughly with your tapestry needle.
Easy to get wrong
Losing the spiral starting point
Keep the stitch marker in the first stitch of every round and move it up as you go, since it is easy to lose track of where a round begins in continuous spiral work. If you lose it, count back from a visible increase round to relocate the start.
Ears sewn on flat
Skipping the fold-and-pinch step at the base of each ear leaves them floppy instead of cupped. Fold the base into quarters and secure it with a few small stitches before you sew the ear onto the head.
Face looks too far forward or crooked
Placing the safety eyes before checking spacing can leave the bunny's face looking off-center. Mark both eye positions with pins first, step back to check they sit evenly apart, then attach the eyes and cinch the thread between them.
Between the songs
- The satisfaction here is in the small construction choices that turn basic single crochet into a creature with personality. The magic ring start keeps every round seamless, the invisible decrease keeps the head's shaping smooth instead of pointy, and the eye-tightening technique — pulling thread straight through the head from eye to eye — is the moment the bunny suddenly looks alive. Folding the ear bases into quarters before sewing gives them real dimension instead of flat flaps. Working two sizes of the same shapes, fingering weight for the keychain and bulky for the toy, means you learn the pattern once and get two completely different objects out of it.
Listener questions
Do I need safety eyes, or can I embroider the face instead?
The materials list offers both options — plastic safety eyes with backings or beads. If you embroider instead, mark the eye positions with pins first so the spacing stays even before you cinch and stitch the face.
Why does the pattern mention shifting two stitches on the arms?
That shift moves the stitch marker to a new starting point before the closing row, which lines up the final flattened stitches correctly for sewing the arm onto the body. Skipping it can leave the seam sitting at an awkward angle.
How do I keep the invisible decrease looking neat on the head?
Work the invisible decrease by inserting your hook through the front loops only of the next two stitches before pulling through, rather than both loops. This keeps the shaping rounds smooth instead of leaving a visible ridge.
What is the eye-tightening technique the assembly steps mention?
It means drawing strong black thread through the head from one eye position to the other and pulling gently to create a slight indentation. This small cinch is what gives the bunny's face its expression before you embroider the nose and mouth.
Original pattern: https://amigurumiarts.com/crochet-bunny-keychain-toy-pattern/
About the Author

Marisol QuinteroWho runs Crochet Obsessed, why a stitch count sits at the end of every round, how a pattern gets written here, and the things this site will never do.
More Patterns
- IntermediateNo. 01

Rose Granny Square Tote Crochet Pattern
Rose granny square tote crochet pattern made from 18 dimensional rose squares for a sturdy, romantic everyday bag.
- IntermediateNo. 02
Tropical octopus baby blanket crochet pattern with appliqués
Tropical octopus baby blanket crochet pattern: a cream filet base with coral and turquoise octopus appliqués, leaves, and…
- IntermediateNo. 03
Sunny lemon couple amigurumi crochet pattern
Sunny lemon couple amigurumi crochet pattern with embroidered slices and safety eyes for a cheerful handmade shelf pair.


