- LevelIntermediate
- Time4-6 hours
- Hook3.5 mm
- YarnWorsted
About This Pattern
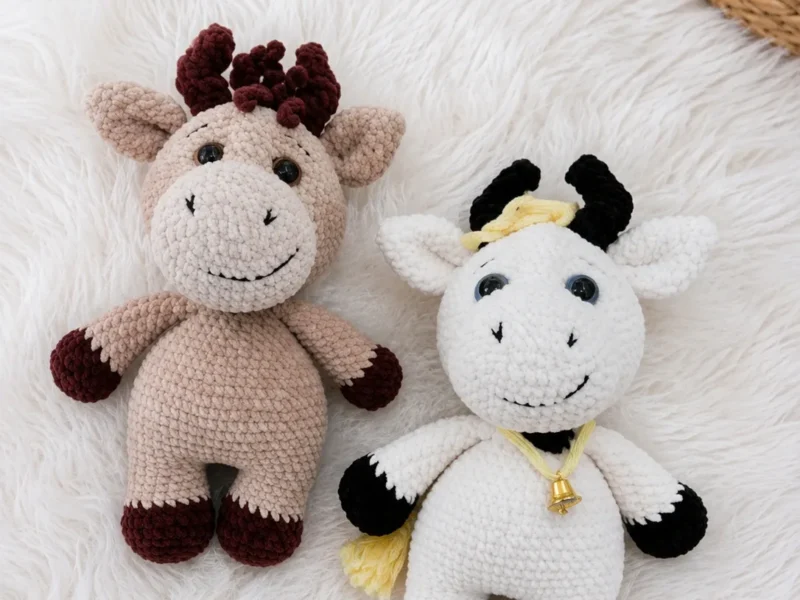
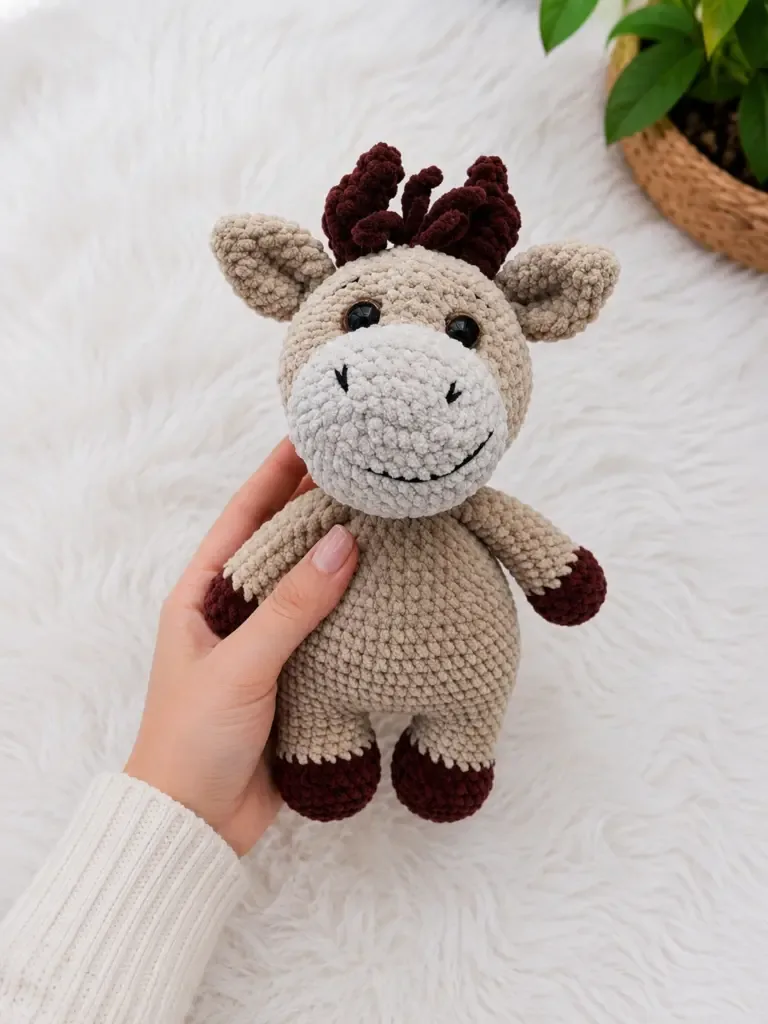
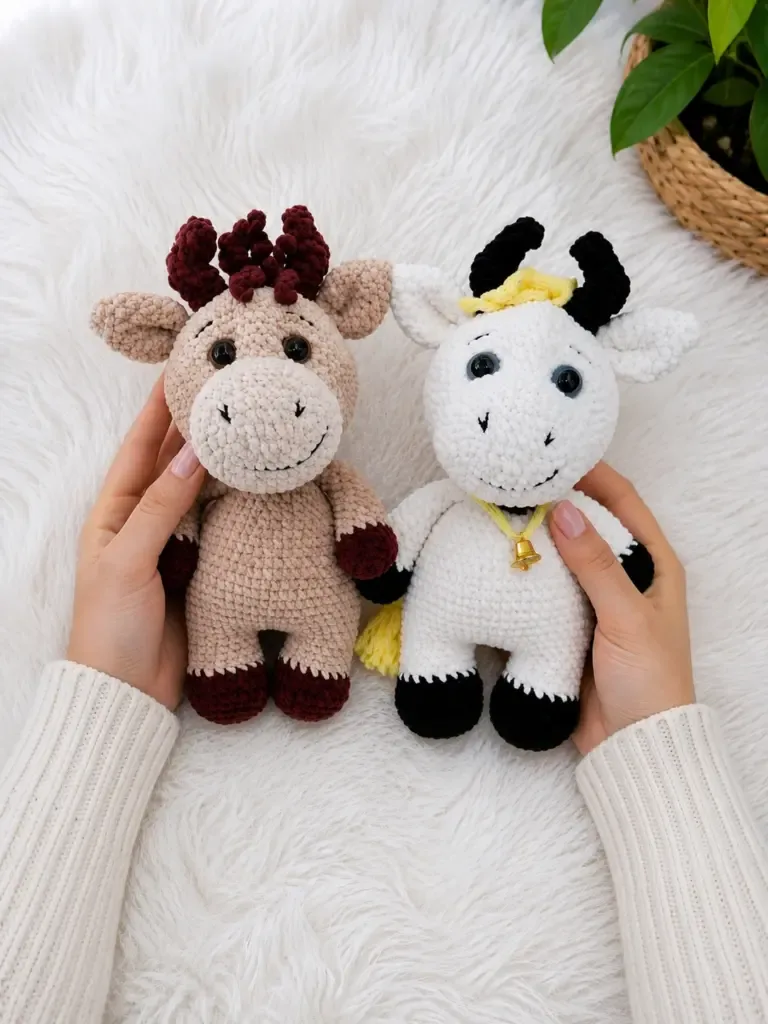
This little bull has a calm, sturdy presence, like he already knows he's the biggest animal in the toy basket. He's not fierce at all. The rounded muzzle and small horns give him a gentle, almost cartoon-serious face that makes him easy to fall for the moment the last stitch is done.
Your hands will spend most of their time on the head, since that's where the real shaping happens between the muzzle color and the main color. There's a nice rhythm to the increases as the face rounds out, then a shift to steadier stitching once you're deep into the body and legs. It's a project that rewards patience during the shaping and lets you relax once the big pieces are underway.
Set him on a shelf next to a lamp or tuck him into a kid's bed and he holds his own without looking fussy. He's solid enough to sit upright on his own, hooves planted, which makes him a good centerpiece rather than something that slumps over. He reads as handmade and a little classic, not trendy.
- Start each small piece, the arms, legs, and horns, from a tiny ring worked in a continuous spiral with no joins.
- Stuff the arms only at the hoof end so the upper arm stays flat where it joins the body.
- Pack the legs firmly all the way through so the bull can stand steady on his own.
- Build the body as one longer piece, stuffing gradually as the rounds go by rather than all at the end.
- Add the eye indentations with a needle and black thread once the head shaping is finished but before final assembly.
- Attach the ears and horns last, positioning them by eye against the finished head.
- Finish face details, eyebrows, smile, and nostrils, with black thread once every part is sewn together.
On the desk
- Yarn (Main Color): Himalaya Dolphin Baby, 100g / 120m — color 80317 (or 80342, or your preferred color), 1 skein
- Yarn (Secondary Color): Himalaya Dolphin Baby — color 80336, approx. half a skein
- Yarn (Muzzle Color): Himalaya Dolphin Baby — color 80342 (or a light contrast color), approx. quarter of a skein
- Yarn (Assembly/Sewing): Vita Coco or equivalent lightweight reinforced thread, in a color to match your main yarn
- Yarn (Face Details): Vita Coco or equivalent, black, for eyebrows, smile, and nostrils
Hook
- E-4 (3.5 mm), or whichever size you normally use for this yarn
Safety Eyes
- 16 mm, 2 pieces
Stuffing
- Polyester fiberfill
- Stitch Markers
- Tapestry Needle (large eye) and standard sewing needle
- Scissors
Stitch shorthand
- BLO — Back Loop Only
- ch — Chain
- dec — Invisible Decrease (insert hook in front loop of next 2 sts, pull up a loop, yo, pull through all loops)
- hdc — Half Double Crochet
- inc — Increase (2 sc in same stitch)
- MR — Magic Ring
- sc — Single Crochet
- sl st — Slip Stitch
- SM — Stitch Marker
- st / sts — Stitch / Stitches
Crochet a soft amigurumi bull with tiny horns
Arms (make 2)
Stuff only the lower rounded portion (the “hoof”). Leave the upper section unstuffed so the arm lies flat when crocheted into the body.
Step by step: Do not stuff the ears.
Step by step: Do not stuff the tail.
- Round 1
Starting with 2 ch, work 6 sc into the 2nd chain from hook. (6)Step by step: Sc in each st around for 11 rounds. (4); Weave in end.
To make the tassel at the tip: secure a length of yarn at the tip of the tail and weave the end inside. Work 1 sc into the stitch where you secured the yarn — leave a loop of yarn at the desired tassel length — then work a sc into the next stitch. Continue this way for 2 rounds around the tip. The resulting loops form Borka’s little tuft.Sew the tail onto the body between Rounds 7–8 of the body section (which corresponds to Rounds 19–20 counting from the very start of the legs).Step by step: Sc in each st around. (6). - Round 2
Inc in each st around. (12)Step by step: Sc in each st around. (12).
- Round 3
1 sc, inc repeat 6 times around. (18)Step by step: Sc in each st around for 3 rounds. (18).
- Round 4
Working in BLO, sc in each st around. (18)
- Round 5
Sc in each st around. (18)
- Round 6
1 sc, dec repeat 6 times around. (12)
- Rounds 7–16
Switch to secondary color yarn. Work 10 rounds of 12 sc. (12)
- Round 17
Fold the arm flat and sc through both layers across — 6 sc. (6)Weave in the end. Set arms aside — they will be crocheted into the body at Round 32.
Legs (make 2)
Stuff legs firmly.
- Round 1
Starting with 2 ch, work 6 sc into the 2nd chain from hook. (6)
- Round 2
Inc in each st around. (12)
- Round 3
1 sc, inc repeat 6 times around. (18)
- Round 4
2 sc, inc repeat 6 times around. (24)
- Round 5
Working in BLO, sc in each st around. (24)
- Rounds 6–7
Sc in each st around. (24)
- Round 8
2 sc, dec repeat 6 times around. (18)
- Rounds 9–12
Switch to main color yarn. Work 4 rounds of 18 sc. On the first leg only, work 3 extra sc at the start of Round 9 to shift the color-change join to the back, so the transition won’t show on the finished toy. (18)On the first leg: cut yarn and weave in the end.
On the second leg: do NOT cut yarn. Chain 3, then join the two legs together — you will continue directly into the Body.
Head
The head begins with the muzzle in your light contrast color, then transitions to the main color. Stuff gradually as you work.
- Round 1
Using muzzle color, ch 7. Starting in the 2nd chain from the hook: 5 sc along the chain, 3 sc in the last chain (corner), 4 sc back along the other side of the chain, inc in the first chain. (14)
- Round 2
Inc, 4 sc, inc 3 times, 4 sc, inc 2 times. (20)
- Round 3
1 sc, inc, 4 sc, 1 sc, inc repeat 3 times, 4 sc, 1 sc, inc repeat 2 times. (26)
- Round 4
2 sc, inc, 4 sc, 2 sc, inc repeat 3 times, 4 sc, 2 sc, inc repeat 2 times. (32)
- Round 5
3 sc, inc, 4 sc, 3 sc, inc repeat 3 times, 4 sc, 3 sc, inc repeat 2 times. (38)
- Rounds 6–8
Sc in each st around for 3 rounds. (38)
- Round 9
Switch to main color. 6 sc, dec, 6 sc, dec, 9 sc, dec, 9 sc, dec. (34)
- Round 10
3 sc, inc repeat 3 times, 21 sc, inc. (38)
- Round 11
4 sc, inc repeat 3 times, 22 sc, inc. (42)
- Round 12
5 sc, inc repeat 3 times, 23 sc, inc. (46)
- Round 13
6 sc, inc repeat 3 times, 24 sc, inc. (50)
- Round 14
7 sc, inc repeat 3 times, 25 sc, inc. (54)
- Round 15
8 sc, inc repeat 3 times, 26 sc, inc. (58)
- Round 16
9 sc, inc repeat 3 times, 27 sc, inc. (62)
- Rounds 17–20
Sc in each st around for 4 rounds. (62)Insert safety eyes between Rounds 12 and 13, with 5–6 stitches between them. Secure the backs before continuing.
- Round 21
29 sc, dec, 29 sc, dec. (60)
- Round 22
8 sc, dec repeat 6 times around. (54)
- Round 23
7 sc, dec repeat 6 times around. (48)
- Round 24
6 sc, dec repeat 6 times around. (42)
- Round 25
5 sc, dec repeat 6 times around. (36)
- Round 26
4 sc, dec repeat 6 times around. (30)
- Round 27
3 sc, dec repeat 6 times around. (24)
- Round 28
2 sc, dec repeat 6 times around. (18)
- Round 29
1 sc, dec repeat 6 times around. (12)
- Round 30
Dec 6 times around. (6) Close the opening and weave in end.
Horns (make 2)
Horns can be left unstuffed (they hold their shape well) or lightly stuffed if preferred.
- Round 1
Starting with 2 ch, work 4 sc into the 2nd chain from hook. (4)
- Round 2
Sc in each st around. (4)
- Round 3
1 sc, inc repeat 2 times. (6)
- Round 4
2 sc, inc repeat 2 times. (8)
- Rounds 5–6
Work 4 sl st, then 4 hdc around for 2 rounds. (8) This shaping gives the horn its gentle curve.
- Rounds 7–9
Sc in each st around for 3 rounds. (8)Weave in end. Sew horns onto the head between Rounds 20–22.
Body
Stuff the body gradually as you work. You may add color-change spots across the body if you like — spots typically span 3–4 rounds, but you can make them larger or smaller.
The body rounds continue directly from the second leg.
- Round 13
18 sc across the first leg, 3 inc across the 3-ch bridge, 18 sc across the second leg, 3 inc across the second side of the bridge. (48)
- Round 14
7 sc, inc repeat 6 times around. (54)
- Rounds 15–22
Sc in each st around for 8 rounds. (54)
- Round 23
7 sc, dec repeat 6 times around. (48)
- Round 24
Sc in each st around. (48)
- Round 25
6 sc, dec repeat 6 times around. (42)
- Round 26
Sc in each st around. (42)
- Round 27
5 sc, dec repeat 6 times around. (36)
- Round 28
Sc in each st around. (36)
- Round 29
4 sc, dec repeat 6 times around. (30)Step by step: Fold the ear flat and sc through both layers across — 6 sc. (6); Weave in end. Fold the ear in half and sew it onto the head between Rounds 20–22.
- Round 30
Sc in each st around. (30)
- Round 31
3 sc, dec repeat 6 times around. (24)
- Round 32
Attach arms — 3 sc, then work the next 6 sc through both the body stitches and the folded edge of the first arm simultaneously, 6 sc across the body, then work the next 6 sc through both the body stitches and the folded edge of the second arm simultaneously, 3 sc. (24) Make sure both arms are positioned symmetrically in relation to the legs.
- Round 33
2 sc, dec repeat 6 times around. (18)
- Round 34
Sc in each st around. (18)
Do not close or cut yarn yet — the head will be sewn on separately after it is completed and the face is finished.
More shots
Where it goes
- A shelf companion for a kid's room, standing steady on his own stuffed legs next to other soft toys.
- A handmade gift for someone who collects farm animals or amigurumi in general.
- A softer, huggable version of a bull for a nursery that pairs well with other Himalaya Dolphin Baby amigurumi in the same yarn line.
- A quiet reading-nook toy, propped against a pillow where his solid stance keeps him from tipping.
Color ideas
- Classic tan bull Main color 80317 across the body, head, arms, legs, and ears, with secondary color 80336 reserved for the horns and muzzle color 80342 used only on the muzzle base rounds of the head.
- Deep contrast bull Swap the main color for 80342 across the body and head, keep 80336 on the horns as the darker accent, and use a pale scrap of your main yarn for just the muzzle rounds so the face pops.
Care
Hand wash in cool water with a gentle detergent, since Himalaya Dolphin Baby is a soft baby-weight fiber that can lose its loft with rough machine washing.
Reshape the head, horns, and legs while still damp and lay flat to dry so the muzzle color transition and hoof stuffing keep their shape.
Store in a dry spot away from direct sun so the main, secondary, and muzzle colors don't fade unevenly against each other.
Assembly
- Step 1 Before attaching the head, complete the face shaping on the muzzle.
- Step 2 Eye indentations: Thread your black reinforced yarn onto a tapestry needle. Insert the needle at Round 16 on the underside of the head and bring it out at the outer corner of one eye. Re-insert at the inner corner of the same eye and bring the needle back out at the underside of the head. Pull gently to create a subtle indentation, then knot securely. Repeat for the second eye. Repeat the entire process two more times per eye for a well-defined indent.
- Step 3 Muzzle shaping (tacking stitch): Without cutting the thread, insert the needle at Round 16 on the underside, bringing it out at Point 1 on the muzzle surface. Insert at Point 3 and bring out at Point 2, then insert at Point 4 and bring out at Point 5 — continue in this pattern to create the soft sculpted shape of the muzzle. Finish by bringing the needle back out at the underside of the head, pull to shape, and knot.
- Step 4 Face embroidery: Using black Vita Coco yarn, embroider eyebrows, a smile, and nostrils onto the muzzle. Secure the yarn at approximately Round 20 of the head, weave the tail inside, and trim.
- Step 5 Tail: Sew the completed tail between Rounds 7–8 of the body (Rounds 19–20 from the base of the legs).
- Step 6 Ears and horns: Sew both ears and both horns onto the head between Rounds 20–22, positioning them symmetrically.
- Step 7 Head to body: Sew the completed head onto the open top of the body using a tapestry needle and matching reinforced yarn. Use a whipstitch or mattress stitch around the full opening edge. Pull firmly and evenly to close.
- Step 8 Weave in all remaining ends.
Easy to get wrong
Stuffing the whole arm
Stuff only the lower hoof section of each arm and leave the upper part unstuffed so it lies flat once sewn to the body.
Rushing the eye indentation step
Pull the black thread gently and check the dent from the front before knotting, then repeat the process the full number of times the instructions call for so both eyes match.
Between the songs
- The satisfaction here is really in the muzzle. Starting the head in a light contrast color and working that oval base before transitioning to the main color is a small technical moment that pays off in a face with real dimension. Then there's the eye indentation step, done afterward with a needle and thread pulled through the head to create those subtle dents, which is the kind of detail that turns a round blob into an expression. Add the horns worked separately and the hooves stuffed only at the tip of each arm, and you get a project with several distinct little techniques instead of one long repetitive round. It keeps your attention the whole way through.
Listener questions
Can I use a different yarn than Himalaya Dolphin Baby?
Yes, any yarn that works well with an E-4, 3.5 mm hook and holds its shape at a tight gauge will do. Just keep the same three-color approach, main, secondary, and a lighter muzzle shade, for the intended look.
Do I need to stuff the whole body firmly?
No, the pattern calls for firm stuffing in the legs so the bull can stand, but the arms are only stuffed at the hoof end. The body and head are stuffed gradually as you go rather than packed tight all at once.
What are the 16 mm pieces used for?
Those are the safety eyes, placed into the head during the face assembly steps. They're inserted before the head is fully closed and stuffed.
How do I get the eye indentations to look even?
Work slowly with the black reinforced thread, going in and out at the same rounds and corners on both sides, and repeat the whole process the number of times noted in the assembly steps. Pull gently rather than tight so the dent stays subtle.
Is this pattern good for a first amigurumi project?
It's friendly for someone with basic single crochet and increase experience, but the muzzle color change and horn shaping give it a bit more going on than a plain sphere animal. I'd call it a confident-beginner to intermediate make.
Original pattern: https://amistitch.com/crochet-amigurumi-bull-borka-free-pattern/
About the Author

Marisol QuinteroWho runs Crochet Obsessed, why a stitch count sits at the end of every round, how a pattern gets written here, and the things this site will never do.
More Patterns
- IntermediateNo. 01

Slouchy everyday beanie worked flat in half double crochet
Crochet beanie pattern for a slouchy everyday look worked flat with hdc rows, then seamed into a soft,…
- IntermediateNo. 02
Crochet amigurumi doll with dress, shoes, and hat
Crochet amigurumi doll pattern with dress, shoes, and hat details for a soft, huggable keepsake you build one…
- IntermediateNo. 03
Chunky moss stitch crochet sweater with raglan-free shoulders
Chunky crochet sweater pattern using moss stitch, worked flat with a 10mm hook for a soft, fast, cool-weather…


